Noise is one of the biggest problems faced by photographers, and it can be difficult to get rid of unwanted noise in photos. In this article, we’ll discuss what noise is and how to use digital noise reduction to get rid of it. We’ll also provide a few tips on how to improve your photos by reducing noise. So if you’re interested in learning more about this topic, keep reading!
What is Image Noise and Where Does it Come From?
Let’s cover this. Just so that we’re all on the same page and can get it out of the way.
In digital photography, noise/grain is made up of lots of small dots that are created when you boost the ISO in your camera.
High ISO allows you to shoot better in low light, but the side effect is high noise. Although this has improved in more modern cameras, it is still very much a problem for most people.
I’m sure it’s something you’re familiar with.
It’s a little hard to see because of the size (there’s an enlargement comparison image further down the page), but this photo was shot at ISO 3200.
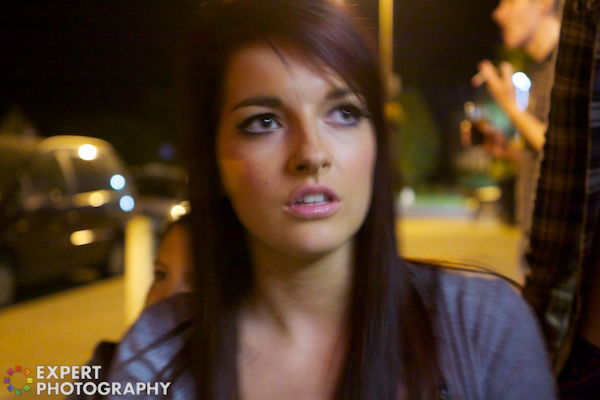
The size of your sensor, and the number of megapixels you have, has a lot to do with how noisy your camera is.
The smaller the pixels in your sensor, the higher the image noise.
This is because on a smaller sensor, the pixel has to be smaller, so is less capable of doing the job as well. Compare the image quality of an iPhone camera, to that of a full frame DSLR, and you can start to get an idea of what I’m talking about.
When you put 20 megapixels into a full frame sensor, and the same number into a point-and-shoot, the noise is always going to be worse in the P&S, because the pixels are much smaller.
This has been made pretty clear with the release of the new Canon 5D Mk III and the Nikon D800. The Nikon has a lot more pixels, but the same sensor size, and for that reason alone, the image noise is a lot worse in the Nikon.
Noise Reduction: Reduce Image Noise in the Camera
ISO
The most obvious choice is to use a lower ISO because they handle the image noise a lot better. I won’t go into detail as to why it works like this here, but if you would like to read more about ISO, then click here.
So lowering your ISO from the realms of 1600, down towards 800 and below is definitely going to make a big difference to the image quality (IQ). But it’s not usually that simple.
If you didn’t know about ISO then this will be a big help. But chances are that you’re using a higher ISO because you’re in low light, and you need to.
On a crop sensor camera (which is likely what you’re using), I find that 1600 is really the max that I like to use, and preferably with it much lower than that.
On full frame cameras though, 3200 can still be acceptable, and by the looks of the new Canon and Nikon cameras, you can push it even higher still.
If you were to lower your ISO, then you would want to change your shutter speed or aperture accordingly.
Shutter Speed & Aperture – Select a different lens
Here’s a quick lesson on exposure. Aperture, shutter speed, and ISO all work together to form an exposure, and if you turn one of those down, then you have to turn one of the other up.
Let’s say that you’re shooting at the slowest shutter speed that you can to have the lowest possible ISO. But you still want to remove more of the image noise, what do you do?
Well, you can widen your aperture, and the good thing is that this isn’t specific to your camera, it’s a part of your lens.
Most kit lenses have an aperture of f/3.5 – 5.6, which is pretty poor, but if you were to invest in a lens such as the 50mm f/1.8, then you will have a lot more light entering your lens.
By changing to an aperture of f/1.8 from f/3.5, you’re allowing four times as much light in, so you can lower your ISO from 3200 to 800. Invest in lenses.
Shoot to the Right
This is something that you may not have heard of before, and it refers to the histogram in your camera. On the right side of the histogram is where all the highlights (lighter pixels) are recorded, and shooting to the right means that you slightly over exposure your photo.
The image noise shows up much more in darker parts of the photos. By slightly overexposing your photos, you’re able to remove some of this noise.
When you’re dealing with the photo in post processing, it’s much less of a strain on your IQ to turn down the exposure, than it is to turn it up.
The photo below was shot at ISO 3200. Yes, it’s over exposed (too much so because it was used for another article).
But after turning down the black point and the brightness, it doesn’t look too bad, and the noise is barely noticeable. At 3200.
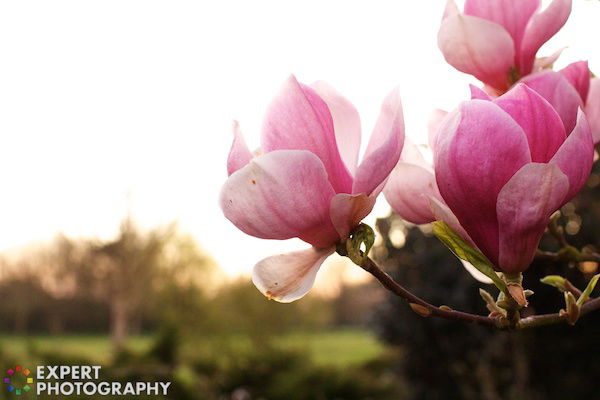
Don’t go crazy with the over exposing of your photos, just one stop, or two at the very most. It’s not hard to recover in Aperture or Lightroom.
Post Production
Shoot in RAW
Shooting in RAW means that your photo remains uncompressed. That leaves you with more options when it comes to fixing it later, and one of those options in de-noise.
Among other things, the less compressed the photo is, the easier it is to make adjustments. I personally recommend shooting in RAW at all times, even if you think you’re not the sort of person who edits photos.
Aperture/Lightroom
Well, if you’re shooting in RAW, then the first thing you can do is turn up the de-noise. This will make a small, but noticeable difference.
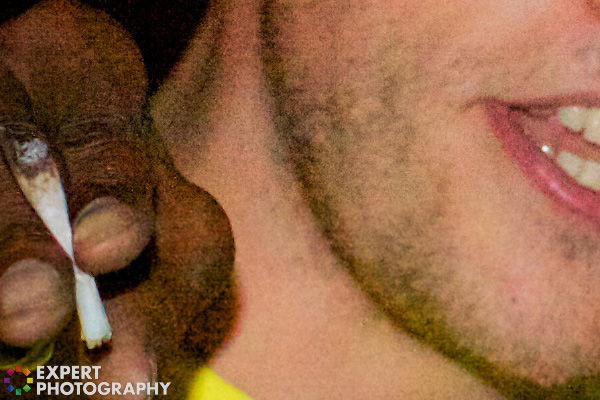
For the purpose of this experiment, I will be using the photo below, shot at ISO 3200. It’s pretty horrible, but that’s why I chose the photo.

I will be comparing the noise reduction using a 100% crop though. That way, you can get a better sense of how the noise removal has taken effect.
The bottom half of the photo has had the RAW de-noise on it, which you should just about notice.
The next, and most obvious step it to go to the adjustments panel, and add noise reduction to the mix.
Using Aperture, I have two parameters, radius and edge detail. They counteract each other, so if I turn them both up, I’ve not done anything.
The larger you make the radius, the softer the image will become. But as you bring in the edge detail, you sharpen it more and add the grain detail back into the mix.
The top half of the photo below has not had the grain reduction added to the photo. Just the slight de-noise.
The bottom half has had the grain reduction. It looks a little bit soft. But you’ve got to remember that this is a 100% crop so it’s magnifying the detail.
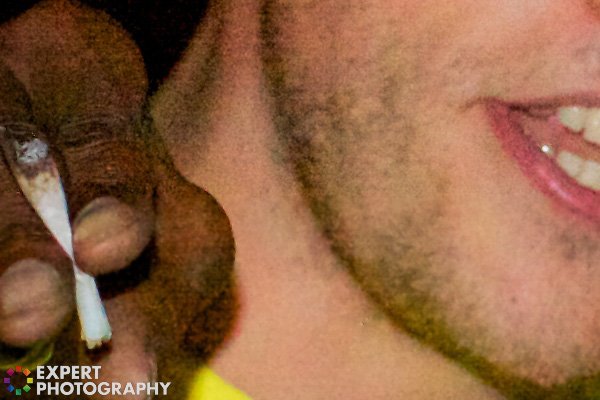
This works well when you zoom out, but there are better options. I like to use an external editor (within Aperture) called Noise Ninja, which is my favourite noise reduction editor.
I first removed the noise reduction I had added before, because too many cooks spoil the broth. Here’s the settings that I used, followed by the results.
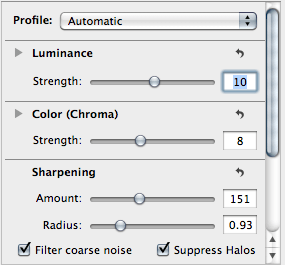
The bottom half of this image has had the noise ninja processing, and the difference is clear.
It might seem like a bit much but it works in the full sized image.

To compare the difference between the two photos, it’s best to look at them in full size, so here they are together.
The image on the top half has had a the noise reduction applied.
Here’s another comparison I made when I was writing my tutorial on ISO. A big difference. But be careful not to overdo it, or you’ll end up with a porcelain look to the face.
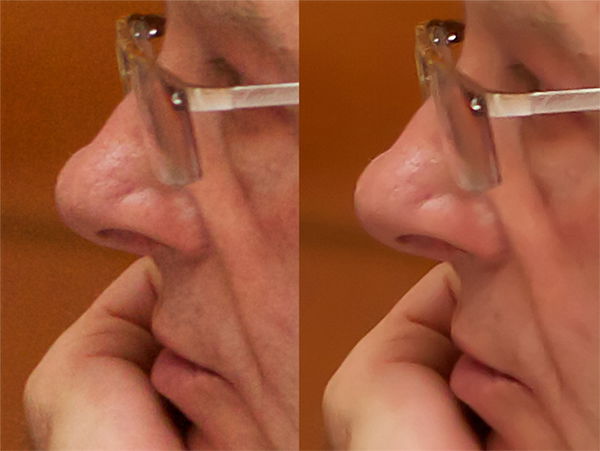
There are many alternatives to Noise Ninja. And you may not want to have to pay for it, but it’s my favourite.
There are options to do something similar in Photoshop, and that works too. But all of the steps are pretty much the same, so I won’t go into detail with that.
You can buy Noise Ninja Pro here.

