Lightroom is a versatile and powerful program used by the majority of photographers. Pros and hobbyists alike use it often.
You can start improving your images right away. But there is a learning curve associated with getting the most out of this awesome program.
Here are 12 common Lightroom mistakes that you’re probably making.
12. Lightroom Mistakes: Not Using the Right Version of Lightroom
Lightroom can be very confusing with the recent name changes. Especially when it comes to “Lightroom Classic” and “Lightroom CC”. The latter is a cloud-based program.
Some photographers opt to use the desktop app, but Lightroom Classic is the better choice for most.
Why? You retain complete control by keeping your images on your own hard drives rather than in Adobe’s cloud-based system.
If you shoot professionally, having several hard copies of your photos and catalog is crucial.
You should also have your images backed up on a cloud somewhere. This shouldn’t be your only copy. Servers can be hacked, and although Adobe is not likely to disappear at any time soon, it’s not a good idea to rely only on this sort of external back up.
Once you pass the 1TB of data you’ll have also have pay for extra storage. 1 TB is very little for any photographer, so using Lightroom CC can get expensive very quickly. This is ironic, since Lightroom Classic is the more robust program.
Lightroom Classic is also more reliable and offers more advanced applications like Print, Book, and Slideshow Modules. In fact, the target audience for Lightroom CC isn’t professional photographers.
It’s a slimmed-down version of Lightroom Classic. It doesn’t contain the tools necessary for a professional level of work.
If you’re not sure which version of Lightroom you’re using, head up to the >Help tab in the menu. Click on >System Info. 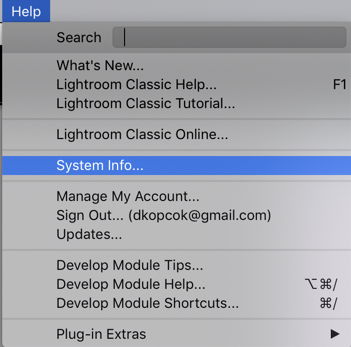
11. Using Multiple Catalogs
There is a great debate over using multiple catalogs with Lightroom versus using a single one. Those that prefer multiple catalogs reason that there’s less chance of the catalog becoming corrupt due to factors like constantly opening and reopening the catalog.
They also prefer to have different catalogs for different work. For example, client work versus stock work, or personal photos and so on.
Having more than one catalog has its drawbacks though.
First of all, you can only open one catalog at a time. You can’t simultaneously view all of your photos. You may want to see all of your flower or landscape images. But you can’t do that if they are all scattered across different catalogs.
You’ll also have difficulty with your backups. The more catalog backups you have, the harder it is to keep track of and manage.
It’s hard to remember which catalogs have been backed up and which haven’t. And they’ll take up space on your computer, which you’ll have to sort through.
If your hard drive fails or a catalog becomes corrupt and you didn’t back it up, you can have a disaster on your hands.

10. Not Using Lightroom Collections
Collections are where you solve the problem of organizing your files into separate themes like you can do with multiple catalogs.
New users to Lightroom often fail to make use of Collections because they can seem confusing at first. But Collections give you a lot of flexibility and control when organizing your photos.
You can add an image to as many collections as you want. You can create a “Collection Set” or a “Smart Collection”.
If you want to know more about working with collections, check out our step-by-step guide.
9. Not Using Develop Shortcuts
If you haven’t taken the time to learn some essential keyboard shortcuts, you can be adding tons of unnecessary time spent in front of the computer. Time that would be better spent shooting!
One of the most important parts of post-processing is “editing”. People think that editing means making exposure and color changes etc. to the file. That is actually called is “retouching”.
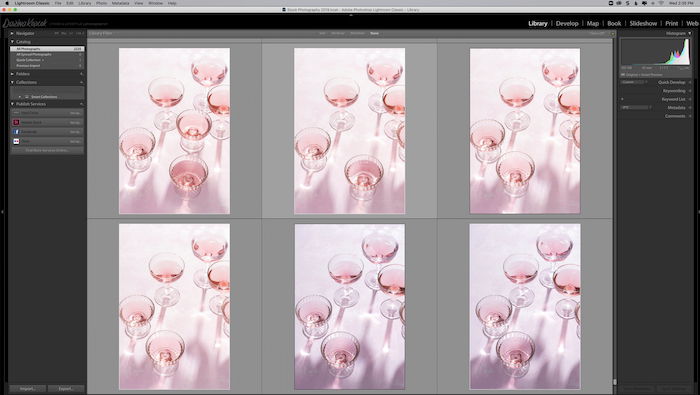
Editing is the process of culling your photos and deciding which ones you’ll make changes to (retouch).
If you’re a wedding photographer, you may have hundreds or even thousands of images to post-process. An extra second lost on each image can add up to hours and hours of wasted time.
The same goes for other genres of photography where you typically shoot high volume, like sports.
Once you learn a few crucial shortcuts that are relevant to you, using them will become second nature and have a big impact on your workflow.
To bring up the Develop menu shortcuts directly in Lightroom, simply hit CmdMac)/Ctrl (PC) +/
To make the menu disappear, click on it.
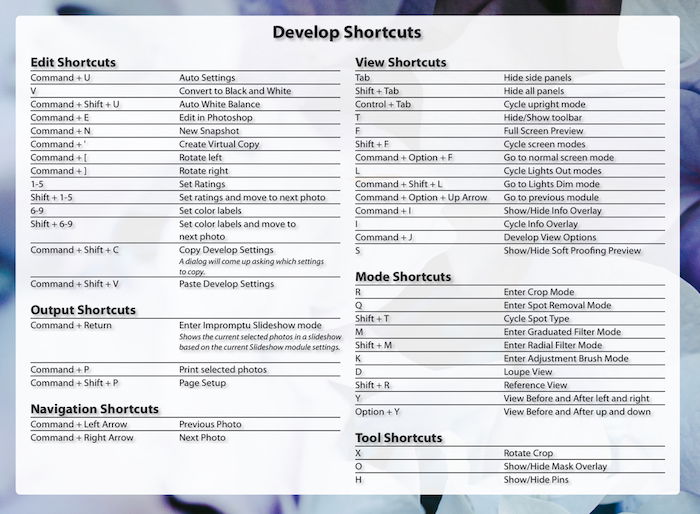
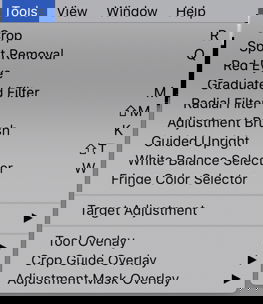
They can also be found in the Menus, next to their corresponding options. You can also download a list of them and print them off through Adobe’s Help Center.
8. Not Putting Keywords in the Metadata
This is a mistake that can cost you a lot of time when you’re searching for certain images.
There are various ways to search for images in the Lightroom interface. For example, you can search by text, color rating, starts, camera, and lens to name a few.
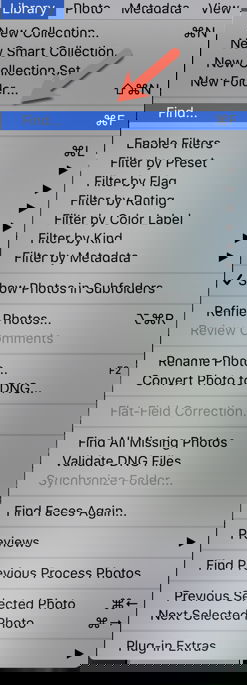
To search for certain photos, you need to be in the Library Module. Hit Cmd/Ctrl + F to search by any of these parameters.
This is very useful if you’re searching for all your images of apple pie, for example. Or maybe you want to find all your cocktail images to update a portfolio gallery on your food photography website.
If you do stock photography, you’ll have to put at least 20 keywords in the metadata of every image you upload to your stock agency.
searching for keywords is the most significant way photo buyers find the images they’re looking for on these sites.
7. Renaming or Moving Images Outside of Lightroom
If you’ve ever renamed an image or file or didn’t take note where you put it, then you know what a nightmare your organization in Lightroom can become. You’ll have to hunt those images down and relink them all.
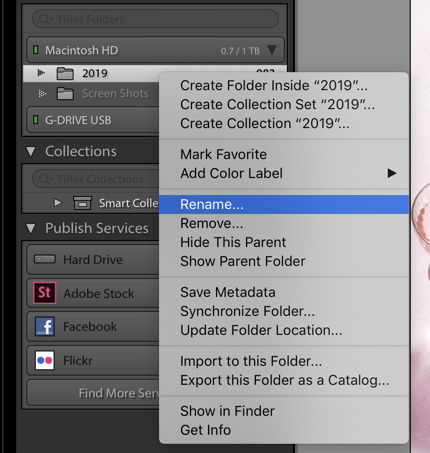
When you change the name of a file outside of Lightroom, it doesn’t know where to find it. You should always change the name within the program itself.
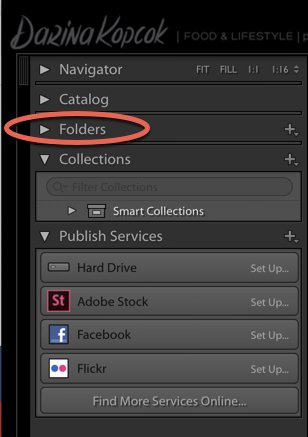
You can rename your folders and photos in the Folder panel in the Library module. You’ll find this in the upper-left corner of the Lightroom interface.
6. Ignoring the Histogram and Clipping Warning
One of the mistakes new photographers make is not paying enough attention to the histogram. This can be the one in their camera or the one in Lightroom.
A histogram will give you accurate information about how well an image is exposed. And it will allow you to make crucial adjustments.
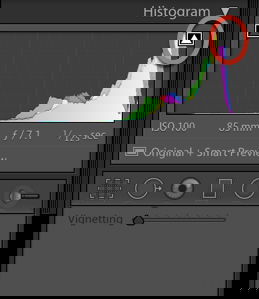
In Lightroom, the Histogram panel features warnings. These will tell you if you are losing shadow or highlight detail in your image.
If you click on the top right triangle within the histogram, it will tell you if your highlights are blown out. If you click on the left triangle, it will give you information about your shadows.
It will also show you where in your image you’re losing detail. Areas with lost shadow detail are marked with blue, while lost highlight (blown out) details are shown in red.
Computer screens can be quite forgiving. If you’re printing your work, any flaws will become that much more obvious.
Clipped shadows and blown-out highlights are hell for printers to try correct and they will degrade your work.

5. Not Doing Proper Color Grading
A common mistake in Lightroom is oversaturating your images or not saturating them enough.
Photographs that are too saturated are overwhelming and take away from the overall effect. If the first thing you notice about an image is the color, you’ve gone too far.
On the other hand, not going far enough, not color grading your images or making use of the HSL panel, will also detract from your images.
By nature, digital files are quite flat. You need to add contrast, vibrance, and adjust the highlights and shadows. This is called “post-processing” and in principle, it’s not any different than taking the film to a lab.
This is assuming you’re shooting RAW files. A .jpeg file is processed. But it’s very limited in the number of tones it can contain compared to a RAW file. Also, every time you edit a .jpeg file, the file loses a lot of information and the quality degrades.
Color grading is a skill you learn over time. You develop your style as you practice. Start with natural looks. When you’ve done, you can move on to more unique effects, like orange and teal.
One tip when you want to boost the vibrancy in an image is to use the Vibrance slider in the Presence panel instead of the Saturation slider. Vibrance boosts the saturation of the mid-tones while Saturation boosts all of the color at once. It begins to look clownish very quickly.
How far you’ll go will be influenced by the kind of photography you shoot. For example, less is usually more when it comes to portrait and food images. Landscapes can often tolerate a bit more saturation.
4. Not Using the Tone Curve to Its Full Potential
The Tone Curve can be scary to less advanced users of Lightroom. Some avoid it or don’t use it to its full potential. Yet this tool can make the most powerful difference to your photos.
The Tone Curve affects the overall brightness and contrast in an image. By adjusting the tone curve, you can make images brighter and affect the levels of contrast.
You can also make adjustments to the Red, Greens, and Blues in a photo individually via the RGB channels (Red, Green, Blue).
When you adjust the RGB curve, you’ll find that your images will start to have a lot of depth.
There are several ways to work on color in Lightroom. The best results always come when you layer these tools.
For more more information about using the Tone Curve, head over to this article.
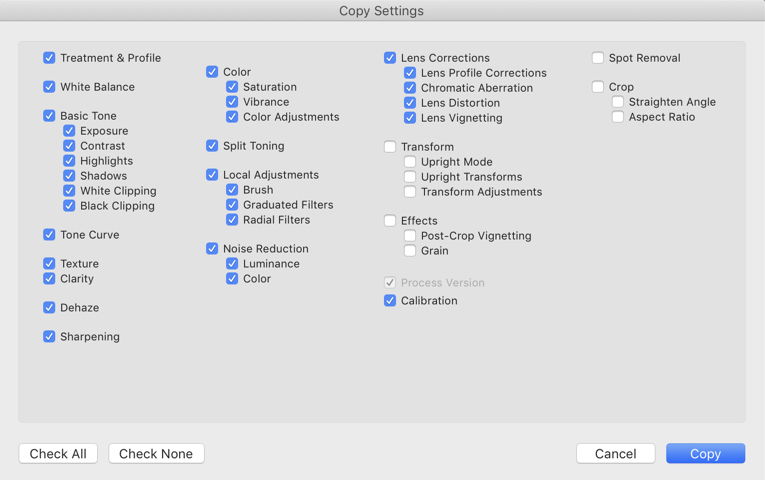
3. Not Using Copy/Paste or Sync
Once you retouch a photo, you can copy all of those changes you made to the file to other images. How great is that?
There are a couple of ways to do this.
You can click on COPY in the bottom left-hand corner of the Develop module.
This will bring up a menu of Copy Settings that will allow you to choose exactly which settings you want to copy.
Then you select the image you want to copy the settings to in the filmstrip and click on PASTE.

However, you most likely will want to apply these settings to more than one image.
In that case, you can click on the image and then click on the last image in the row of photographs you want to copy them to.
Hit SYNC in the bottom right-hand corner of the Develop Module.

2. Oversharpening Your Images
Images from a digital camera require sharpening.
If you shoot in .jpeg, then they are already sharpened to some degree, but they’ll still need a bit of sharpening.
RAW files definitely also need sharpening when post-processing. The key is that you don’t want to sharpen them too much.
Oversharpened photos will emphasize noise or add a grainy, pixelated look to the image, and create halos and harsh edges.

Luckily, Lightroom has a tool that will help you from going too far.
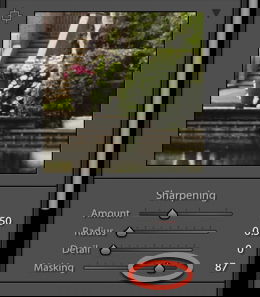
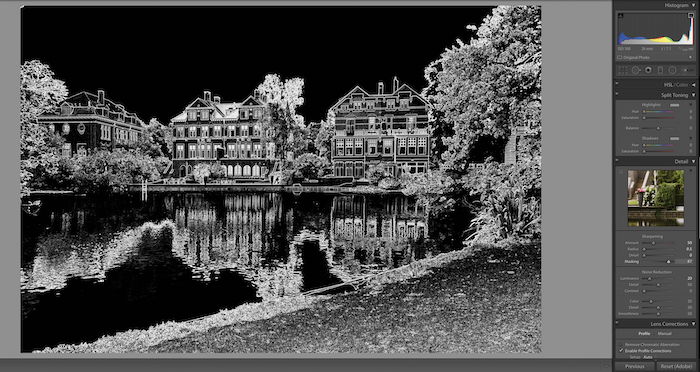
In the Detail panel, go down to Sharpening and apply a default level of sharpening such as +40 or +50.
Click on Option/Alt and drag the cursor towards the right. The image will start to look like an x-ray, with black and white areas to show you where it’s being sharpened.
In this image, +80-90 or so was sufficient. I wanted to sharpen the buildings more than the sky or water, which wasn’t as necessary.
1. Not Taking Advantage of All the Tools
Lightroom Classic offers so many tools to help you get the best images possible. It pays to learn these tools and spend some time playing with them to see how they affect various images.
Adding Clarity to an image can be a great way to layer contrast. A gentle hand with Split Toning can really make an image pop.
The local adjustment tools can help you make an adjustment to certain parts of the image that are not well exposed, are losing detail, or need a bit of a color boost.
Vignetting can naturally occur from your lens. In Lightroom, Vignette can be used to deepen the shadows around the edges of the frame.
This draws the eye towards the subject and looks great in portrait, or moody food and still life photography.

Conclusion: Lightroom Mistakes
In addition to its powerful post-processing capabilities, Lightroom is a fantastic program that will help you organize your photos.
By reading this article, you may have gotten some ideas about how to improve your workflow and quickly take your images to the next level.
Check our guide on moving Lightroom to a new computer or using the clone tool!
![]()
![]()
![]()
![]()