The Lightroom brush tool is one of the most powerful and versatile tools in the program. It can be used for everything from local adjustments to dodging and burning. In this article, we will show you how to use it for all kinds of adjustments.
What Is the Lightroom Brush Tool and What Can You Do With It?
The Lightroom Adjustment Brush is one of the most useful tools Lightroom has to offer to make localized adjustments to specific areas in your image.
You can use it for increasing or decreasing exposure, modify the saturation, contrast, clarity or do any other basic adjustment.
You can do several adjustments with the same brush. Or you can use different brushes in the same picture. As you can see, the brush tool adds a lot of new options to your editing!
How to Access the Brush Tool in Lightroom
As with any other adjustment tool, the Brush is in the Develop module. It is located below the right bottom corner of the histogram.
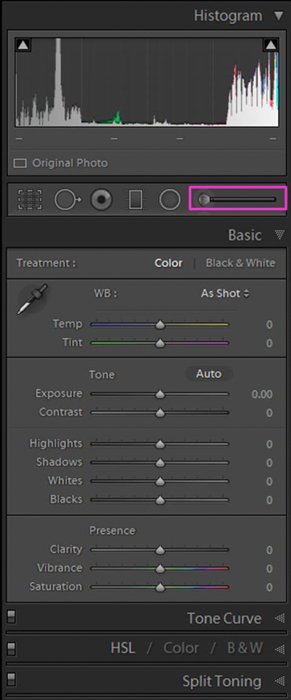
After clicking on the Brush icon (or using the shortcut K on your keyboard), you will access the Brush Tool panel.
Once you’ve selected it you can “paint” the area that you want to modify on your image. Drag the mouse cursor over it while pressing the left mouse button.
After you’ve “painted” an area you will see that there is a pinhead on the spot where you’ve started painting. When the brush is active, the pinhead will look like a little white circle with a black dot in the middle.
In this case, you can keep painting and do modifications in your brush.

When you finish, press Done to deactivate the brush. The pinhole will then appear like a simple white circle.
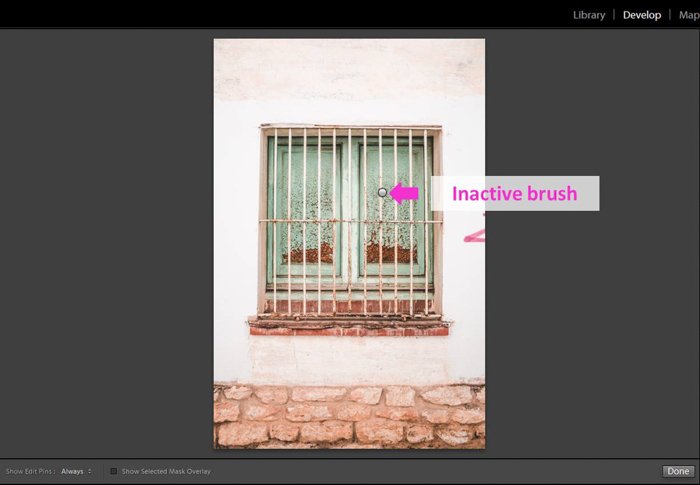
By clicking on the pinhead you can reactivate the specific Brush. You can make new changes even if you went out of it and went to work with other tools or painted new brushes.
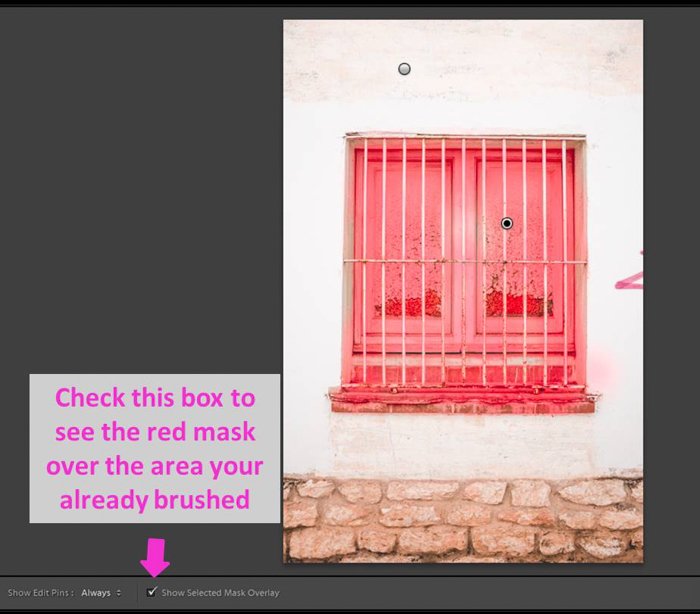
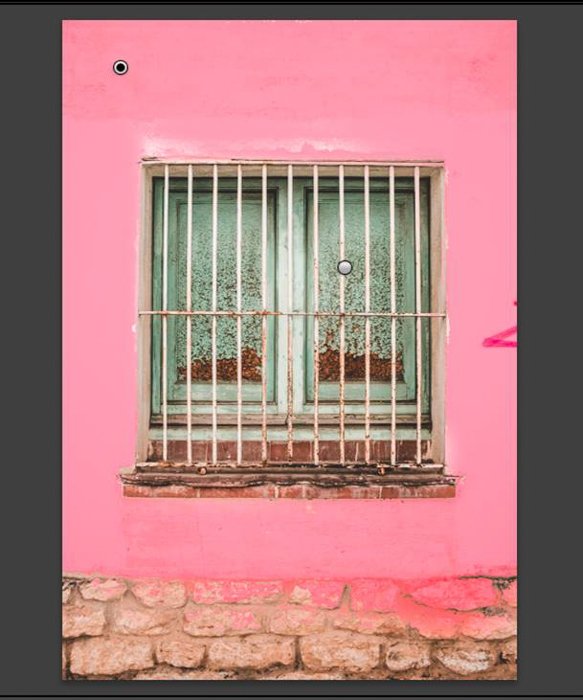
Activate the Brush Mask Overlay to Control the Brushed Area
One of the challenges of working with the brush is that you don’t see the areas you have covered with it.
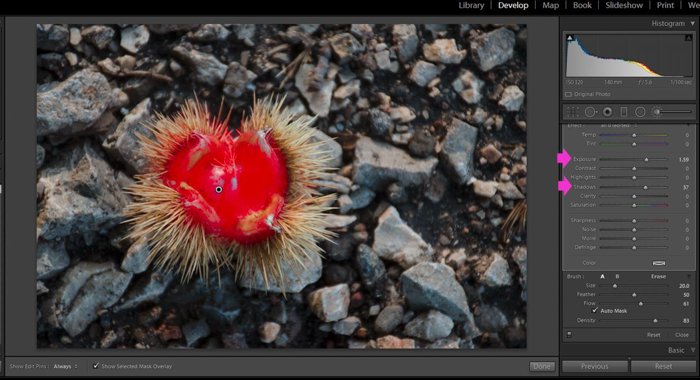
Lightroom’s solution to this problem is the Mask Overlay. This is a visual effect that shows the brushed area in red while the brush is active.
This effect is not shown in the final image. As you work, you can switch it on and off. You can control whether the Mask Overlay is on or off by checking the Mask Overlay box.
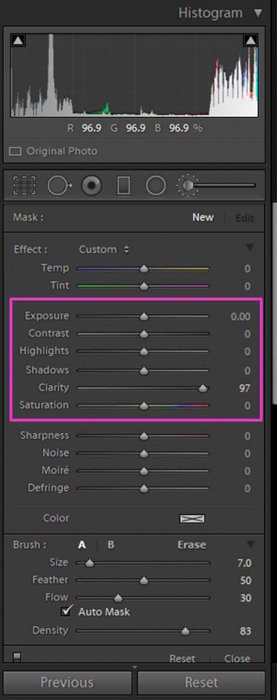
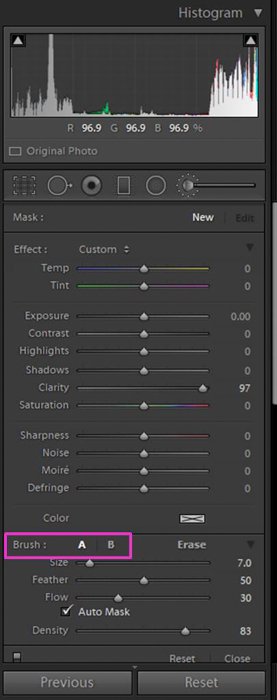
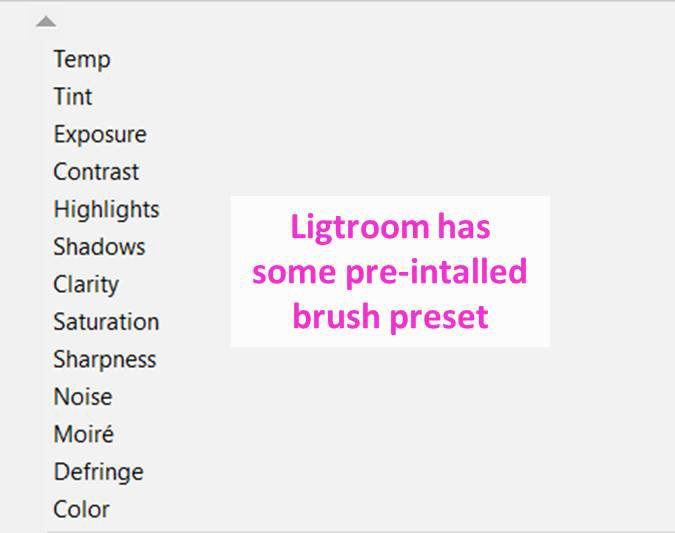
Get familiar with the Brush Tool: Effect Section
The Brush tool contains the adjustment sliders that are similar to the ones you use in the Basic panel of the Develop Module. The first two sliders, Temp and Tint, control the white balance settings.
With the Temp slider, you can control the color temperature and make it cooler or warmer. With the Tint, you can give a magenta or green color.

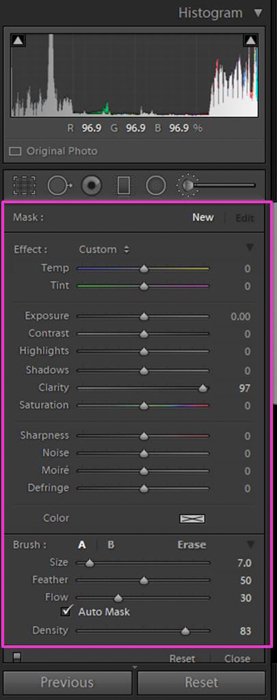
The six sliders below Temp and Tint are the basic adjustments such as exposure, contrast or clarity. They work in the same way as they do in the basic panel.
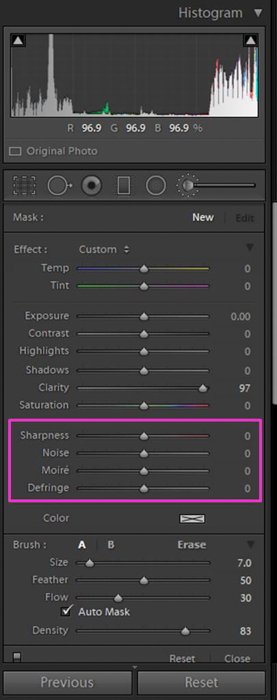
The last four sliders allow you to correct issues caused by the camera sensor such as noise (grain), moiré (pattern distortion) or defringé (chromatic aberration).
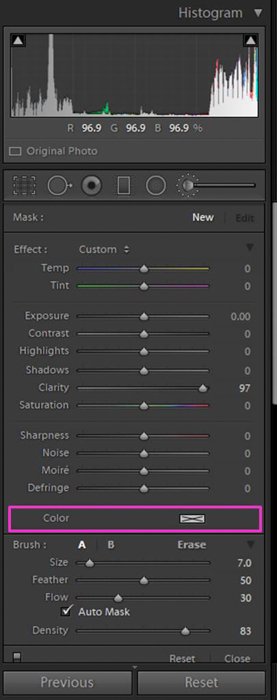
You will find a color palette in case you want to add a color cast to your brush.
Use the A-B option to easily combine two Ligtroom brushes
In some cases, you might need to use two separate brushes. For example, you might need a big brush for big areas and a small one for details.
Instead of changing the brush size all the time, you can use the A-B option.
When you select the brush, you are in fact using the A brush. That is the default option.
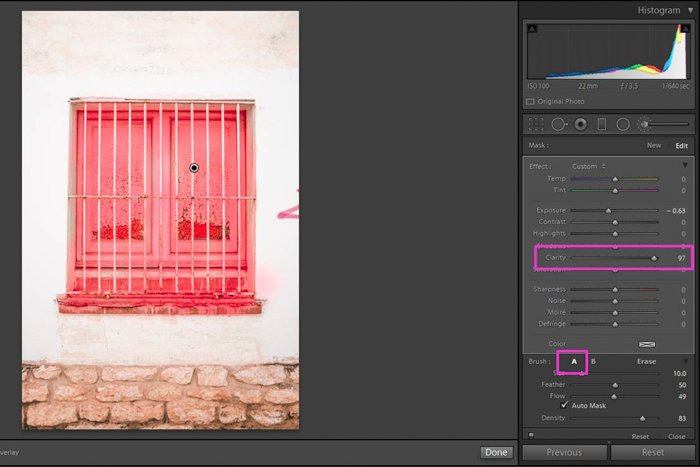
If you need another brush, but you also know you will need to return and use the adjustments settings again later, you can click on B. Adjust the settings to your new needs and brush.
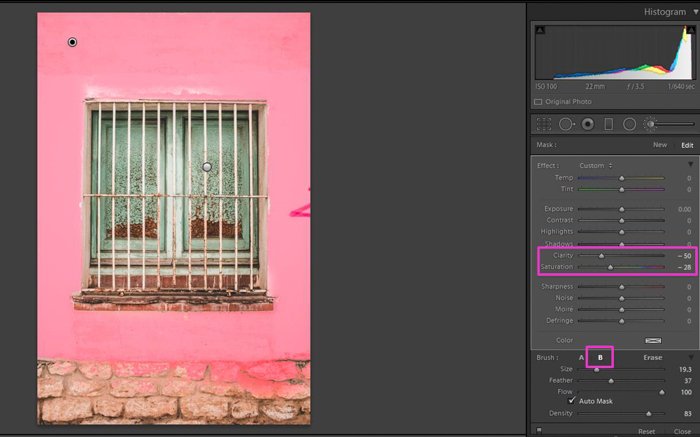
Want to come back to the original brush? Just click on A. Doing so, you will save a lot of time readjusting the brush settings every time.
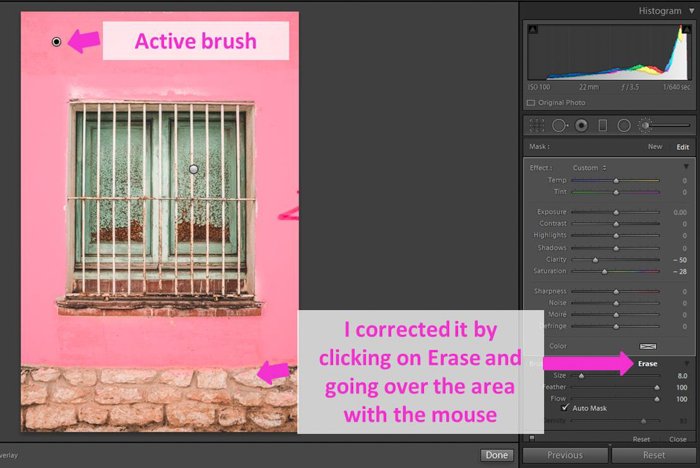
Correct Mistakes With the Eraser Option
We all have these moments: you work carefully, but then you get distracted, your hand slips, you’ve painted an area you didn’t mean to.
Does that mean you have to remove the brush entirely and start all over again? Of course not! For those moments we have the Eraser.
This option allows us to fix and take out parts of the brush we didn’t mean to paint over. To use it, all you have to do is click on “eraser”.

Go over the areas you want to erase, just as if you were using the brush tool normally. The eraser will remove the brush effect, but won’t delete anything from the original image.
If you are using the Mask Overlay you will see that the red color of the mask overlay disappears from the area you’ve erased. To go back to the brush, check A (or B if you want to use the second brush option).
Select the Size and Feather of Your Brush Tool
One of the most common adjustments you need to do to your brush is changing its size. You’ll need to do this to fit it to the area you are working in.
You can do it using the size slider. But you can do it even faster using the shortcuts [ to make it bigger and ] to make it smaller.
This little trick will save you a lot of time editing.
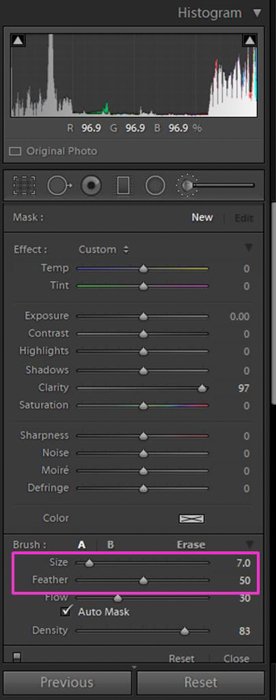
Feather defines the transition zone between the brushed and non-brushed area. A small feather area means that the brush is harder and that the edges between areas are more defined and noticeable.
A big feather makes the transition much softer and gradual.
Adjust Flow (Opacity) and Density to Control the Strength of the Brush
A great thing about the brush tool is that you can control the intensity (or strength) of the painted effect. It goes from 0 to 100% coverage when you paint.
You have two sliders that control it: flow and density.
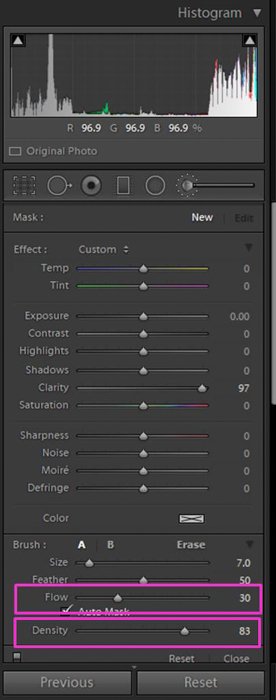
Flow regulates the intensity. If you add brush strokes, the intensity of one adds to the previous one. This gives you more flexibility and control painting. You can add the effect gradually by adding stroke over stroke.
Density also affects the intensity of the effect. It doesn’t have the summing effect that Flow does.
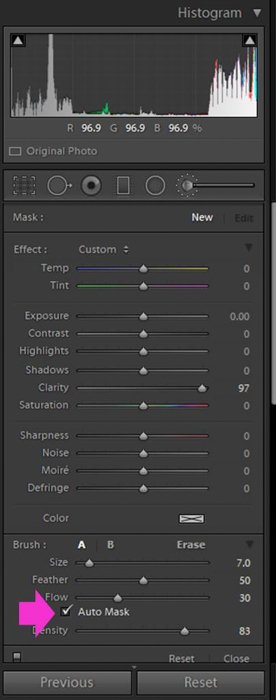
The Auto Mask Will Help You to Brush Within the Borders
One of the challenges with the Adjustment Brush tool is to keep within the borders of the area we want to modify. The Auto Mask is a feature which helps us deal with this problem.
To activate the Auto Mask feature you need to check the box right next to the words “Auto Mask”. You’ll find this at the bottom of the Brush drop-down menu right under the “Flow” slide bar.
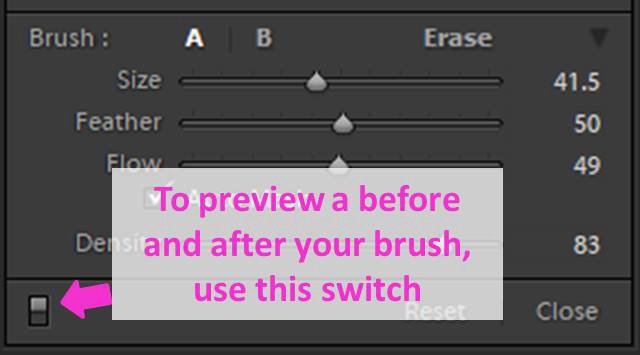
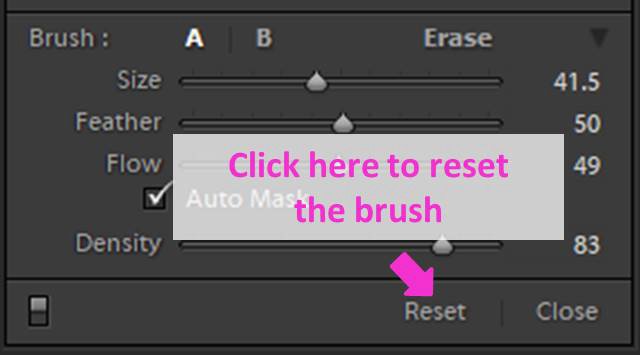
How to Preview and Reset the Brush
If you want to compare how your image looks like before and after the brush, click on the little switch in the left corner of the brush panel.
If you want to reset the brush, click on “Reset” and the brush will be deleted from the image.
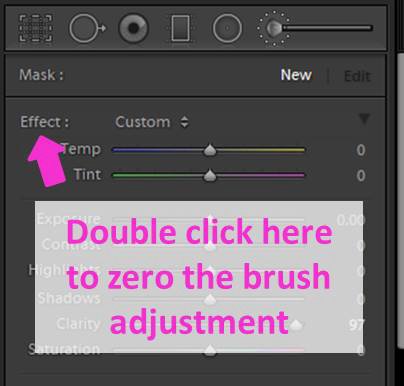
If you just need to reset the slider values you don’t have to do it one by one. Double click on “Effect” at the top of the adjustment sliders. Lightroom will set all of them at once back to zero.
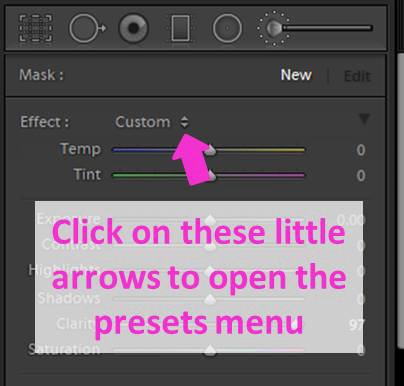
Use Brush Presets to Save Time
You can either adjust the settings until you get the desired effect or you can use a pre-installed Lightroom preset.
Click on the two little arrows next to the word “Custom” in order to open a drop down menu that shows all the brush presets you can use.
Select one and brush over the area you want to edit. Lightroom’s original presets might give your image an artificial look because they are quite extreme.
You can modify them until you get the result you like.
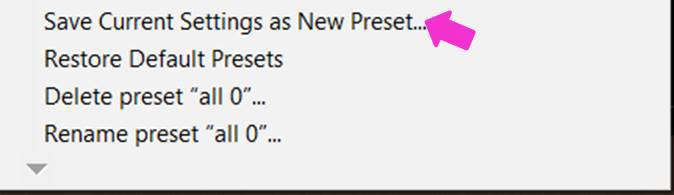
You can also create your own presets and save them for the future.
To do so, click again on the two little arrows next to the word “Custom” to open the drop-down menu. Look for the line that says “Save current settings as New Preset”. Click on it, give a name to your new preset and click “Create”.
Now your preset will appear in the presets list.
Using presets will not only make your workflow much easier and faster but it will also be more consistent because you will use exactly the same settings.
Examples of How to Improve Your Images Using the Lightroom Brush Tool
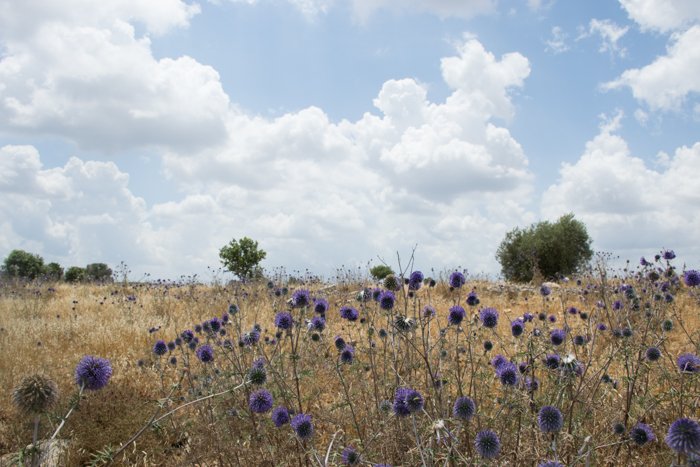
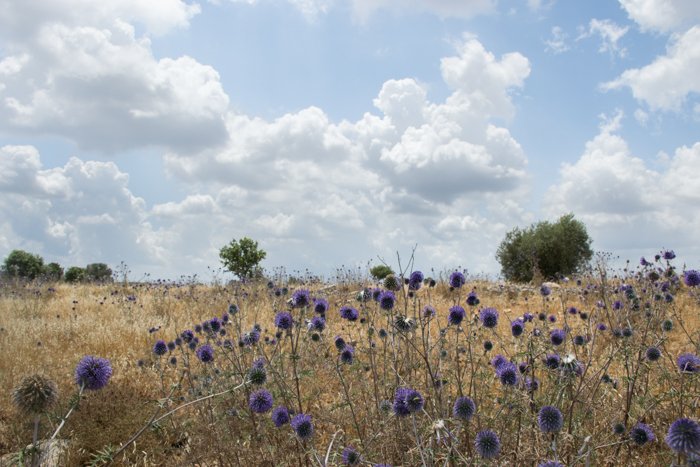
Recover Details From Shadows
The adjustment brush is useful to recover details from both the dark and the light areas of your photos. Paint the area you want with a brush tool, edit and adjust its exposure.
You can also decrease the shadows. After making these adjustments the area might look a bit flat. You might need to increase the contrast a little bit.

Enhance Details in the Highlights
To enhance details from areas that are too bright, use a brush tool and adjust the highlight by moving its slider to the left.
You can also try to decrease the exposure a bit. Take care because this adjustment is easily noticeable.
To enhance the details, even more, you can increase the brush clarity to make the textures pop.

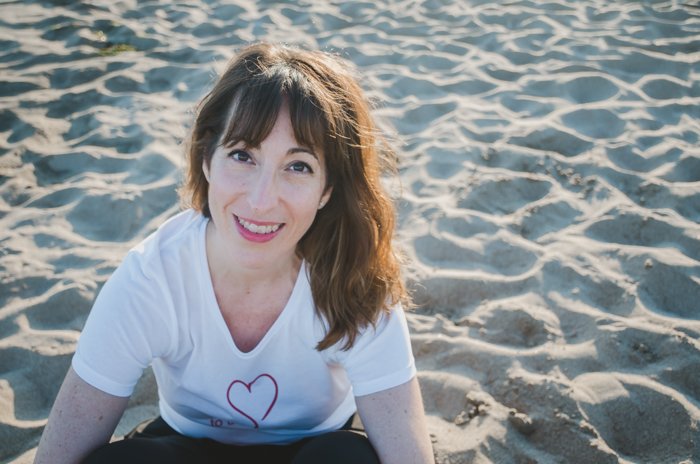
Skin Softening
The brush tool is used a lot in portrait photography to make the skin of your subjects smoother. Use a brush with negative clarity. Take care not to exaggerate with it because then the skin will look artificial.
To have more control, I like to use a brush flow around 60-70 and then the effect will be more subtle with every single stroke rather than using the brush at full strength (flow 100).
If the skin smoothing is enough and it looks natural, you stop brushing. If you want to smoothen it more, you can add more brush strokes on top of the previous ones and the effect will accumulate.
If your model´s skin is underexposed, you can also add some light by increasing the brush exposure a bit. This will help to make imperfections in the skin much less noticeable.


Conclusion
The Adjustment Brush is a very versatile and powerful tool that enables you to make localized adjustments in your photos.
Getting familiar with it will make your workflow more efficient and will enable you to create effects without switching to Photoshop to finish editing your images.
Why not check our posts on how to whiten eyes and teeth or edit landscape photos in Lightroom next!
![]()
![]()
![]()
![]()