The Dehaze slider in Lightroom is a powerful feature that often goes overlooked. Let’s take a closer look at what you can use it for and how it can improve your photography.
What Is Dehaze?
Lightroom is very user-friendly for beginners and pros alike. The many sliders that you can use to make minor and significant changes to your image files are one of the reasons for this.
You can change anything from exposure, color, tone and other considerations.
According to Adobe, the purpose of the Dehaze slider is to add or remove “atmospheric haze” from a photograph.
You get fog, smog, mist or “haze” in a photo due to the scattering of light particles.
Some of this may be desirable. Oftentimes it’s not. It can cause your images to lack contrast and look blurry or muddy.
With the Dehaze slider in Lightroom, you can remove this hazy look. And maintain the original integrity of the image.
It’s a simple tool that can give you magical results.
Where Can I Find the Dehaze Slider?
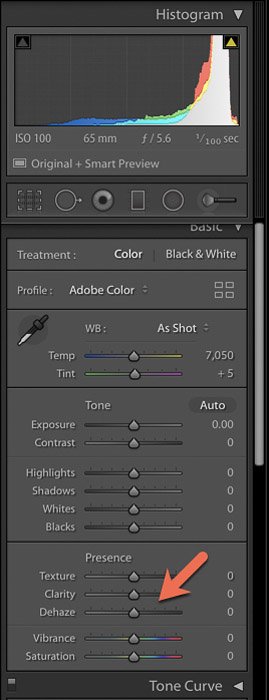
The Dehaze slider can be found in the Basic panel. This is not the only area in Lightroom where you can find Dehaze.
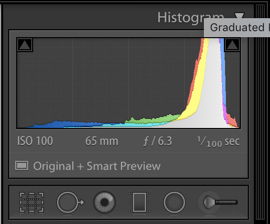
You can use the Dehaze globally–that is, throughout the whole image–or locally with one of the adjustment tools found under the Histogram in the Basic Panel.
You can use the Dehaze slider in combination with other brush and filter tools. This will help decrease the haze selectively in your photos.
Sometimes the Dehaze slider on its own is not enough to get the effect that you want. Try playing with the Contrast and Clarity in your image as well, and even the Tone Curve. The latter will help you boost the contrast in the mid-tones of your image.
Why Should I Use the Dehaze Slider?
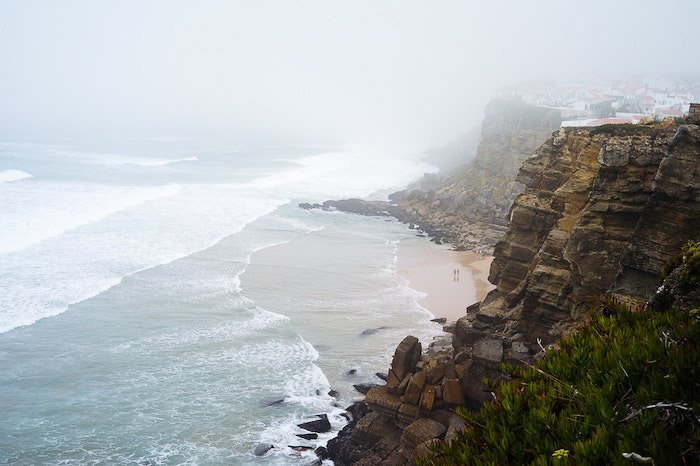
As a landscape or aerial photographer, you may find yourself using the Dehaze slider often due to conditions like fog.
But landscapers aren’t the only ones to benefit from the Dehaze tool. As a food and still life photographer, I find that a touch of Dehaze to many of my pictures–say from anywhere from +5 to +10–adds some additional contrast. This works well with my style of photography.
Rather than going crazy with the Contrast slider, you can “layer” the contrast in Lightroom using different tools. The Dehaze slider is one of these tools.
The problem with relying on the Contrast slider is that it’s fairly haphazard. It doesn’t give you the ability to choose which specific tones to brighten or darken. The Dehaze slider is great for adding contrast to large patches that are lacking in contrast.
In addition to using Dehaze to your whole image, you can add it to just small portions of the image. I often use the Dehaze slider locally using the Adjustment Brush.
In the image of the beverages below, the light hitting the largest glass at the top of my frame was very diffused. Diffusing the light helps reduce reflections and glare that are typical when working with glass objects.
In this case, the light created a hazy, clouded look on the side of the glass. I used the Dehaze slider with the Adjustment Brush at +46 to brush in the appearance of sharpness and contrast.
This didn’t 100% solve the problem, but it helped. I was able to further finesse it with a bit of work on the edge of the glass in Photoshop.
Other Uses of The Dehaze Slider
Another example where you might use Dehaze is in outdoor portrait photography, where you may encounter haze in your shots due to backlighting where the sun is behind your subject.
This can be a beautiful effect. But it can blur the features of your subject too much. Even if a portrait is soft looking, the face and particularly the eyes need to be relatively sharp.
There are also some other specific situations where Dehaze can be extremely useful.
One of these is in night photography.
When you’re shooting at night, you need to be working at a high ISO. This introduces “noise”, or grain, into your images. There are various ways of counteracting noise. You can do it in Lightroom or using external plugins like Dfine. One additional trick is to use the Dehaze slider.
Sometimes you can get condensation on your lens while working outdoors in cool weather. A small amount may not be visible until you upload your images into Lightroom. The Dehaze slider can quickly help you remove this unwanted effect.
Dehaze is also excellent for bringing out the details of the sky in landscape shots.
In Black & White photography, the particular brand of contrast that Dehaze offers makes it perfect for a dull sky or images that generally look too flat. This is a common problem.
Working in Black & White requires a bit of a different approach than post-processing images in color.
If your sky is blown out in your landscapes, you might also have underexposed foreground. Use graduated filters in Lightroom to create balance in your shots.
Get Creative
As with so many of the excellent tools in Lightroom, Dehaze offers you unlimited creativity. Especially when applied selectively to an image.
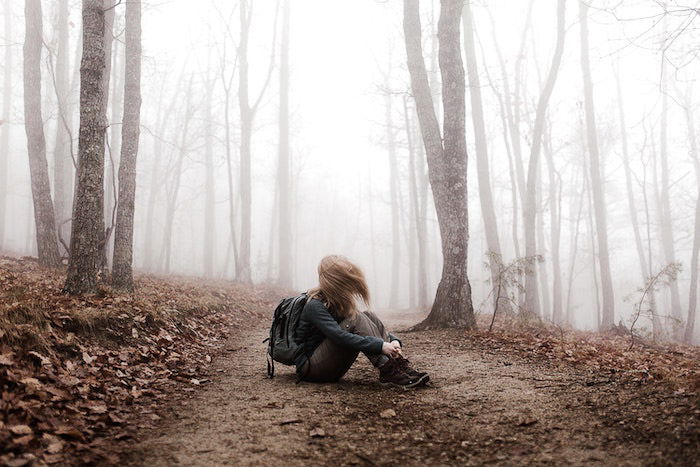
You can add a dreamy quality to portraits or amplify the mood in a landscape or lifestyle image.
You can also remove a foggy effect from certain areas, such as the foreground of an image. Or you can remove it from most of the image except the key focal point.
Take some time to think beyond the obvious and take a creative approach to your images.
The Dehaze slider doesn’t work for every image, every time. When it does work, it can be amazing and you’ll wonder how you could have lived without it.
Conclusion
The best way to get started with Dehaze is to experiment in Lightroom. See how the various ways to use the slider affect your images. Most likely there will be a sweet spot for the type of photography that you do.
Last but not least, remember that Dehaze is a Slider, i.e. it goes both ways. Sliding it to the left will give you the opposite effect and add more haze or fog to your images. This may very well be exactly what you want.
For more great Lightroom tips, check out how to use split toning or radial filter next!

