It’s a competitive Instagram world out there. And it can seem impossible to create the perfect feed for your brand. So how do you make each photo look professional?
To help you create that picture-perfect feed, we’ll show you how to edit Instagram photos in Lightroom.
The editing process starts way before the images get to Lightroom, though. So let’s first look at what you need to keep in mind when shooting for Instagram.
![]()
![]()
![]()
![]()
Shooting for Instagram? Learn How to Edit Instagram Photos
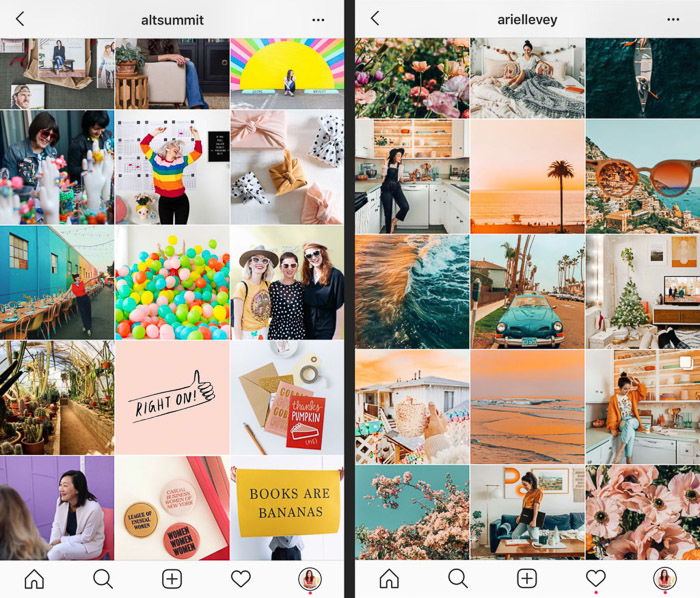
When it comes to Instagram, you’ll want to always keep in mind what the feel of your feed is.
Consistency will help create your brand and draw in the people you want to work with. Keep in mind any color schemes or vibes that your brand calls for.
Your whole feed might be full of bright photos with pastel colors. Or you might have a clean and modern aesthetic with only black, white, and metallics.
Your brand might be all about peace and zen moments. Or it might speak of high energy living and engaging with the outdoors.
Knowing your brand will guide your feed. And knowing what your feed needs will guide your photo-taking.
You’ll also want to consider shooting for broad themes and seasons.
On a bright day near the ocean you may want to take some photos of details and landscapes. You can later use these to talk about summertime.
The holiday season always calls for photos of gifts, sparkles, champagne glasses, pine trees, and snow. If you talk a lot about organization or business topics, show workspaces or office supplies. And don’t forget to make sure they go with your color scheme!
Sometimes these photo opportunities present themselves naturally. But it may be necessary to set aside a few hours or even a whole day to shoot some photos that you can use throughout the year as needed.

Using a DSLR will bring your Instagram feed to another level. Even if you don’t have the funds for a professional grade camera, having an entry-level DSLR will be better than using your phone.
Your feed will be consistent in look and quality, making your brand and feed stand out a bit more. Whether you shoot in RAW or JPG is a personal decision. RAW images will give you more flexibility in editing. But many professionals shoot only in JPG and have excellent images.
I like shooting in RAW for the added ability to stretch things like exposure and shadows farther than I could with JPG while maintaining a clean look.
Why Edit Instagram Photos in Lightroom
Now you’ve taken some new photos. Great! Where to edit, though? These days, Lightroom is the main tool you want to use for incredible editing power. Even on the go!
Ideally you would be editing on your computer and then saving your finished photos to your phone for posting. But Lightroom does offer a mobile app with an incredible amount of editing power as well. And it’s available for both iOS and Android devices.
Let’s take a look at both.
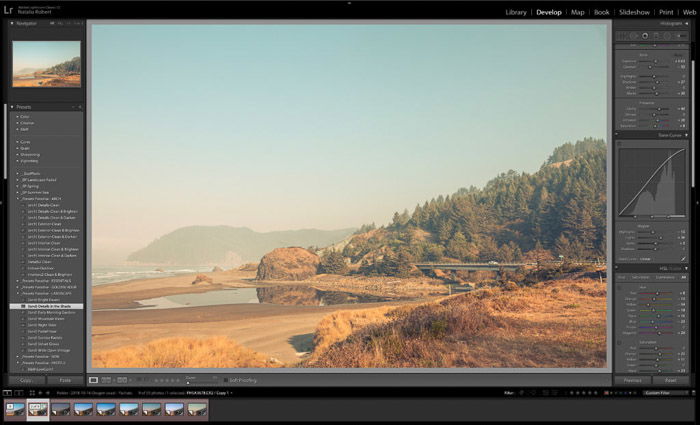
Editing Instagram Photos in Lightroom Classic
The ideal place to edit photos is on the desktop version of Lightroom, called Lightroom Classic. For this you need a Creative Cloud subscription.
The desktop version does give you access to more tools like working with RAW files and creating collages within Lightroom. It’s also very easy to work with. And it allows you to save final images to any size, file type, and resolution you want.
If you want to use your photos across multiple platforms or media, the desktop version of Lightroom will be worth considering.
Once you have the Creative Cloud subscription, you can also sync your presets to the Lightroom Mobile app. This means you can even apply the same edits while on the go!
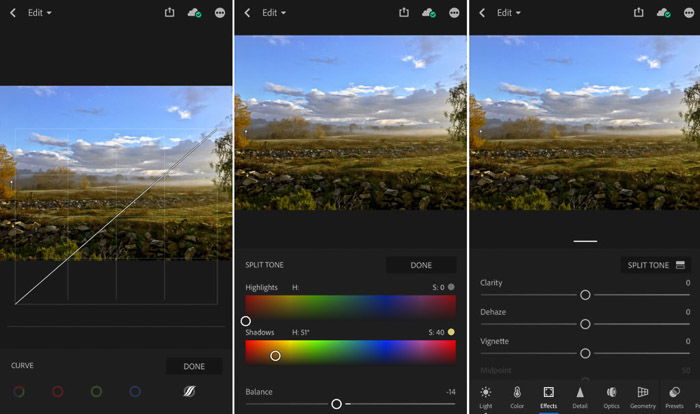
Editing Instagram Photos in Lightroom Mobile
The perfect supplement to editing in Lightroom Classic is Lightroom Mobile. This is a free app that makes editing on the go a breeze. With Lightroom Mobile you can edit any photos on your phone. This includes ones that you shoot on your phone or ones that were sent from your computer.
Lightroom Mobile does bring some presets built into it, like Lightroom Classic does, but you can also create your own! We’ll talk a bit more about presets in a bit. And we’ll walk you through how to create them on the app or import them from your desktop.
Using Presets for Consistency
Presets are like filters. Presets are a set of settings that are saved and can be applied to any photo so that you create the same look from one photo to the next.
Sometimes presets can create very artistic looks like vintage film or cross-processed tones, but they can also be perfect for applying basic edits that create a clean and consistent look.
For your Instagram feed specifically, it’s the best way to make sure that the color tones, light temperature, and style of photos stay consistent with your brand!
Lightroom already brings presets built into it. But it’s easy (and recommended) to create your own presets that fit your look perfectly.
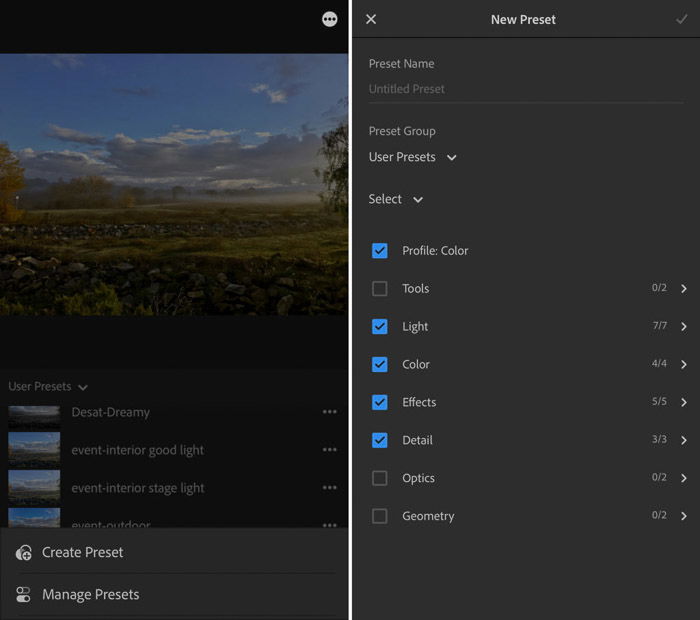
On the mobile version of Lightroom, you start by editing the photo the way you want it to look. When you have the settings how you want them, you go to the Presets section and click on the circle with three dots on the top right.
This opens up a small menu at the bottom, and you can select Create Preset. You then name the preset, select what folder the preset will be stored in, and pick which tools you want it to remember as part of the preset.
Once done, click on the check mark and you’re done!
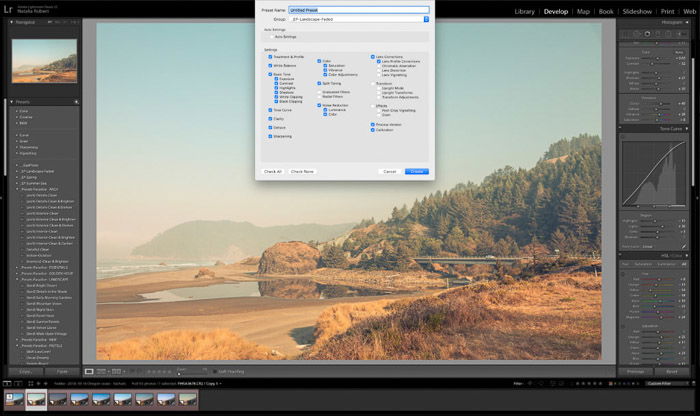
For Lightroom Classic on your desktop, the process is quite similar. While in the develop module, you set your settings to what you want.
When everything is set, you go to the column on the left and click on the + sign at the top right of the list of existing presets, then select Create Preset.
A window will open up where you name the preset, select a folder to store it in, and then select which settings to make part of the preset.
Click on Create and you’re done! It will now show as a preset in the left column.
If you have presets already created in Lightroom Classic and want to use them on the mobile app, the easiest way to do this is by importing them into Lightroom CC Desktop. And then syncing that to your mobile app.
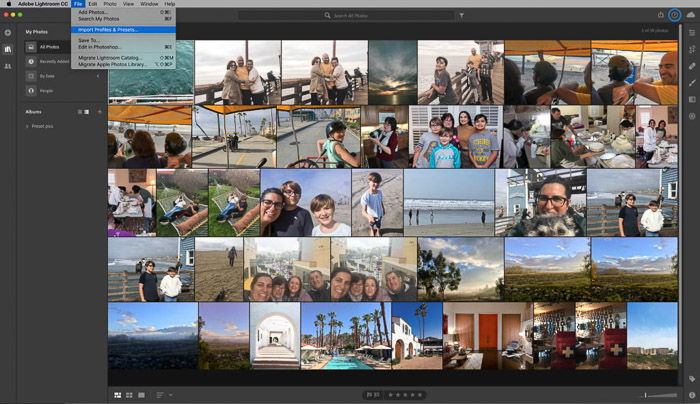
The full Lightroom program is now called Lightroom Classic. But there’s another download available to CC subscribers that’s called Lightroom CC.
This other version is more or less the mobile app on your desktop. You’ll notice that the interface is like the mobile app. Lightroom Classic is very different.
When you open Lightroom CC on your desktop, you can import presets installed in your Lightroom Classic program. Once Lightroom CC has your presets imported into it, you’re ready to sync them with the mobile app!
To do this, first make sure that you’re logged into the mobile app with the same account as your desktop programs. When you open the mobile app and also have Lightroom CC open on your desktop, they should automatically sync.
Once syncing is complete, you’ll see your presets listed in the presets section of the mobile app.
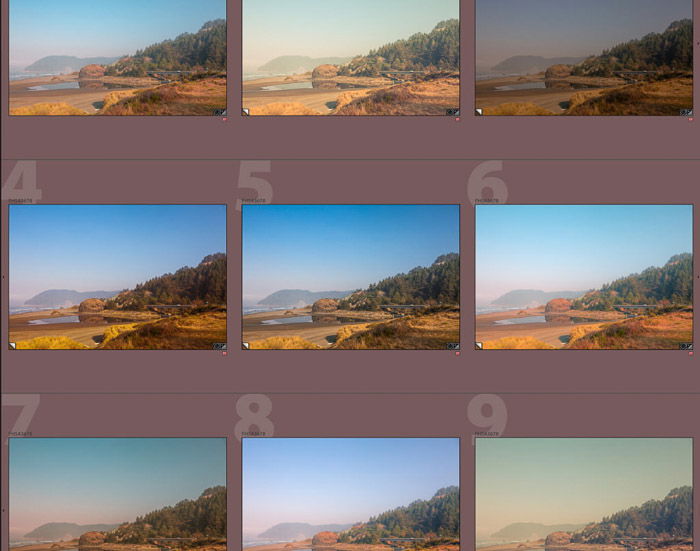
A second way to use presets from Lightroom Classic is through DNG files. This is ideal if you have preset files but don’t have a subscription to Creative Cloud.
First, each preset will need to be applied to a photo in Lightroom Classic and then exported as a DNG file. That DNG file will then need to be saved into your phone for easy access. Once on your phone, you open it in the mobile app and copy the settings.
With your settings copied, they can now be applied to the next photos you open. It’s a simple copy-and-paste process!
It helps to save the DNG photo file in a folder separate from your other photos. That way you can find it when you need to use its preset again.
Instagram Editing Tips for Lightroom Presets
If this is your first time playing with presets, it will be tempting to go a bit crazy and add lots of effects. Try to resist the temptation, though!
First, always ask yourself if the final look matches your branding and your Instagram feed. Second, using strong effects on photos tends to make them feel a bit dated and unprofessional. When in doubt, keep the look clean and fresh.
Finally, you’ll want to select a style of editing that lends itself well to all types of photos that you’ll be posting.
If you post landscapes and food photos, you’ll want an editing style that works well with both. That way there’s consistency in your Instagram feed.

While each brand’s look will be different, here are some basic editing settings. You’ll want to know these to create your personalised look:
- Exposure: Adjust how bright the photo is.
- Tint: Adjusts color tint on a spectrum between green and red; balances out with temperature.
- Temperature: Adjusts the warmth of the photo – slides between blue and yellow for the spectrum.
- Clarity: I recommend adjusting this instead of contrast. Helps add a touch of contrast and sharpness.
- Blacks/Whites: You can darken or brighten the blacks and whites in the photo – helps balance out adjustments that you make to highlights and shadows.
- Highlights/Shadows: Balance out bright spots or dark shadows by adjusting these.
- Vibrance: A more subtle adjustment than the saturation, this slider helps give the colors a bit of pop.
- HSL/Color: Adjust individual colors on hue, saturation, and luminosity.
- Enable Profile Corrections: Check this box and select your lens from the drop down menu so that it corrects the lens’ natural distortion.
You’ll want to use your phone for some photos or videos. But they won’t be up to par for posting on your feed. But your Instagram stories are the perfect place for them!
You can edit your stories on Lightroom Mobile. But you don’t need to be up to the same level of quality when shown in the stories.
This can be perfect for behind-the-scenes, impromptu photos, glimpses into your personal life, or Instagram Live videos.
Conclusion
Instagram is a major force in our online world these days. And it’s difficult to stand out as a brand. Knowing your branding, being consistent in your imagery, and showing high quality images on the feed can help to attract your tribe.
The top tool for editing your photos and creating that consistency is Lightroom. And it’s available for both desktop or mobile.
With such easy access to editing tools, creating the Instagram feed of your dreams is only a matter of time!
![]()
![]()
![]()
![]()