Sepia is a warm brown color that can give photos an antique look. It was very popular in the early days of photography, and many classic photographs are in sepia tones. You can create this effect by adding sepia toning to your photos in post-processing, or by using filters when you take the photo. Here’s how to add a sepia color to your photos.
What is the Sepia Color of Sepia Toning?
The sepia toning was originally used to preserve printed photos and make them last longer. In fact, it is not uncommon to see sepia-toned photos from seventy, ninety or even a hundred years ago in great condition.
This method was so common in the past and there are many photos that survived to our times. This is why we have a strong association between sepia tone and old times, vintage, nostalgic, old school looks.
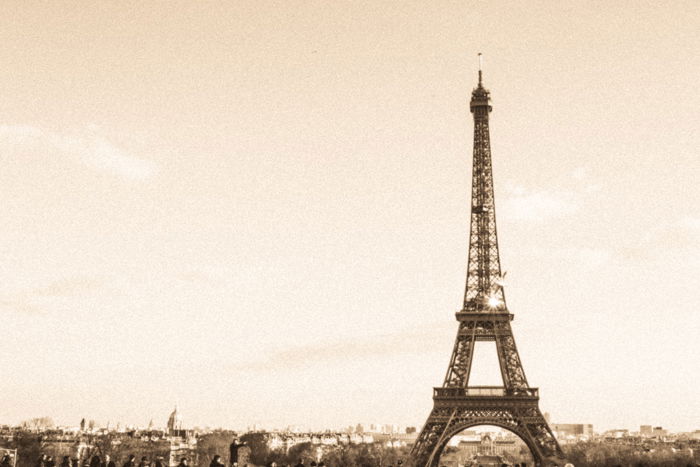
Sepia photos are monochromatic, some even consider them to be black and white photos. They have distinct warm, brown-yellow tones.
The process was done by a chemical reaction. You can see many variations in the tones. It’s due to differences in the treatments and methodology of the developers.
How Do You Get a Sepia Tone in a Darkroom
Sepia tone can be added to a black and white photograph in the darkroom.
Sepia toners are chemical compounds that replace the traditional metallic silver of the black and white photos with another substance (a sulfide-based compound). This results in the addition of warm colors to the image.
Depending on how much of this compound you add to the image, the warm effect you get varies in intensity.
Why Was Sepia Tone so Popular
Photographers started using the sepia toning back in the 1800s for two reasons. The first one is merely artistic. They liked the warm look that sepia tone adds to the image, so it was a way to make their photos look a bit different.
The second reason was to slow down the deterioration of the image. The chemicals involved in sepia toning have a longer life span, so photos lasted longer too.
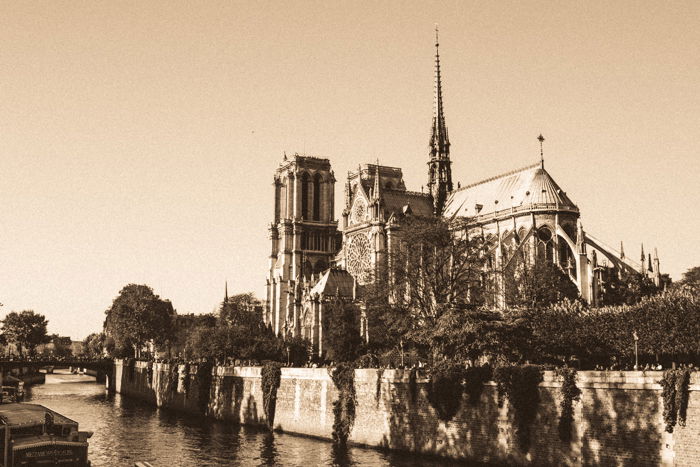
Create an In-Camera Sepia Effect
Chemicals used in the darkrooms to get the sepia tones were quite toxic. Thanks to digital photography we don’t need to handle hazardous products anymore.
Most digital cameras have the option to shoot in sepia tone. I will show you how it looks like on my camera, a Nikon.
If you have a different brand, it might be a bit different. Check your camera manual to learn how to select the sepia effect.
In Nikon, you need to go to Shooting menu> Set Picture Control.
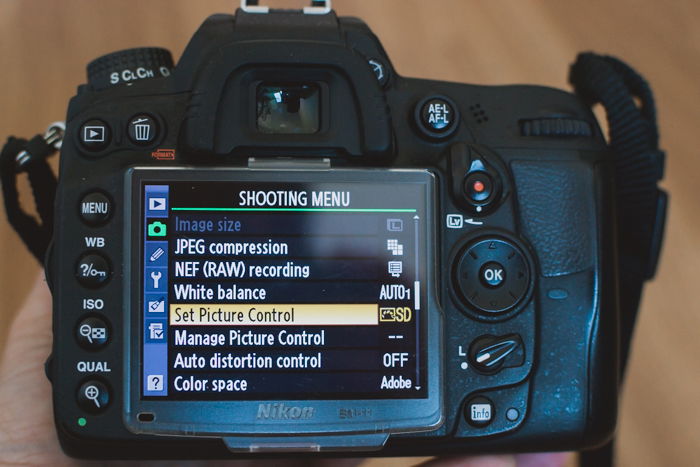
Look for the Monochrome option.
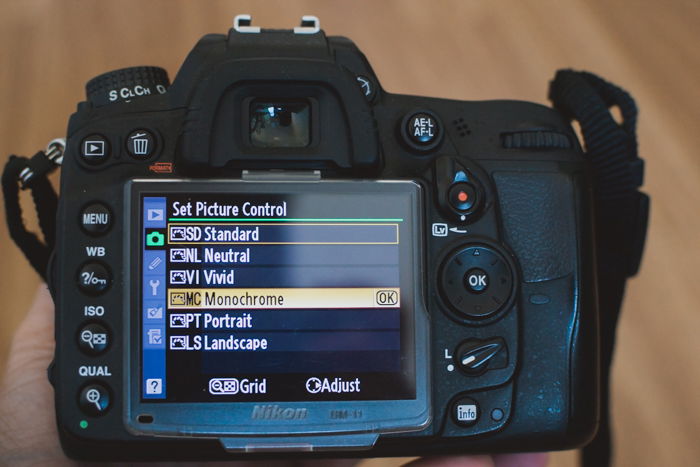
Instead of just selecting it by pressing the OK bottom, press the right arrow on your camera Multi Selector. In the Monochrome Menu, select Toning
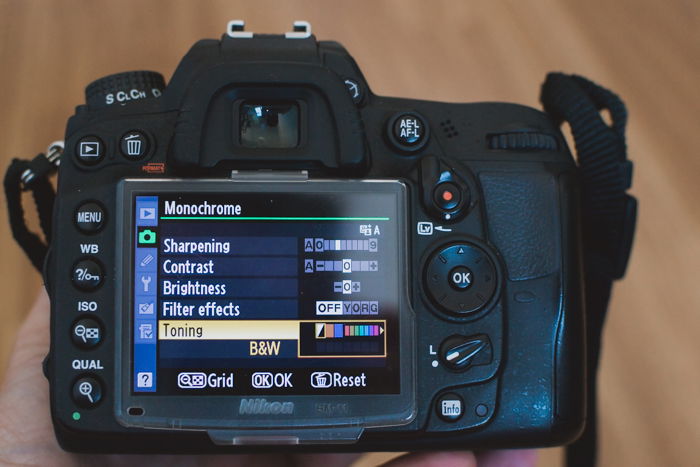
Select the sepia color in the Toning section. This is the second brown little square. You can also choose its intensity by using the sepia color scale.
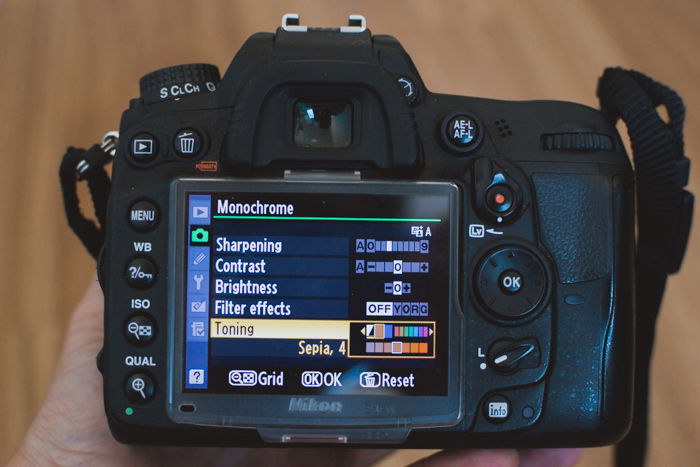
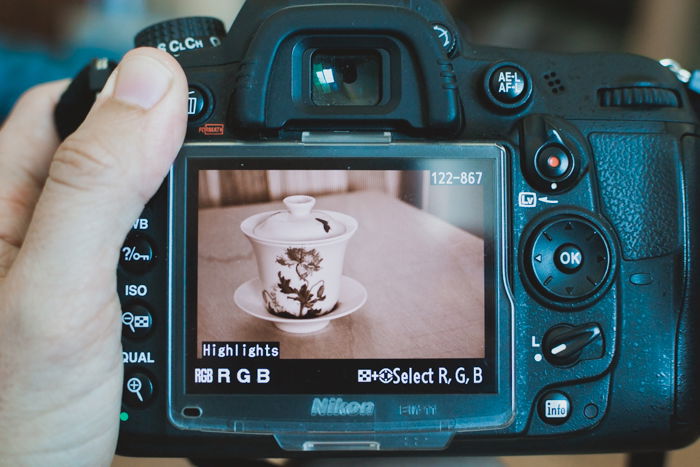
Keep in mind that this monochromatic effect is applied straight in-camera only if you take your photos in JPEG format. If you are shooting in RAW, you will see the sepia tone on the camera screen. Once you transfer the images to your computer, you will have them in color.
This is because RAW is a format that stores all the pixel information, including color. In that case, the monochromatic effect can be useful to have a preview and decide if the photo you are about to take will look good in sepia or not.
Create a Sepia Photo Effect Using the Split Tone Panel in Lightroom
If you want to have more control and flexibility over your sepia effect, instead of using your camera monochrome options you can create a sepia effect in post-processing.
Today I am going to explain to you how to create a sepia effect using Lightroom. It is easy and quick, just a few steps.
Step 1: Create a Virtual Copy
Before you start editing your image, it will be useful to create a virtual copy. These copies are created just inside Lightroom to store editing information, so you won´t duplicate your original file.
As a result, they won’t take up room on your disk. They are useful because they let you apply different edits in each one of them. You can then keep your original image and a version of it, for example, with a sepia effect.
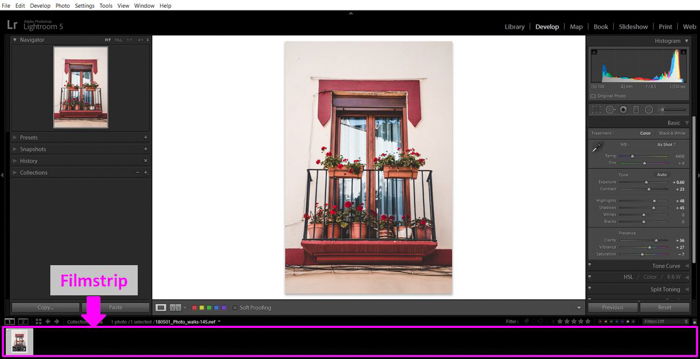
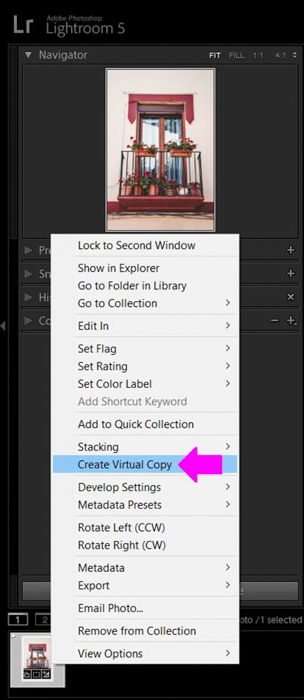
To create a virtual copy, right-click on the photo in the film strip and select Create Virtual Copy.
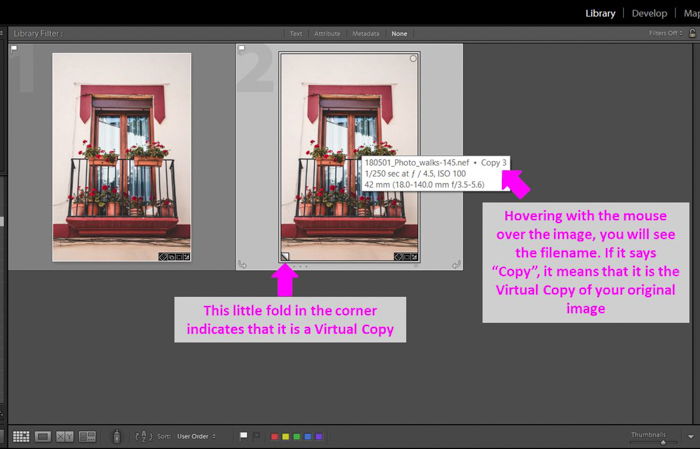
You will know which one is the original and which is the copy by their file name. The virtual copy also has a little fold in the left bottom corner.
If you want to delete a virtual copy, you can do so by selecting it and pressing Delete. However, take care not to delete the original thinking that it is a copy. If you do, you will lose both the original and the copy!
Once you have different versions of your image, you will be able to compare them selecting both images in the Grid View and clicking on the Compare View option.
Lightroom will show them side by side. This also works for more than 2 photos.
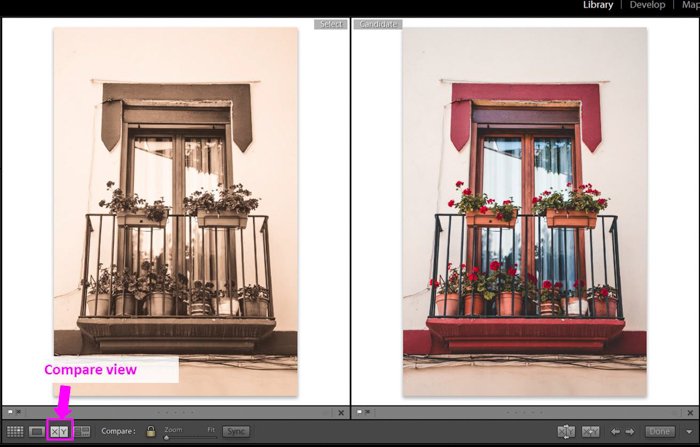
Step 2: Convert the Virtual Copy to Black and White
Now that you have created a virtual copy, let’s convert into Black and White.
In the HSL/Color/B&W panel, click on B&W and Lightroom will convert the image.
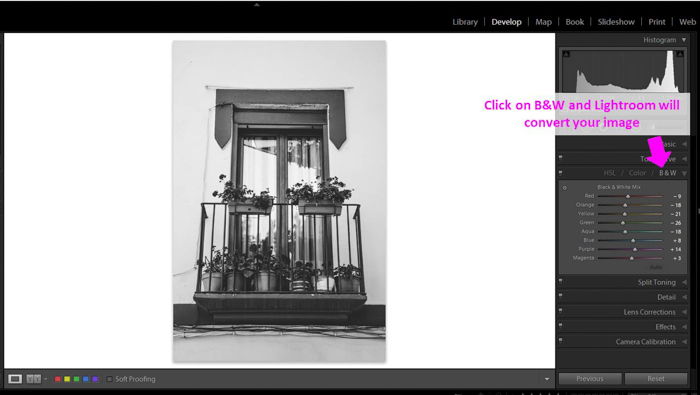
You might need to do some adjustments, such as the exposure, contrast or any other.
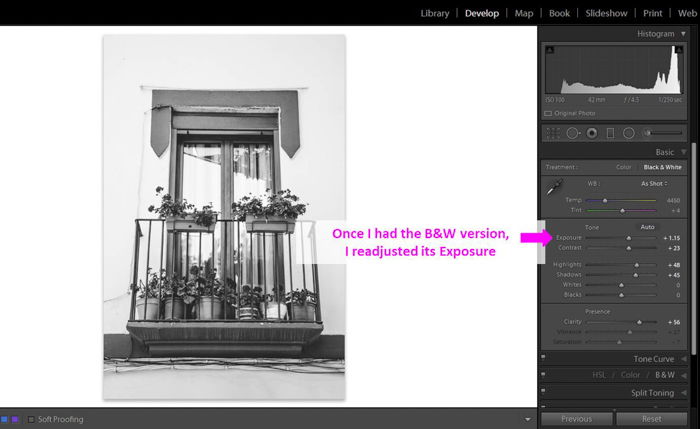
When you are happy with your Black and White version, do a Virtual Copy of it to create the sepia effect on the copy. Then you will have 3 versions of the image: original, Black & White and Sepia.
Not all photos convert well into sepia. The more suitable are those with some contrast. This means that they have both Blacks and Highlights.
Photos with just mid-tones might not look good with this effect.
Step 3: Go to the Split Tones Panel
To create the sepia effect, go to the Split Tones panel in the Develop module. This simple looking panel offers you a lot of creative options. It enables you to make strong effects of color in your images.
It has 2 sets of Hue (color) and Saturation sliders. One pair allows you to set the tones that will be applied in the shadows of the image, and the other affects the tones in the Highlights.
There is also a balance slider to give more intensity to either the shadows or the highlights.
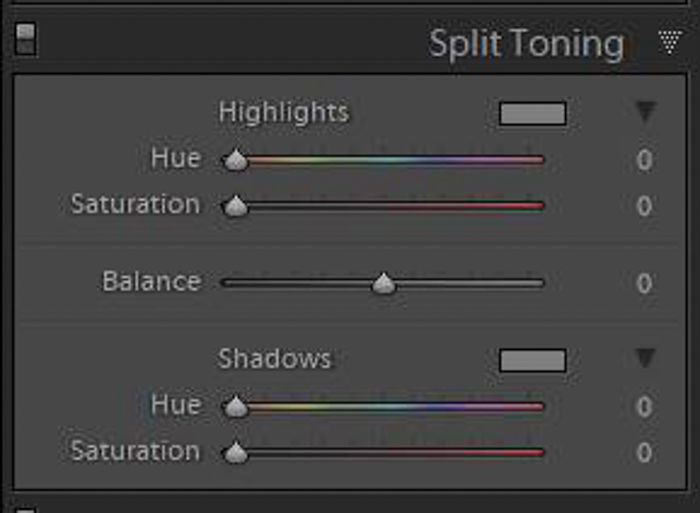
Step 4: Select a Color for the Highlights
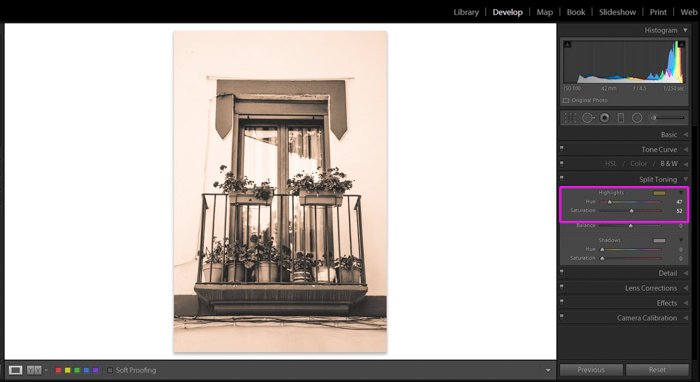
Let´s start by selecting a color (hue) for the highlights. You can select a color by moving the Hue and Saturation sliders. If you hold Alt while moving the Hue slider, Lightroom will show you the Hue at 100%.
This trick is useful because it helps you to decide if you like the color. For a sepia effect, I usually choose a golden color. You can start with a Hue value of 47 and a Saturation of 52. Adjust it to your personal taste.
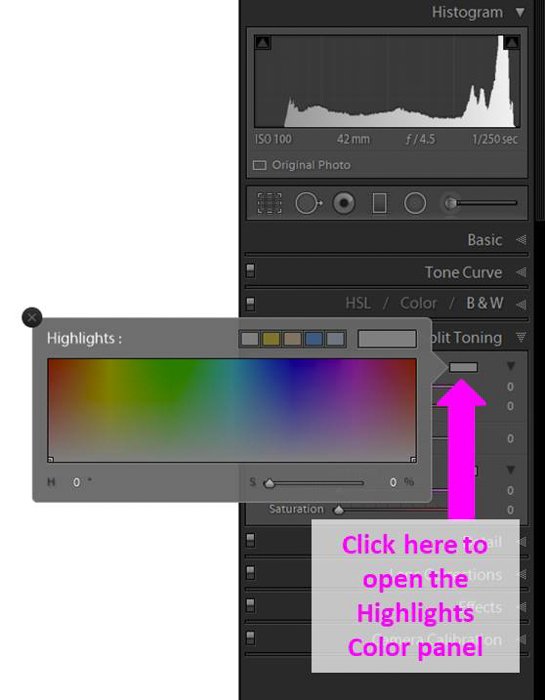
Another way to select a color is through the Color Panel. Its icon is the little colored rectangle above the Hue slider. Click on it to open the Color Panel window, that is mostly a color palette.
Choose the color you want to add to the highlights by clicking on it. You can modify the saturation of the color using the slider at the bottom right corner.
Step 5: Select a Color for the Shadows
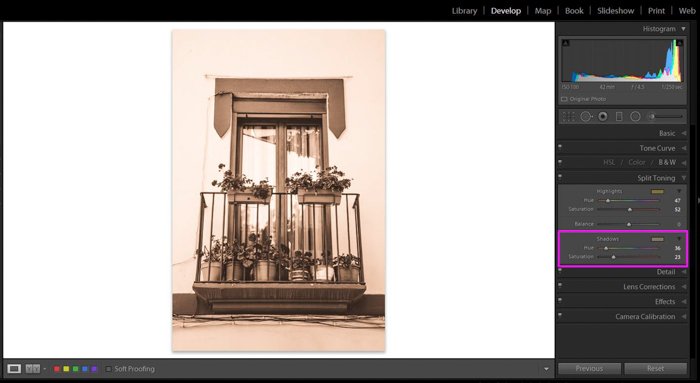
Now you need to select a color to add to the shadows. To do that you need to follow exactly the same steps you took for the Highlights but using the Shadow Hue and Saturation slider or the Shadows Color Palette.
A hue value of 36 and a saturation of 23 belongs to a sepia color that might be a good starting point.
Step 6: Balance the Highlights and the Shadows
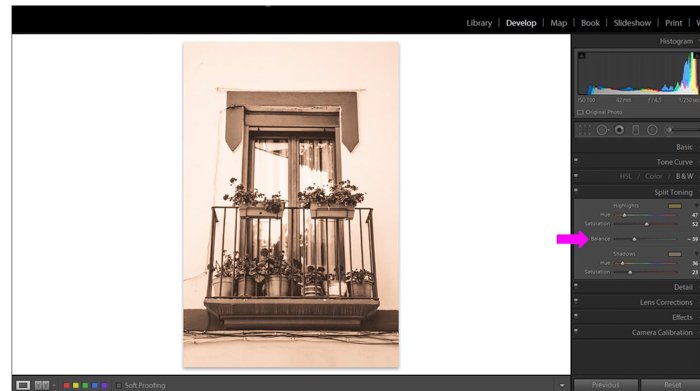
Finally, use the Balance slider to find the relation between shadows and highlights that you like. By moving the slider towards the left you will make the shadows predominant in the image.
Moving it towards the right, the highlight colors will be predominant.
Step 7: Final Adjustments to the Sepia Version
Check if you need to do some final adjustments to your image. Something I like to do is to emphasize textures using the brush tool.
To do so, I select the Brush tool, increase its clarity and brush over the areas of the image with interesting textures. I think this improves the sepia effect.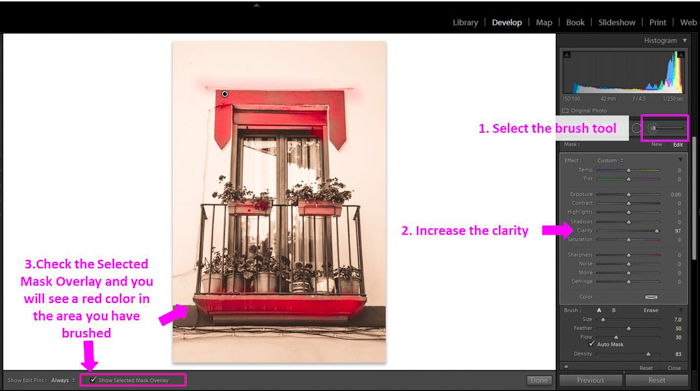
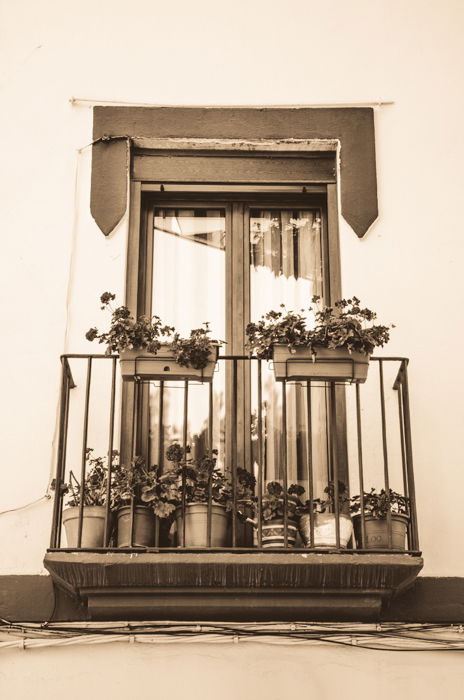
Here is the final image:
Step 8: Create Your Own Sepia Develop Preset
One of the great things of Lightroom is that you don´t need to repeat all these steps every time you want to create a Sepia effect.
Instead, you can create your own Develop Sepia Preset and apply it with just one click in other images.
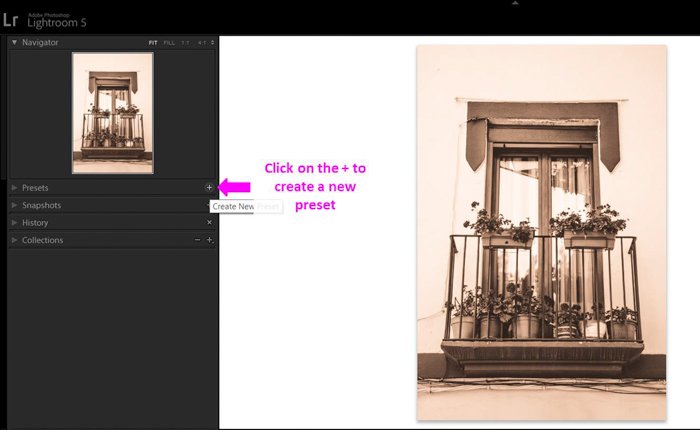
Creating your preset is easy. First, click on New Preset.
A window will open where you can Rename it. Use a name that will allow you to quickly identify the preset in the future.
You can save it in a Preset folder to have everything more organized.
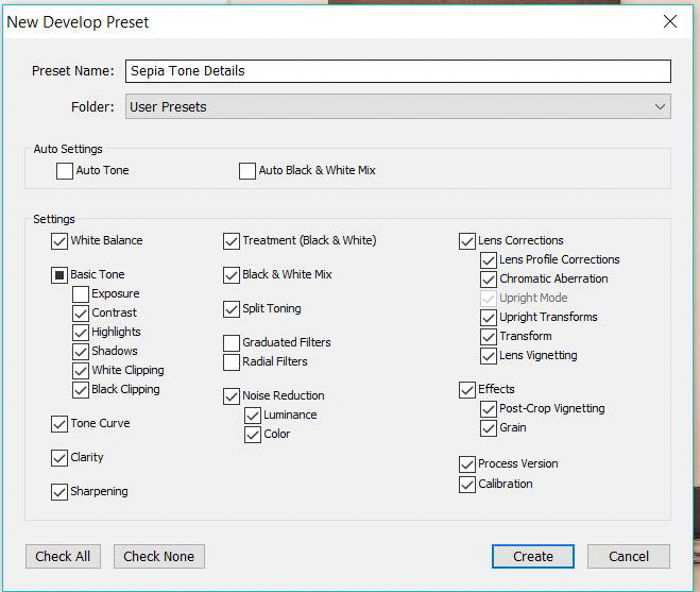
In the Preset windows, you can select which settings you want to save. I usually save them all except for the settings that are very specific for an image (such as Exposure) or the local adjustments (such as Graduate and radial filters).
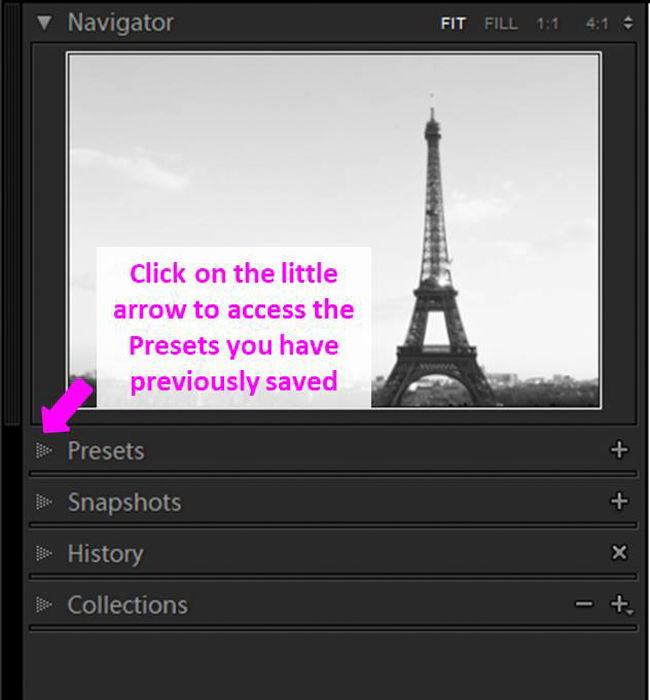
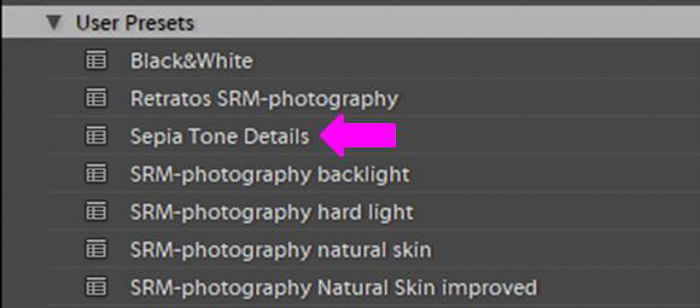
In the next image you edit, you just need to select your preset from the Presets panel in the Develop module. Lightroom will apply all the edit settings to your image automatically.
Extra Step: Add Grain to Emphasize the Old Photo Look
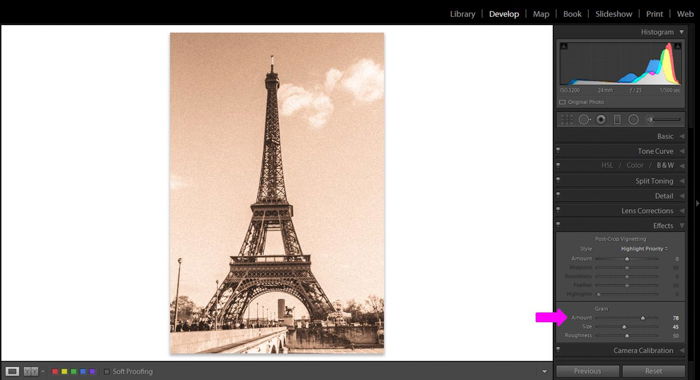
If you want to add an old look to your image, a great way to achieve it is by adding a bit of grain. In the Effect panel, increase the grain by moving its slider to the right.
You can also change the size and the roughness of the grain. Play with these sliders until you get the effect you like. This is the final image with the added grain:

Conclusion
Sepia toning creates an old nostalgic look that is difficult to achieve with any other edit or filter. You can create sepia images in the darkroom using chemical products but those are hazardous for your health and the environment.
Luckily we can achieve this effect digitally either straight from the camera or using editing software such as Lightroom. You can also add a sepia filter in Photoshop.
This second option allows you to have more control over the sepia effect and even add some grain to emphasize the old-photo effect.
You can create the sepia effect in Lightroom following a few simple steps, allowing you to easily experiment and get creative with your images.
