When you’re editing photos in Lightroom, there will be times when you want to change the brightness or color of a certain part of the photo, but don’t want to affect the rest of the image. This is where masks can come in handy. Let’s see how you can use a mask in Lightroom to improve your photo editing.
Create and Use a Mask in Lightroom CC
A mask is a way for you to control what areas of a photo receive the edits you want to apply.
In Lightroom, you have three different local adjustment tools allowing you to edit particular areas of your image:
- The Brush Tool,
- The Radial Filter,
- The Graduate Filter.
When you use a local editing tool, a mask is created and updated in real time.
To improve the mask for a more precise local editing, you can rely on two different features: Auto Mask and Range Mask.
Auto Mask vs Range Mask: Few Key Differences
The main differences between the two masks are:
- Auto Mask is available only for Lightroom brushes, while the Range Mask is available for all local adjustment tools;
- In order to activate the Range Mask you have to place the local editing tool on the image first;
- Range Mask provides a quick and simple way to create a Luminance or Color based masked. Auto Mask, instead, can only use the color information of the area under the brush to detect edges.
- While Auto Mask has no specific controls, with the Luminance and Color Range Masks, you have the tools to fine-tune the masks.
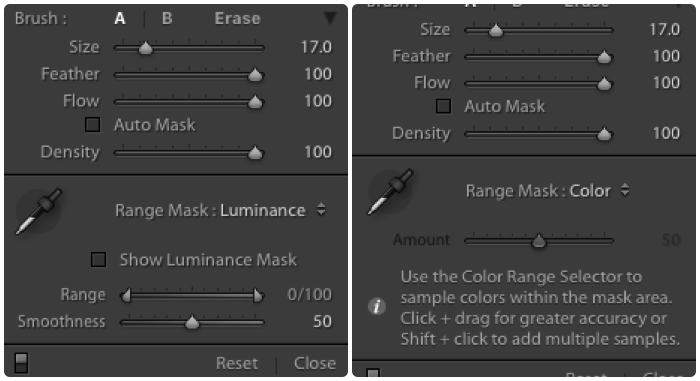
Luminance Range Mask Vs Color Range Mask
The Luminance Range Mask applies local adjustments to areas of luminance within the selected range (the range slider).
A quick way to select the proper luminance range is to sample the area of the interest with the Eye Dropper tool. You can also manually move the left and right sliders.
Pressing the Alt key while dragging the range sliders will reveal the corresponding mask. The areas being edited are in white, while the ones not affected by the local editing appear black.
The Smoothness slider controls the intensity of the masking effect from hard to soft.
The Color Range Mask applies local adjustments based on the color range selected. It relies on two controls:
- the Eye Dropper tool,
- the Amount slider.
By clicking and dragging the Eye Dropper over an area of your photo, you select a large color palette. To target specific color areas, you can shift+click on the desired color.
The Eye Dropper allows you to specify up to 5 targets, color tones and/or palettes, per adjustment tool.
This lets you creatively select exactly which tones will receive your adjustments.
The Amount slider allows you to adjust the blending with more precision.
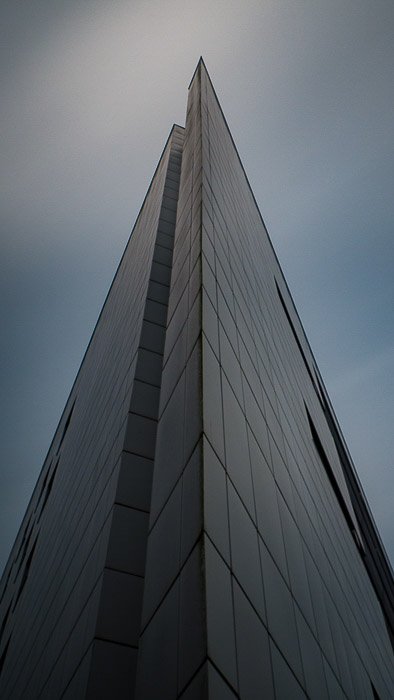
Using the Auto Mask In Architecture Photography
Architecture photography is a typical example where the use of the Auto Mask is a must.
The Auto Mask, in fact, is the best masking tool to work around edges, and buildings have plenty of those.
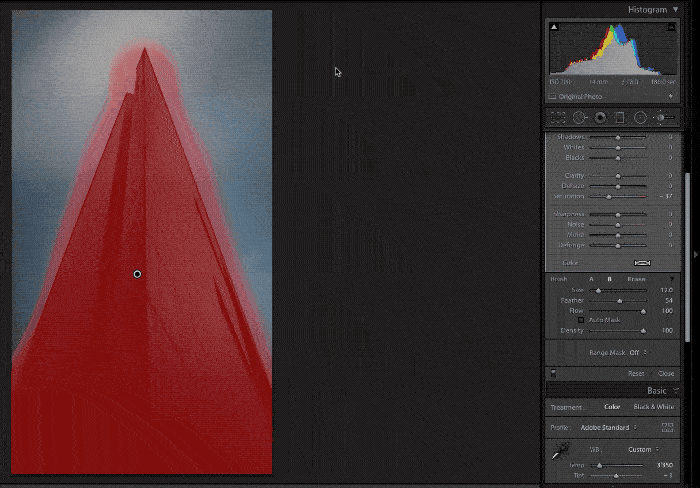
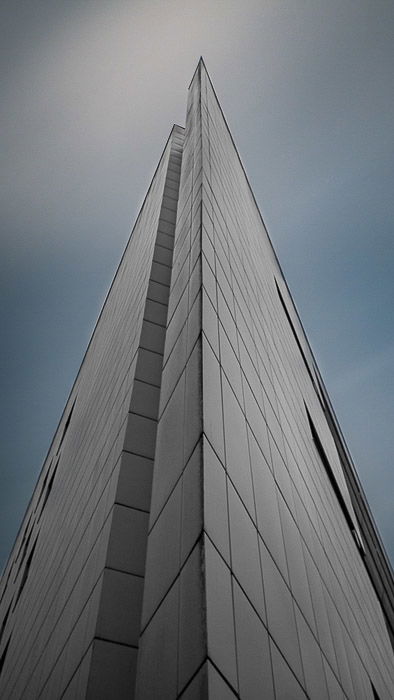
Consider the image below. I wanted to photograph this building against the sky and some motion blurred clouds.
I used a strong neutral density filter to take a long exposure, but the building is underexposed.
With an adjustment brush, I painted over the building without any Auto Mask, to be sure I masked the whole facade. I set the brush to light up the facade and desaturate it a bit.
By turning on the Show Selected Overlay Mask option located under the image, the mask is shown by turning the painted area to red.
The mask can be revealed or hidden with the keyboard shortcut ‘o’.
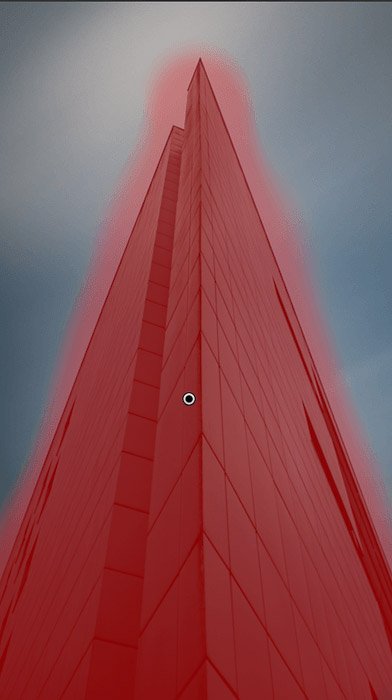
You can see that the mask is not very good. It overlaps with the sky around the building edges.
To restrain the mask to the building only, let’s turn on Auto Mask for the Erase brush and paint over the sky near the the building edges.
As you approach or leave the edges, it is useful to toggle Auto Mask on and off. You can do that by ticking the on and off option or by using the keyboard shortcut “A”.
The animated gif below shows how quick and easy it is to clean up the mask around the edges.
And this is the final result.
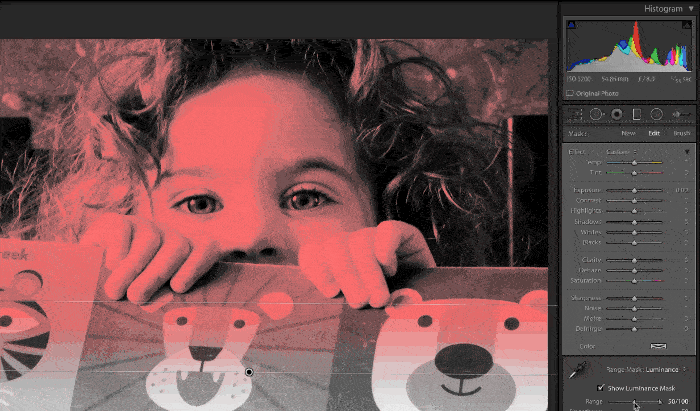
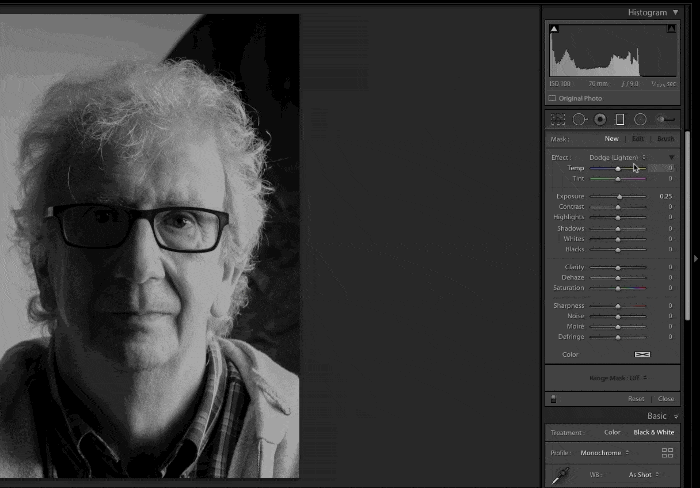
Using the Luminance Mask to Fix Portrait Backgrounds Around Model’s Hairs
Often, when doing high key portraits, you want to have your background white. When doing low key portraits, you want to have a nice dark or black background.
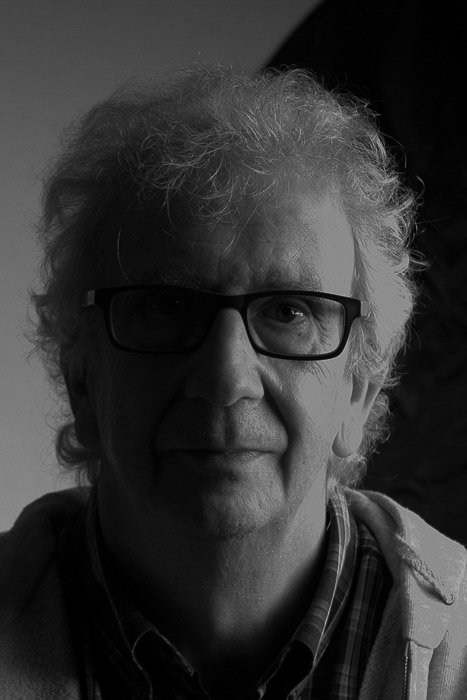
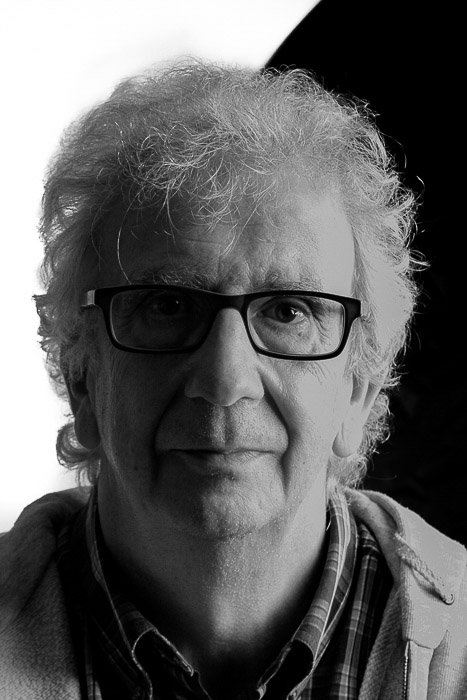
If you’re feeling crazy, you can go for a split black and white background and opposite shadows, as in the portrait below.
In all cases, you will have to fix the background around your model and the most difficult area is around the hairs.
Photoshop has always been the go-to editing software for this kind of job, but now we have Luminosity Mask.
Let’s start by turning the dark part of the background to black.
- I can use a graduated filter to darken the left side of the background towards pure black. Some hairs and other parts of the image are also affected by the filter and will turn darker.
- With the Eye Dropper, I can sample the background right above the model shoulder. The Range slider now is set to so to select a luminance range from 0 to 54. Most of the hairs and clothes that went dark with the filter are not bright again.
- By dragging the Smoothness sliders while pressing the Alt key, I can further adjust the mask. Remember that the white parts of the images are those affected by the filter.
The animated gif below shows the whole process.
You can now do the same for the left part of the background and turn it to pure white.
And here is the final result.
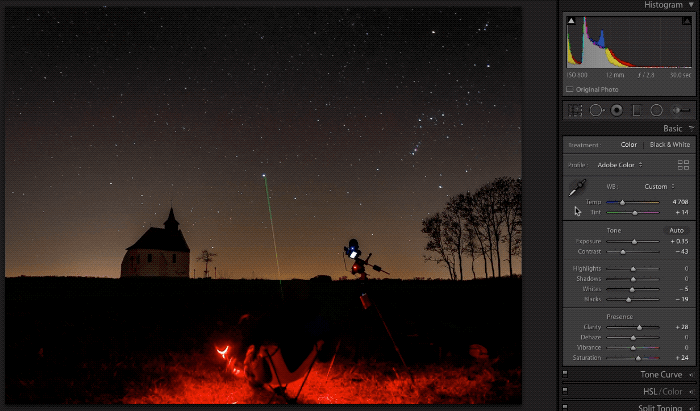
Using the Color Mask to Reduce Light Pollution in Starry landscapes
One of the most annoying aspects of photographing starry landscapes is light pollution. Even in the countryside, nearby villages and roads lights will still spoil your sky.
The effect of light pollution is a dome of orange light rising into the sky. You need to turn it down in your images.
With a clear horizon, you could use a graduated filter. But what if you have a more complex one, with trees and rocks?
Color Mask is one solution. Let’s see how we can use it to fix the light pollution in this image.

Time for some basic editing: crop the image, fix the horizon and set general contrast and exposure. I also reduced luminance and color noise, to better work with the mask.
To reduce the effects of light pollution I used a graduated filter, from the top of the sky downward.
The filter tunes down the highlights and reduces saturation. It also cools the temperature color, thus reducing the orange glow of the light pollution dome.
With the Color Mask active, I sample some areas near the horizon to create the mask. With the Amount slider, I could also refine the mask.
The animated gif below shows the whole process, which was rather fast and easy.
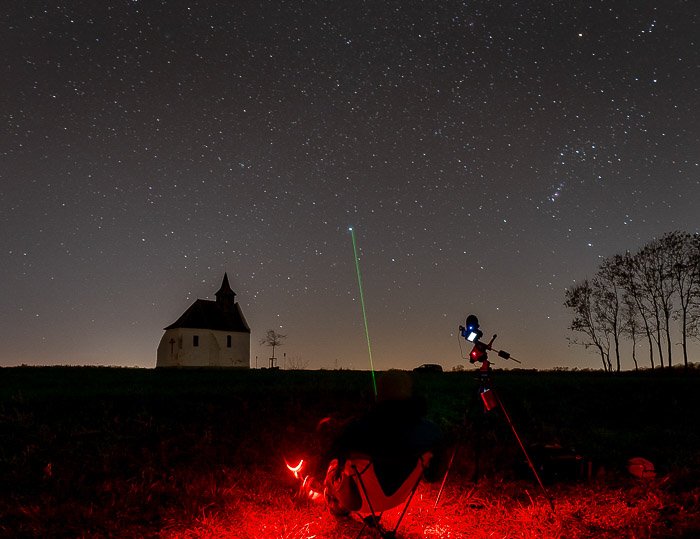
This is the final image.
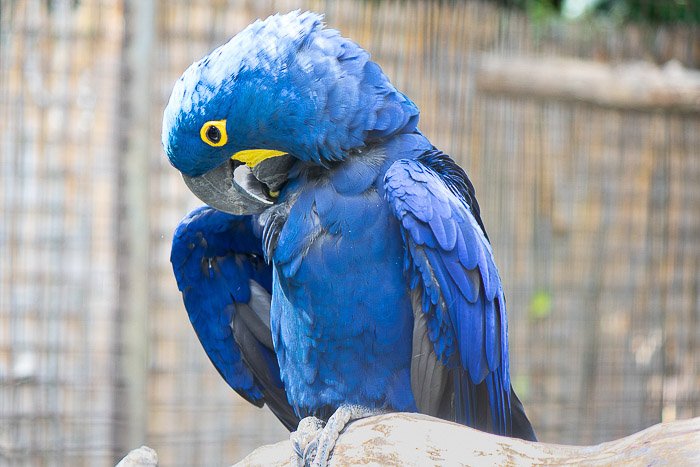
A Quick Lightroom 6 Tutorial to Turn Auto Mask Into a Color Mask
I know many amateur photographers still working with Lightroom 5 or 6. Many didn’t feel the need to commit to Adobe subscription.
This is a neat Lightroom 6 trick to use Auto Mask to target your adjustments based on color. With overlapping patterns, textures and details, it may be difficult, or time-consuming, to create a good mask.
Let’s work with this photo of a parrot I took at a zoo. I want to edit the bird in a different way than the background.
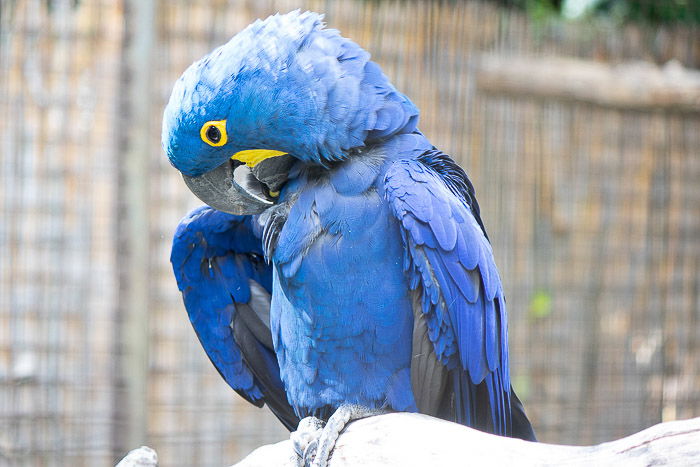
I could use a brush and use the Auto Mask as usual. But this will require some time to make a good mask. Because the body of the bird is blue, here is a trick.
- With an adjustment Brush selected, turn on Auto Mask and set the Flow, and Density to 100. Then drop Feather down to 0.
- Set the size of the brush so that it is larger than the bird.
- Finally, place the brush on the bird.
This last step will cause the mask to use only the specific color of the area where you dropped the brush pin.
Now you have a mask targeting the blue colors et voila! You have just created a basic Color Mask in a single click.
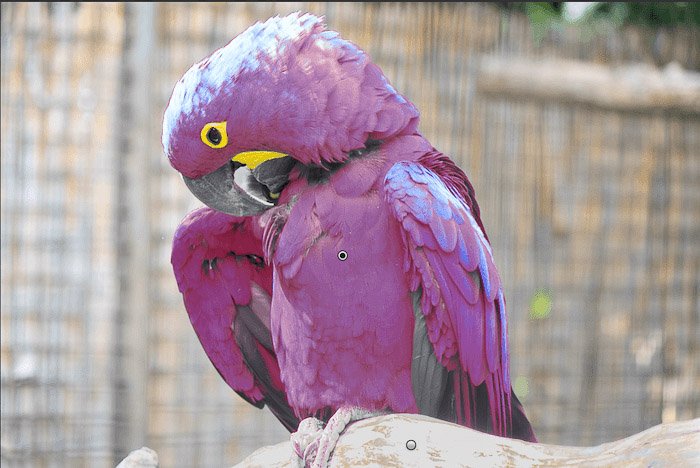
As you can see from the image above, the mask is rather accurate, particularly along the contour of the bird.
I did the same to mask the overexposed brunch in the foreground, in an attempt to recover it as much as I could.
Here is the final result.
Conclusion
Being able to apply a particular edit to a targeted area is a very powerful technique to get the most out of your images.
Unfortunately, Auto Mask and the newer Mask Range are great editing tools that are often overlooked by Lightroom users. These are invaluable tools that allow you to easily target particular areas for very precise edits.
Learning how to use those will speed up your editing and step forward to improve the quality of your images.
Stay up-to-date, and read our post on Lightroom’s new AI masking tool, too!
![]()
![]()
![]()
![]()