Google’s Nik collection had a massive boost in popularity when it was made available as a free download. Although it’s no longer free, is it still worth looking at it? You can use the Nik collection as plug-ins for Lightroom and Photoshop.
Take a look at our review to find out if they’re still worth getting.
Where to Find the Nik Collection
You can find the Nik Collection here. While there are many tool packets, you only need one download to get all the components.
Once you’ve downloaded the file, open to begin the installation. The installer will walk you through each step, including which image editing tool you want to use the plug-in with. It scans your computer to find what compatible programs you have.
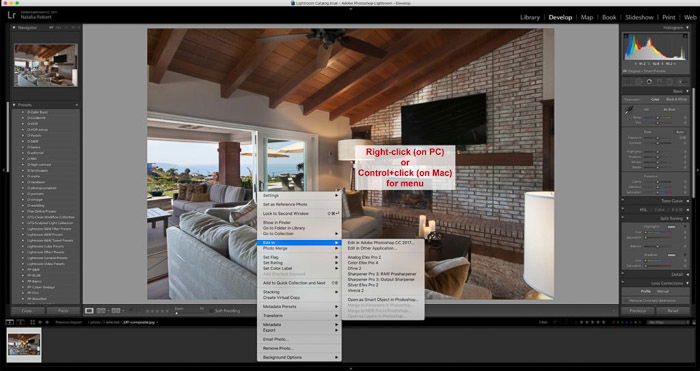
Once it’s installed, you can open Adobe Lightroom, which will look the same as always. Within the Develop Module, you can choose a photo to work on and right-click (or Ctrl+click on a Mac) on the photo itself for the menu to appear.
In this menu, you’ll hover over “Edit In” and see that the components of the Nik Collection are now each listed as an option! The only one missing is the HDR Efex Pro, but we’ll talk more about why that is when we review that tool.
Things to Keep in Mind
As with any new version download, it will take a bit of time to integrate this collection into your workflow.
On my first use, I noticed a few things.
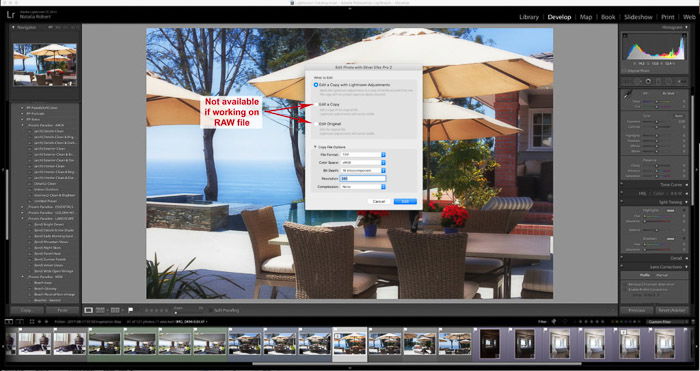
When you select a tool to use on a photo, a pop-up window will appear to ask you what type of file you want the copy to be. The edits you do in Nik, even as a Lightroom plug-in, are on a copy of the photo. This is NOT a virtual copy; this is an actual new image file. You’ll have the options of TIFF, PSD, or JPEG file types.
I gravitate towards TIFF to maintain as much quality to the image as possible. You’ll also choose color mode, resolution, and compression. At the top of this pop-up window, you’ll see options about creating copies that maintain LR edits within them.
If the original file is a RAW or DNG file, you can’t select anything except to create a copy that has LR edits applied. If the original file is anything else, like a JPEG, you can edit a copy of the original with NO Lightroom edits applied, or edit the original itself.
You have to select which Nik toolset to work with from the Lightroom menu. Some experimentation will help when you first download the Nik Collection. For example, you would use Analog Efex Pro if you want a vintage film look, but would most likely use Color Efex Pro if you want to bring out the colors in your landscape photo.
What’s Included?
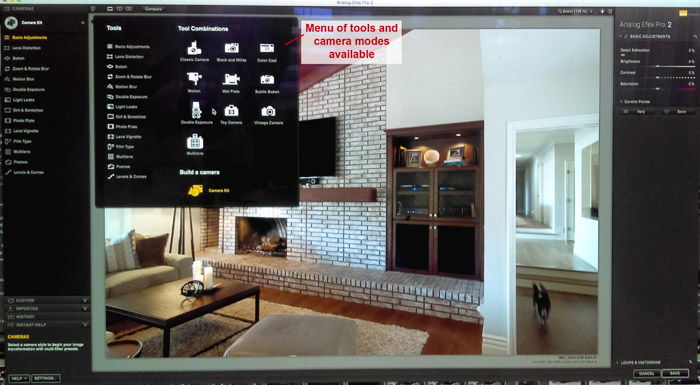
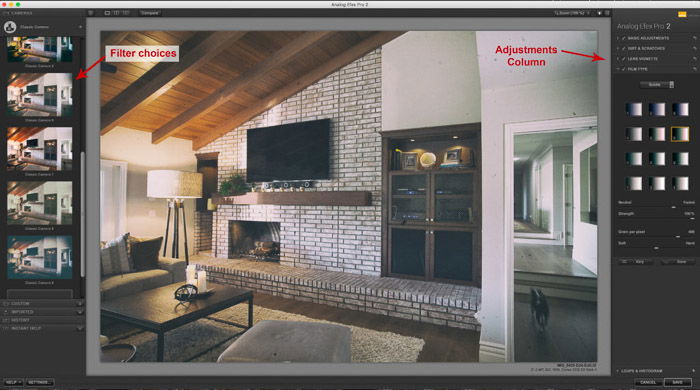
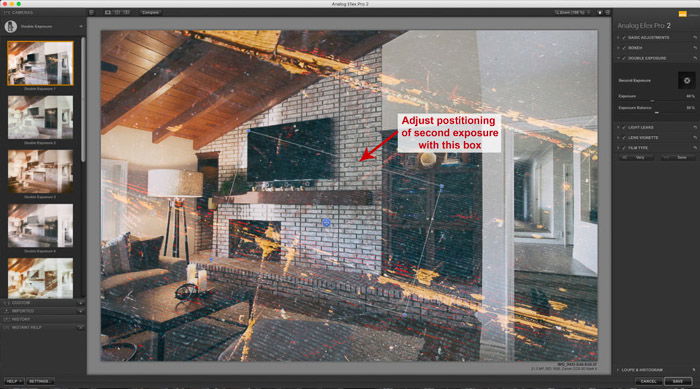
Analog Efex Pro:
This set of tools is perfect for mimicking film of all types, as well as vintage cameras and lenses. Besides applying filters that give a certain look, you can also add creative effects like scratches, light leaks, and multi-lens.
One big time-saving tool is the ability to create a double exposure quickly and easily! You select your second exposure from your computer and then adjust things such as placement, scale, and opacity.
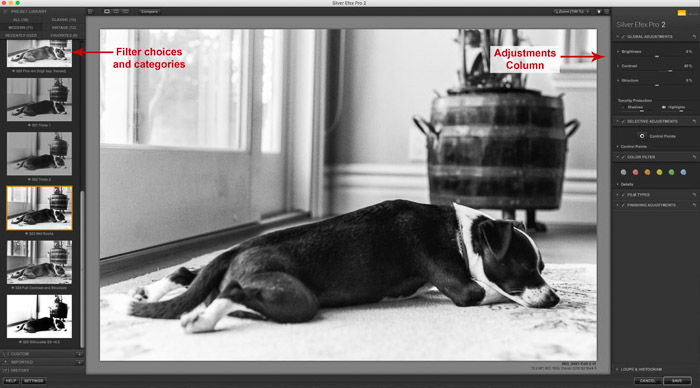
Silver Efex Pro:
This collection is for black and white edits, but it’s still loaded with adjustments to make it your own!
You can dictate what type of film to mimic, apply color filters, vignetting, grain, and other basic adjustments. There is also a variety of black and white edits to use as a starting point, with different levels of exposure and contrast.
HDR Efex Pro
The HDR collection is excellent to create an HDR image from several bracketed shots. The best thing about this tool is that it makes the process user-friendly and then allows you to make adjustments on the new HDR image.
The only confusing thing about this tool is that it’s not accessible from the same list as the others! This is because the HDR tool uses multiple photos, rather than one selected image to work on.
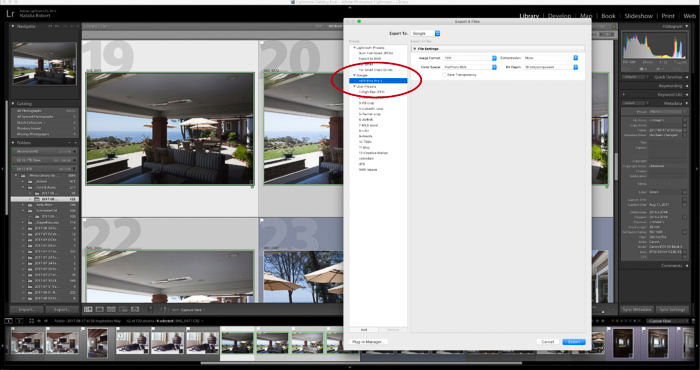
To access this collection, select your bracketed images to work with. Go to File → Export and the pop-up window will appear to export photos (see screenshot below).
On the left column, you should now see Google as a section, and HDR Efex Pro underneath that. You select this export option, make your selections from the drop-down menus, and press “Export”.
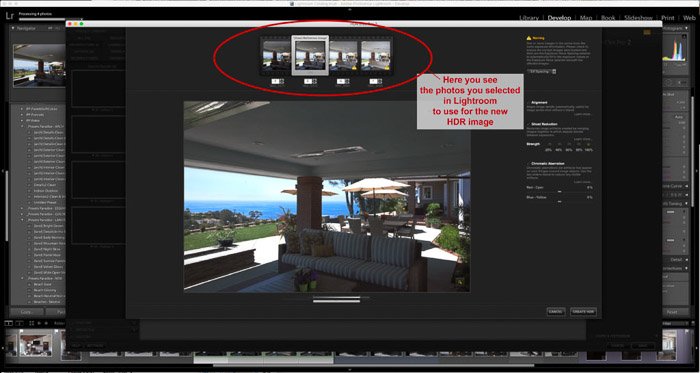
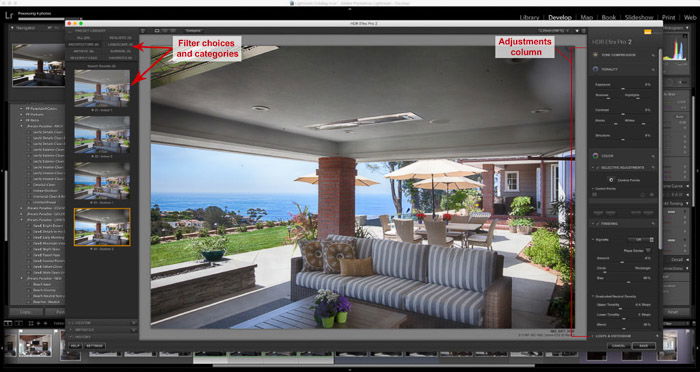
This will open a new Nik Collection window where you’ll work on your HDR image, make adjustments, and choose filters before saving the final photo.
The final photo will now be saved in your computer folders, but will NOT be automatically imported into Lightroom. If you want to do any further adjustments in Lightroom, you can simply import that photo and continue adjusting.
Dfine
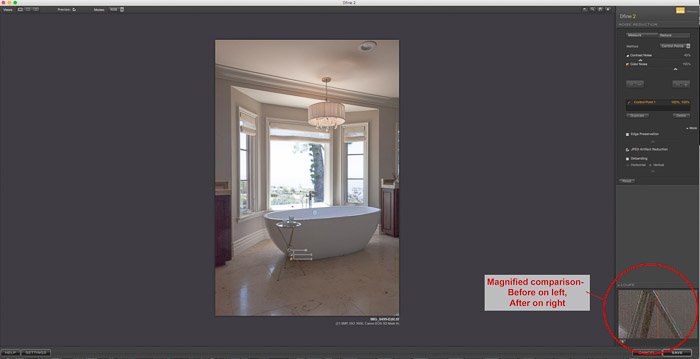
The Dfine collection helps reduce noise and can be fully automated or manually controlled. This is ideal for underexposed images that would otherwise be full of grain in the shadows!
While results can be subtle, it’s a great help to add finishing smoothness to dark or underexposed photos.
Color Efex Pro
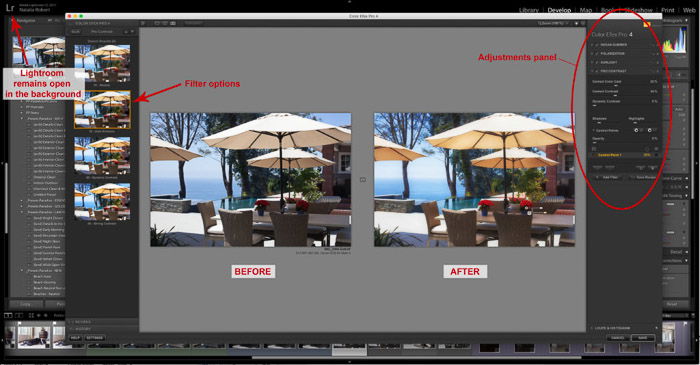
This is the Nik Collection’s equivalent to the typical develop presets packages you can find online. Essentially, they are Google filters for photos. One of the standout new features within this collection is the “control point” that allows you to lessen the effect of the filter on a specific area.
For example, in case you apply a filter but find that the foliage has become too orange. You can then apply a control point in the area of the foliage and lower the effect of the filter over that area so that it retains its green color.
Control points are used in all the other collections as well, but they’re used to make additional adjustments. Additionally, you’re able to layer filters in this collection. The ability to layer effects gives you more control and endless possible looks.
Viveza
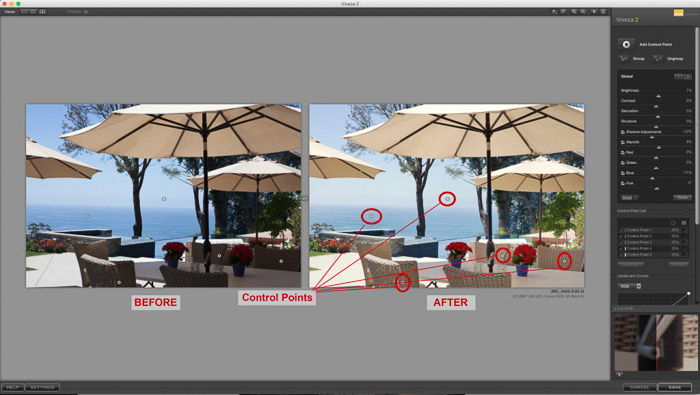
The Viveza collection is ideal for applying selective adjustments, like masking. You use control points once more, but this time you can do a variety of adjustments for specific areas of the photo.
The control points are blended into the rest of the image so that you never see an edge to these adjustments. This gives you control over specific areas of the photo to create your own look without filters.
For those of us who are not comfortable applying filters, this manual control is perfect.
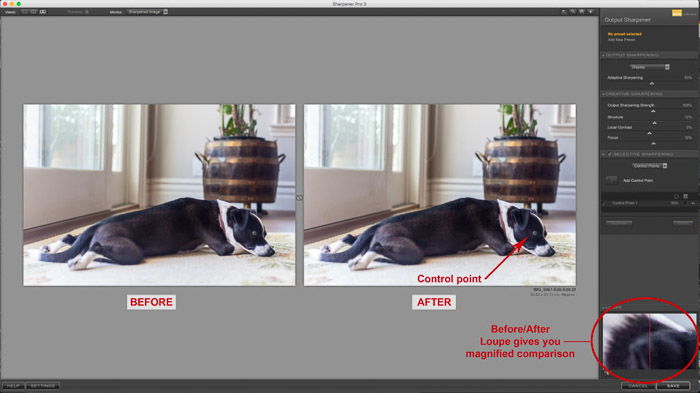
Sharpener Pro
Sharpener Pro is for exactly that – sharpening! Within Lightroom, there are two options that appear for this collection. One option is a RAW Pre-Sharpener, and the other option is Output Sharpening.
The RAW pre-sharpener is ideal for sharpening before making any other adjustments. The Output sharpener is ideal for a final touch or if you’re working with other file types besides RAW.
Whether Google’s Nik Collection is enough to replace tools like Lightroom or Adobe Photoshop is up to you. Integrating it with Lightroom definitely helps add another layer of editing options. The HDR capabilities are impressive and provide a nice user experience.
Directly mimicking specific films is a great bonus for film-lovers everywhere. And the Color Efex Pro pack offers variations for landscape photos, especially if you want to bring out gorgeous colors.
It’s definitely worth integrating into your workflow. Especially considering that it’s free!
Google’s Nik Collection is now provided by DxO labs. Register your email and they send you the entire collection for free, immediately.
You can also check our step by step guide to creating collections in Lightroom or our tips on using Lightrooms transform tool or Graduated filters tool.