The Lightroom Mobile app is a powerful editing tool to have at your fingertips. And it’s free to download and use. If you want to use Lightroom mobile presets on it, though, things can get confusing.
Let’s break it down so that you can easily install presets into Lightroom Mobile without a desktop computer.
Installing Lightroom Mobile Presets: How to Add XMP Preset Files to Lightroom Mobile
When learning how to install Lightroom presets into Lightroom Mobile without a desktop computer, it works a bit differently than the Lightroom Classic desktop version. You won’t have XMP files for your presets. Instead, you’ll use DNG files to install the presets to Lightroom.
DNG files are a type of RAW file that retains all the information of the image. This includes all the setting adjustments.
What you essentially do is have a photo in DNG format with the preset applied. And you use that photo to tell Lightroom Mobile what the preset is.
1. Get DNG Files on Your Phone
When you purchase or download Lightroom presets, you’ll either get the individual files or a zip file. If you receive them individually, simply open the email directly from your phone and save the presets files.
If you’ve got the files already saved on your desktop computer, there are several ways to transfer presets to your phone.
You can email the files to yourself to then open the email on your phone. You can use Dropbox to transfer presets files from your desktop. Or you can use AirDrop if you have the files saved on your desktop and you’re a Mac user.
Once you have the files on your phone, make note of where the files are saved. This way, you can easily find them later.
If you receive a zip file, you can use an app such as iZip to unzip it on your cell phone. Of course, you can also unzip the file on your desktop and then use any of the above methods to send the files to your phone.
2. Import DNG files Into Lightroom Mobile
The next step is to bring the DNG files into the Lightroom app!
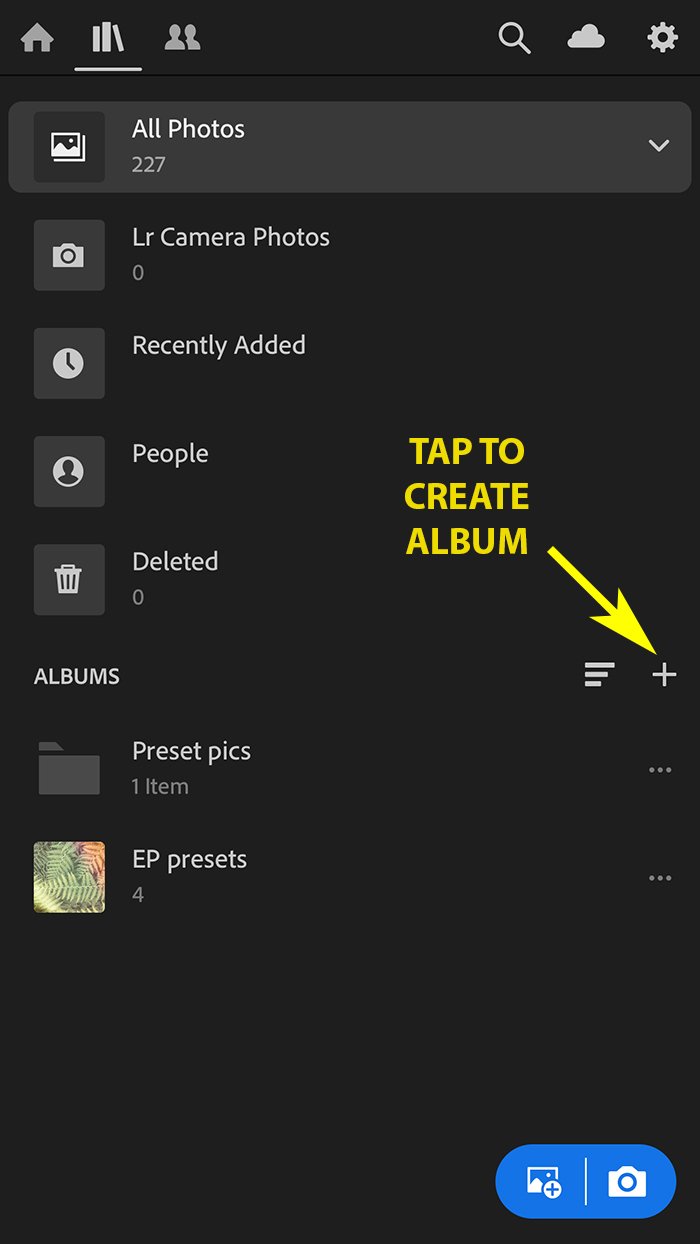
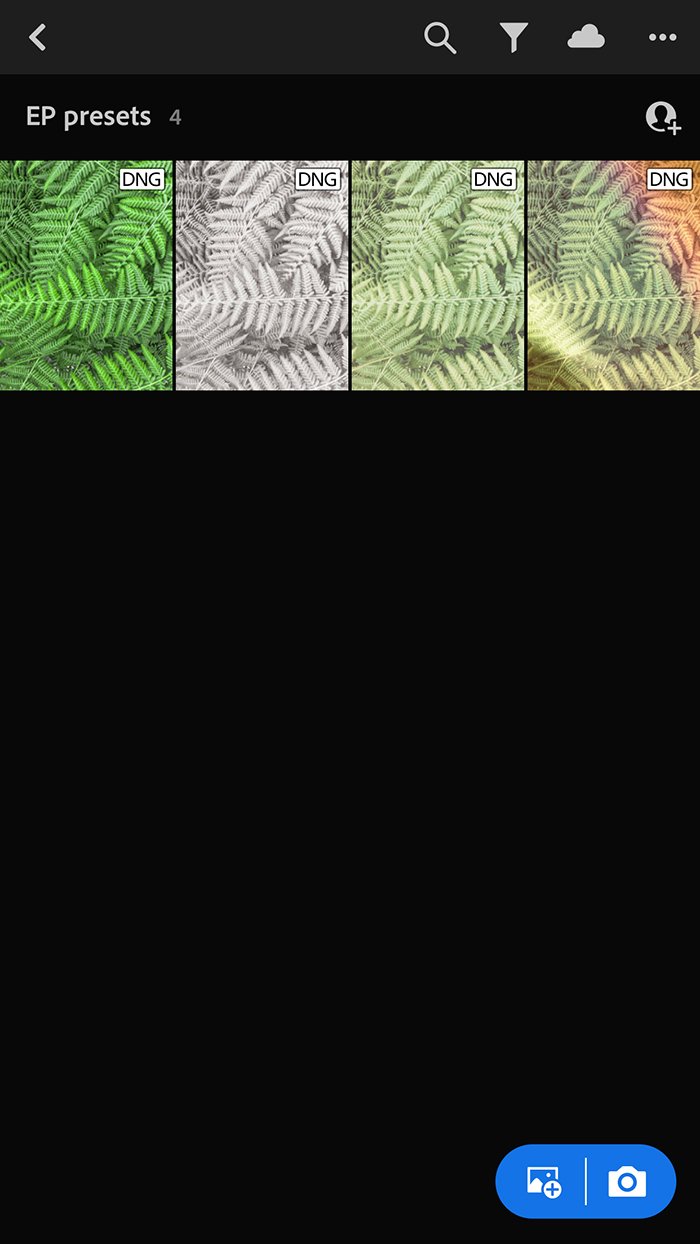
Open the Lightroom app and create a new album to house just your preset DNG files. To create the new album, tap the + to the right of the “Albums” section title. Then tap “Album” when it appears at the bottom.
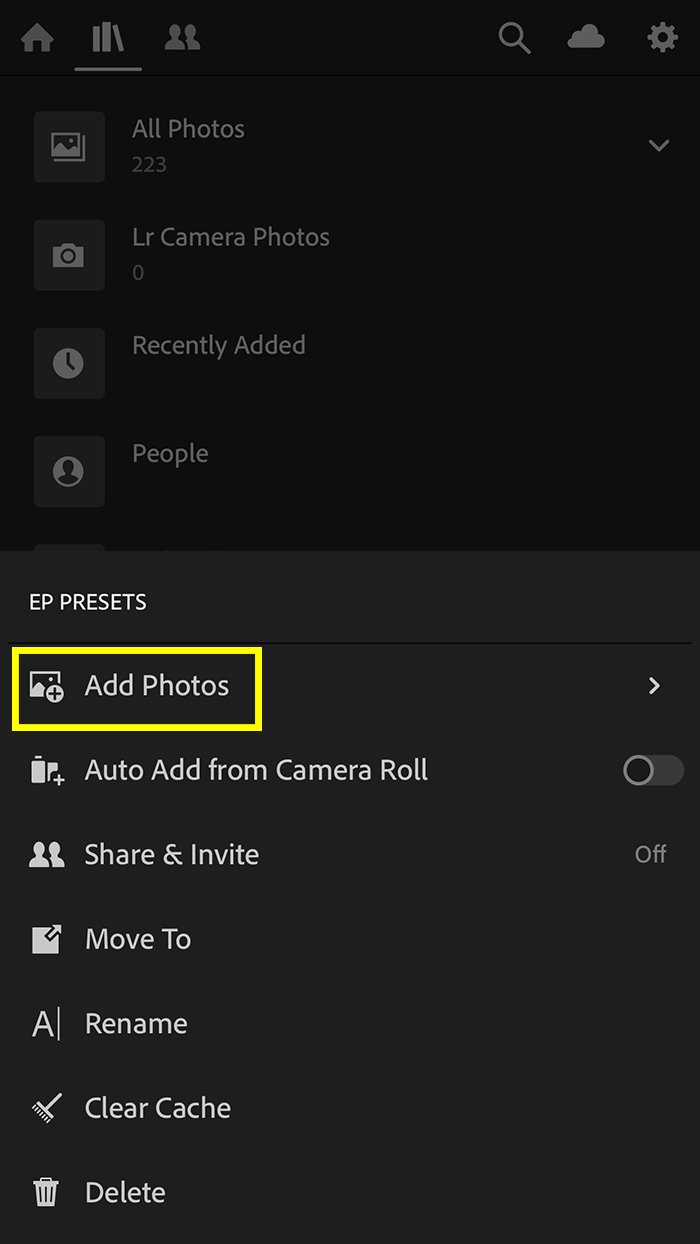
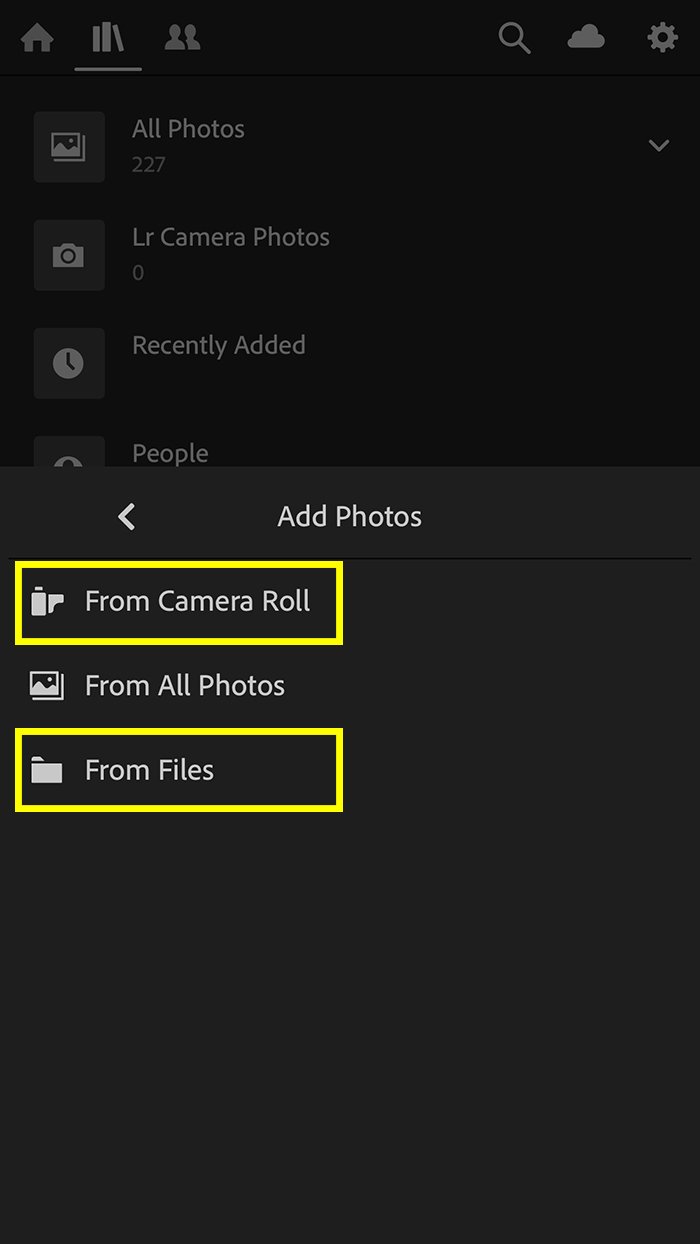
Once you have the Lightroom presets album created, tap the three dots to the right of the album name. Select “Add Photos”, and then select where your photos are saved.
If you used iZip, you’ll select “From Files”. If you brought the files in individually, though, you’ll select “From Camera Roll”.
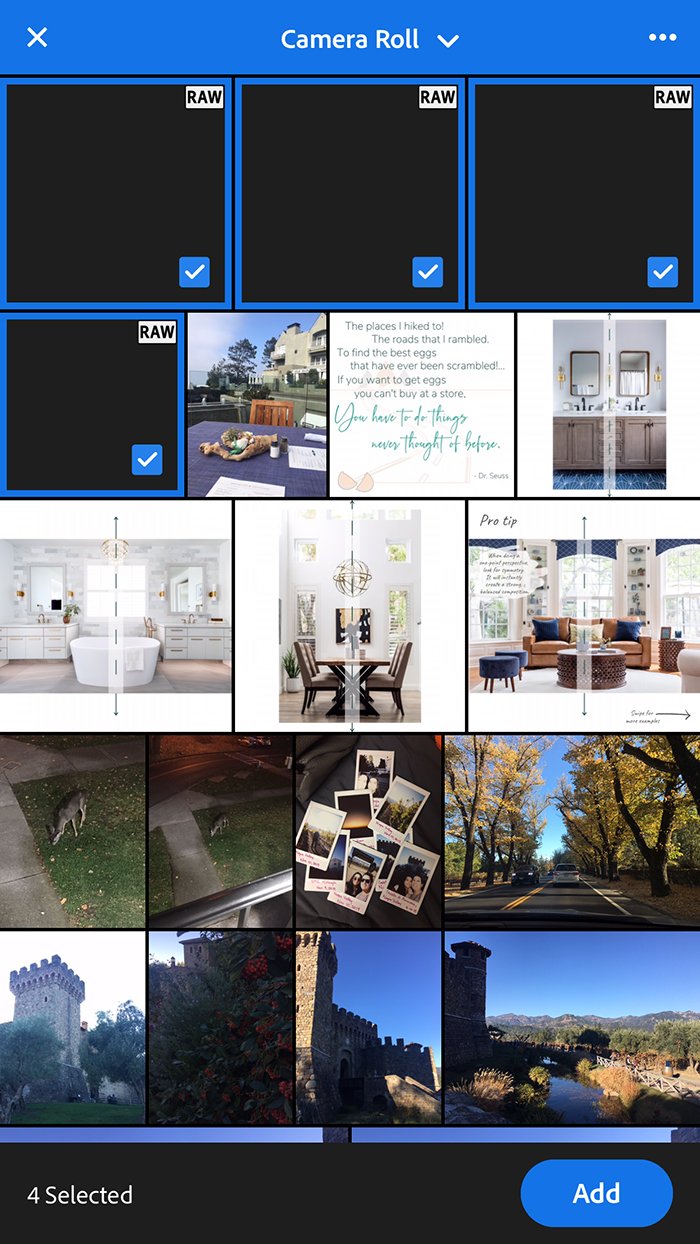
Next, select the DNG photo files to add and tap “Add”.
3. Save Presets
You have the DNG files loaded into the Lightroom app, so let’s go ahead and save those Lightroom presets! Open up one of the photos from your folder of DNGs.
I recommend starting with the top left and going in order so you don’t lose track.
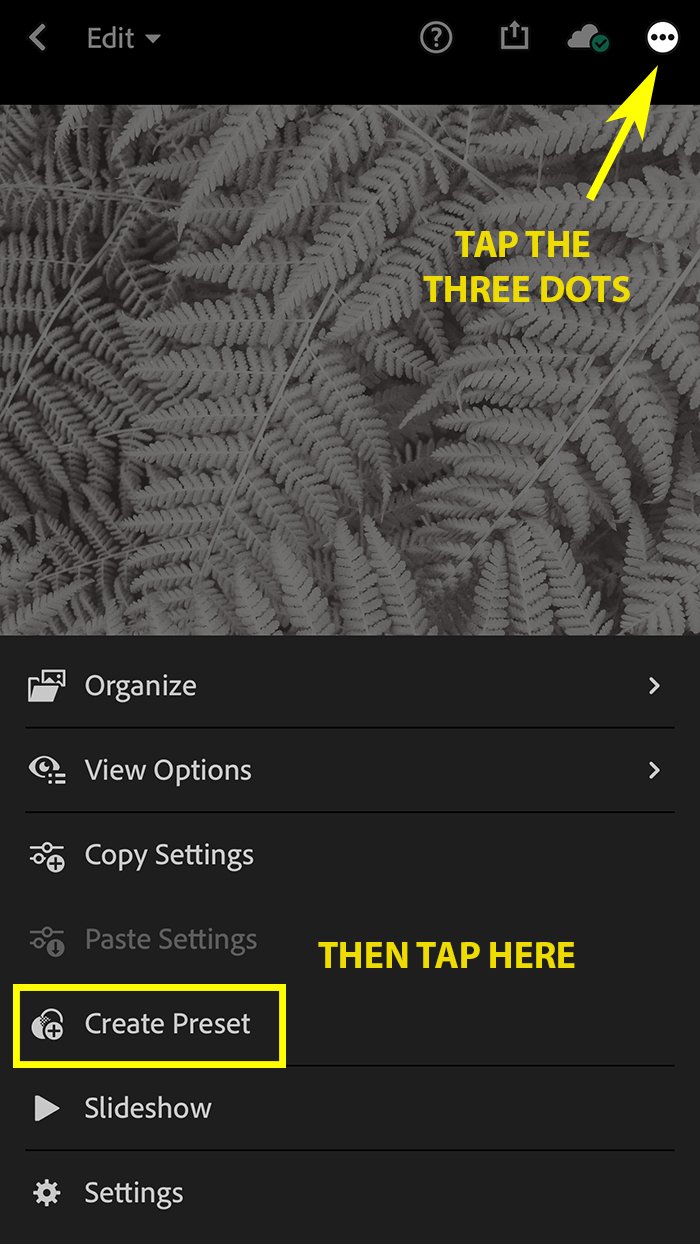
With the DNG photo open, tap the three dots in the top right corner. When the options appear, select “Create Preset”.
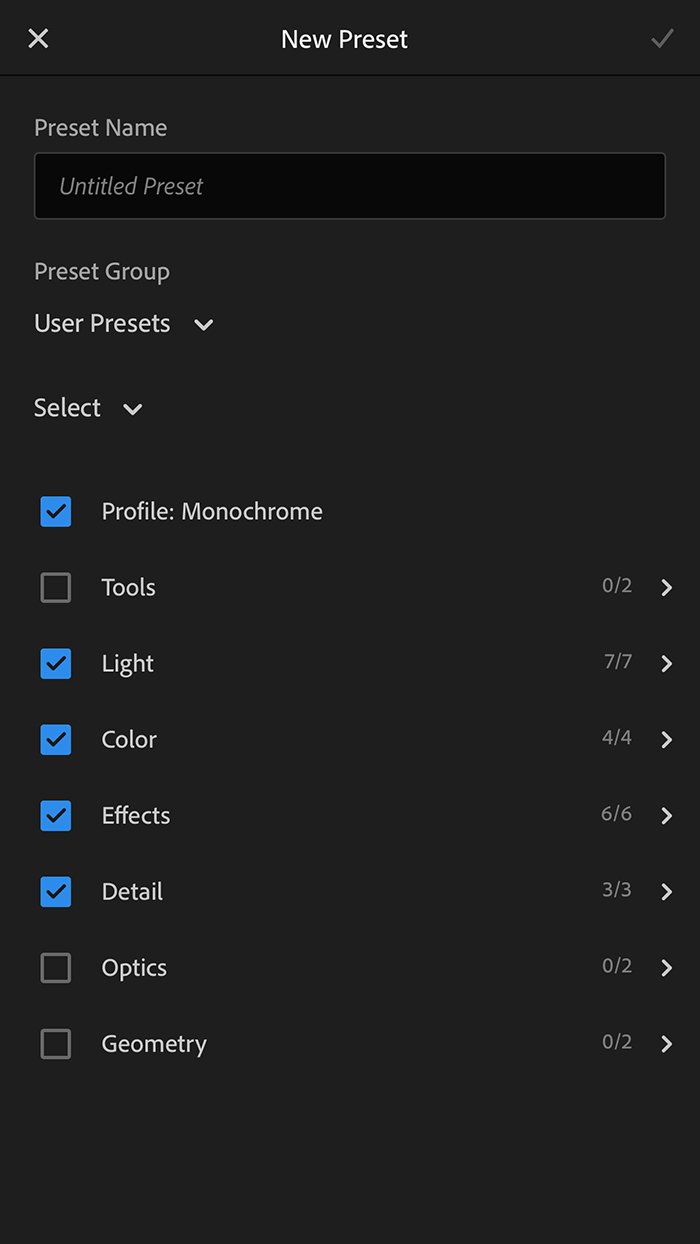
A list of options and checkboxes will appear. These let you select which settings you want to include in the presets. This screen is also where you name the preset and can create a separate folder for it.
If you purchase presets from multiple sources, I recommend having a folder for each source.
When you have selected everything you want, tap the checkmark to save the new Lightroom presets. Next, repeat this process with each DNG file in the folder!
4. Use Lightroom Mobile Presets
Now that you have the presets saved in the Lightroom app, it’s very easy to use them. Open a photo that you want to edit.
At the bottom of the screen, you’ll see the sections with settings you can adjust. Scroll to the far right to reach the “Presets” section.
The presets section at the bottom of the app screen houses all your saved Lightroom presets.
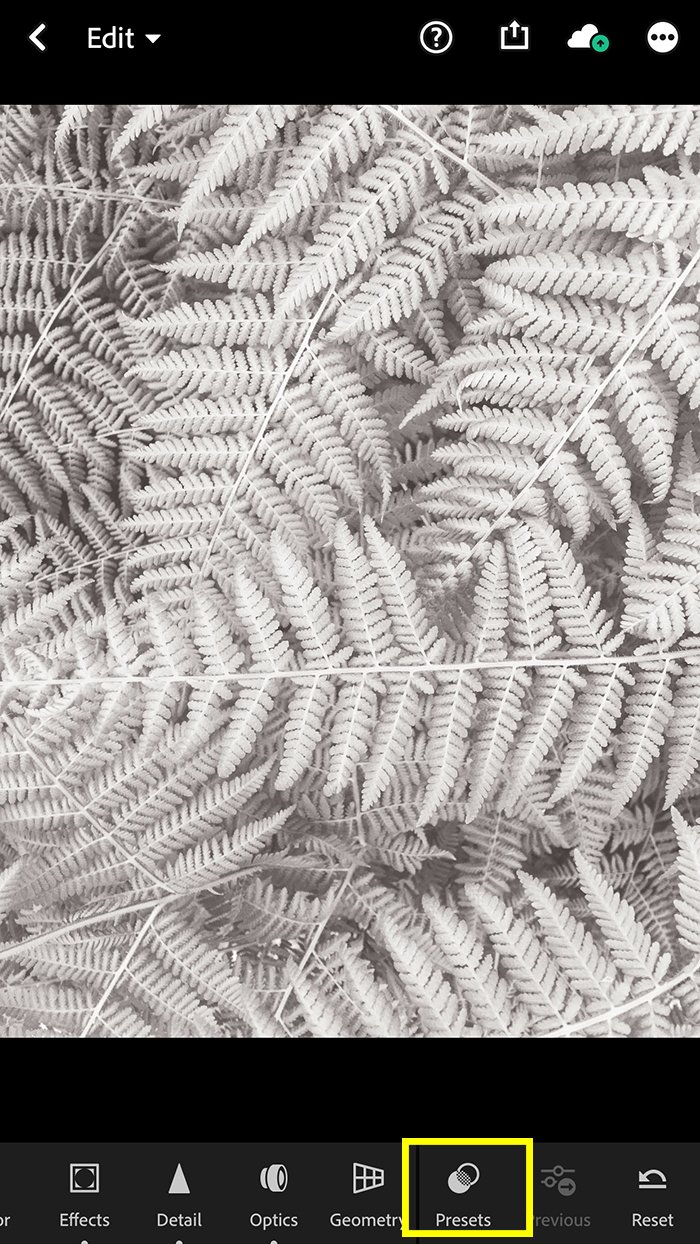
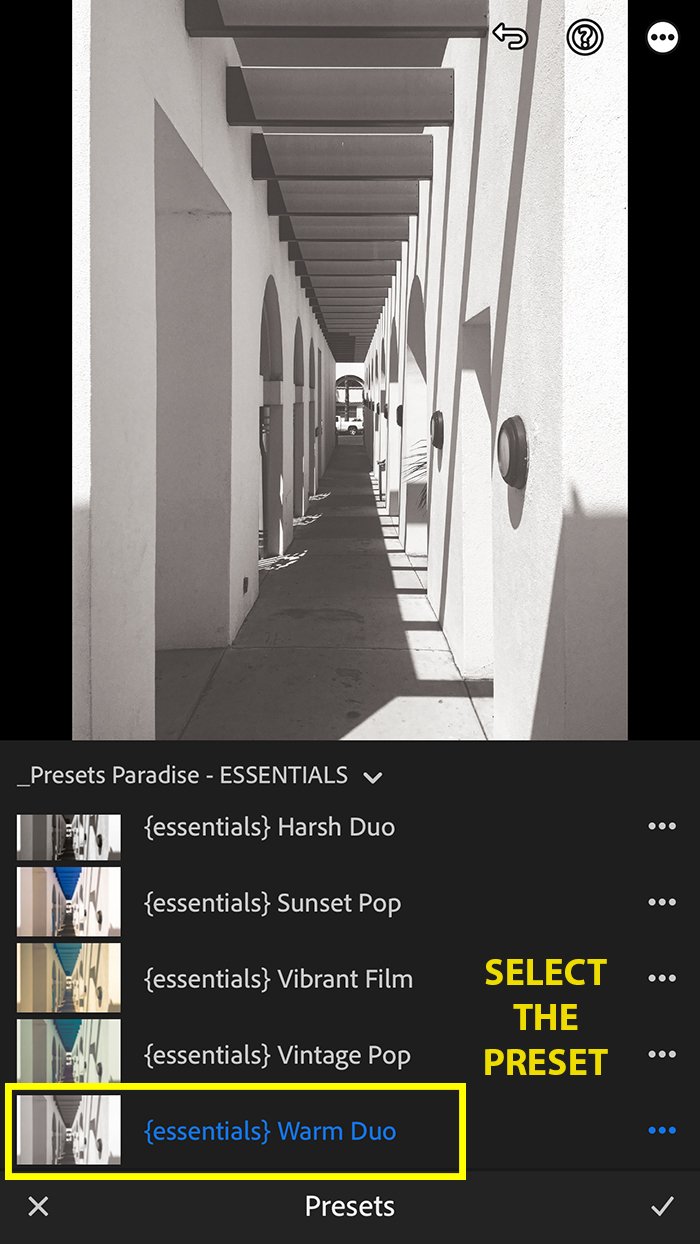
Tap into the Presets section, select the folder with the preset you want to use. Then tap the preset you’d like to apply. Lightroom even creates mini thumbnails showing a preview of that preset applied!
When the preset is selected and you want to keep it, tap the checkmark to finalize.
Lightroom Mobile Presets – Conclusion
Lightroom Mobile brings a wide range of powerful editing tools to our phones, making editing on the go simple. Lightroom Mobile presets are yet another tool that can make editing even easier!
While the process to load presets into Lightroom Mobile is different than the Lightroom classic desktop version, it’s still straightforward.