Adobe Lightroom is a great photo editing program. You can spend hours post-processing a photo until it looks perfect. But once you are happy with the image, then what?
You probably want to share your favourite pictures with family or social media. In this article, we’ll look at how to export photos from Lightroom.
Why Export Photos from Lightroom?
Before learning how to export photos from Lightroom, why do you have to export an image to share it? Lightroom is a non-destructive photo editing program. When you edit a photo, the program does not change the image. This protects your original file.
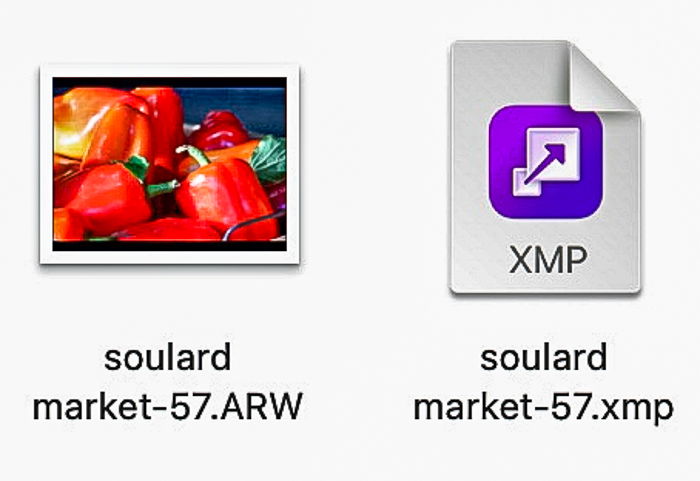
Lightroom saves edits to a linked file called a ‘sidecar’. The program reads the saved changes in this file and applies them to your image. If you share your photo without first exporting, you won’t see any post-processing edits.
If you want to show others your edited image, you must package the original RAW file with the sidecar file. We export the image as an easy-to-read image file like a JPEG. You won’t see the sidecar file unless you specifically ask Lightroom to show the icon in the preferences.
How to Export Photos From Lightroom CC vs Classic
Lightroom CC and Lightroom Classic organize export options differently. Both programs let you customize your export, but Lightroom Classic has a few more options. Here’s how to export photos from Lightroom programs:
- Select the image.
- Then go to the File drop-down menu and choose File > Export.
In Lightroom CC, the hotkey combination is Shift+E. In Lightroom Classic, you can use the hotkey combination Shift+Ctrl/Command+E.
Export Settings in Lightroom CC
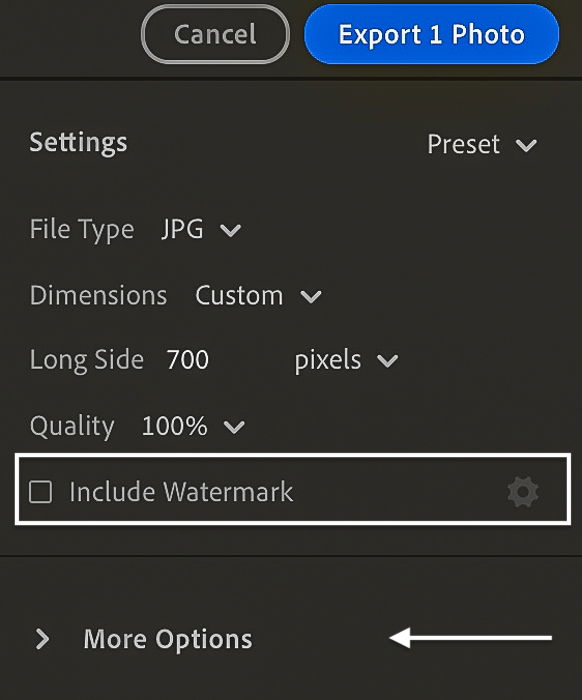
In Lightroom CC, export settings appear in the right-hand column of the workspace. You can select the file type, size, quality and include a watermark.
The most common file type is a JEPG. It is a compressed image file that works well for sharing on the web. If you want to print an image, you may instead want to select a higher quality TIFF or DNG file.
Check the box next to ‘Include Watermark’, and click the gear icon. More options will appear. Recent versions of Lightroom CC include the ability to add a graphic watermark. Or you can type in a text watermark.
Open the caret next to ‘More Options’. You can now change the name, adjust output sharpening and color space, and limit metadata.
Export Settings in Lightroom Classic
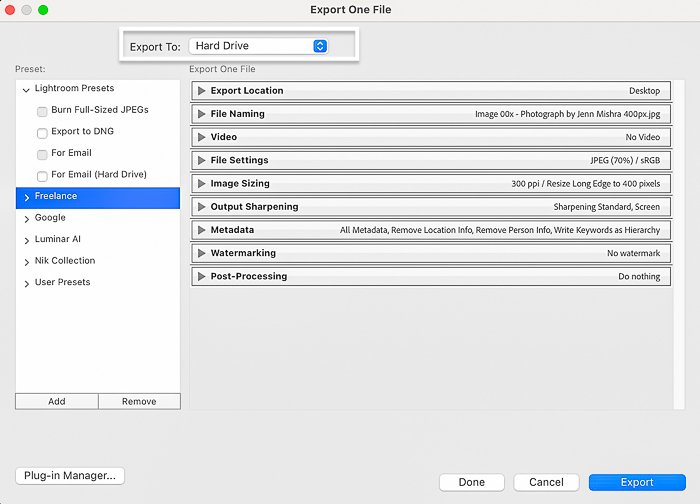
In Lightroom Classic, the export process opens an export dialogue box. Settings are under headings like ‘Export Location’, ‘File Naming’, ‘File Settings’, ‘Output Sharpening’, and ‘Watermarking’. You can also choose to export to a hard drive, email, or a DVD/CD.
Lightroom Classic gives you a wide selection of export options. For instance, you can rename, choose metadata, and use a numbering system of your choice. You can also configure the size of your photo.
How to ‘Export with Previous’
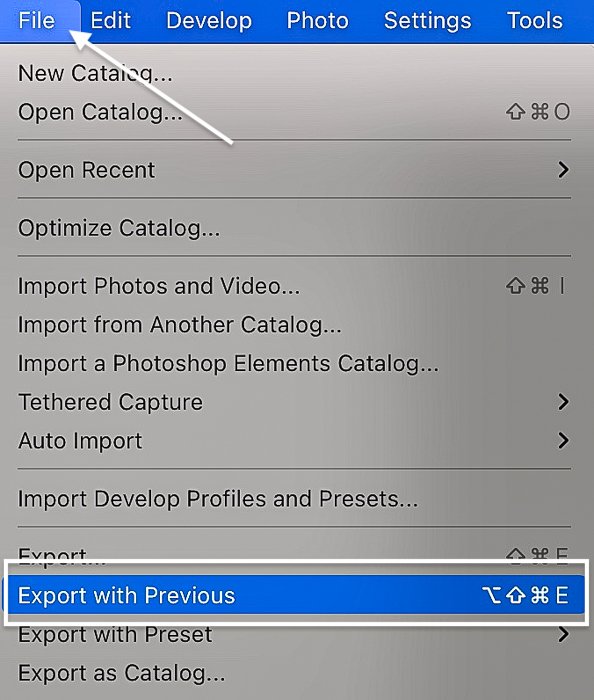
‘Export with Previous’ is a handy little command. It lets you quickly export images using your last set of file settings. This command bypasses the export dialogue box and saves your image in the background.
Go to the File drop-down menu and select File > Export with Previous. In Lightroom Classic, the hotkey combination is Option+Shift+Ctrl/Command/E. In Lightroom CC, the hotkey combination is Ctrl/Command+E.
How to Export Multiple Photos from Lightroom
Lightroom makes it easy to batch export many photos with the same export settings. Simply highlight the images you want to export in the filmstrip:
- To do this, select the first image you want to export. Hold the Shift key and pick the last picture you want to export. This highlights all the files in between. If the photos you want to export are not in order, hold the Ctrl/Command key. Then click on the separate images.
- Once you have selected your images, start the export process.
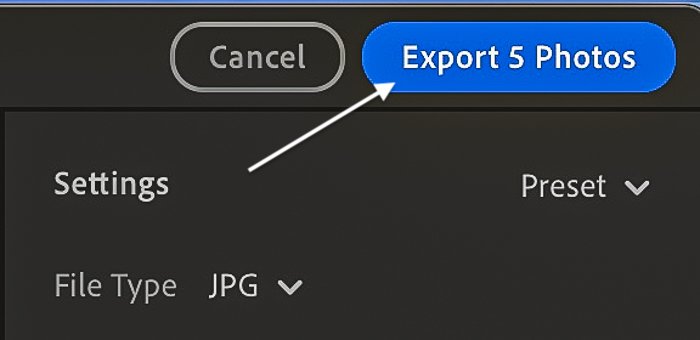
The settings you choose in the export dialogue box are applied to all selected images. Lightroom reminds you how many files will be exported at the top of the export panel window.
How to Use Lightroom Export Presets
You may have different Lightroom export settings for different needs. For instance, you may want to create a smaller-sized file for posting to load faster on social media. A good size for online photos is 2048px on the long side. Or, if printing, you may want to export a full-sized image.
Both versions of Lightroom come with a few export presets. Export presets are listed in the left-hand column of the export dialogue box. They are also listed under the File drop-down menu under File > Export with Preset.
Creating a Lightroom Classic Export Preset
Rather than remembering different export settings, set up an export preset. You can set up separate presets for posting on Instagram, websites, and printing. Lightroom Classic lets you create your own presets:
- First, select your export settings.
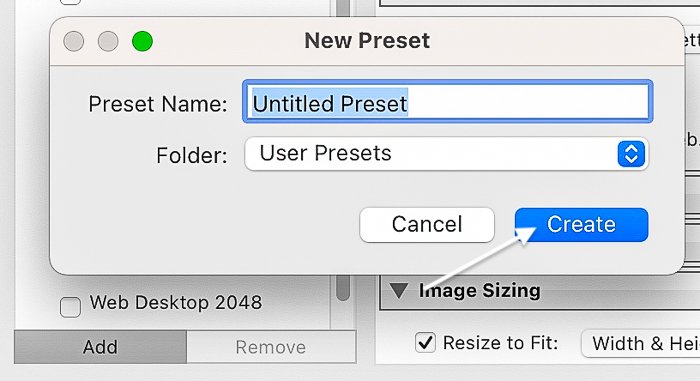
- Click the Add button below the Preset column in the export dialogue box.
- Rename the file and choose a folder to put it in.
- Click the Create button.
How to Batch Export with Several Presets from Lightroom
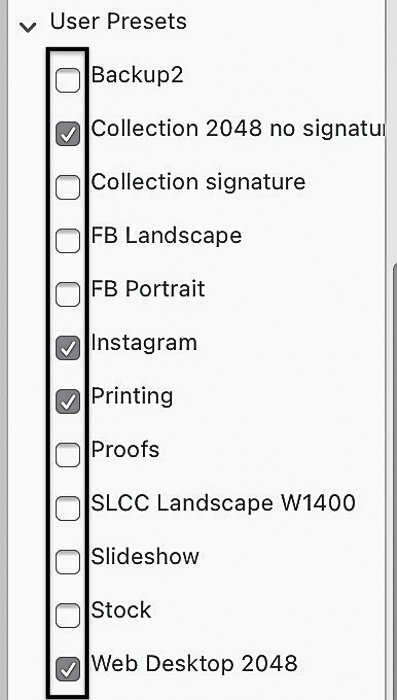
A little-known trick lets you export several versions of an image with different presets at once:
- Select at least one photo.
- Open the export dialogue box.
- In the User Presets column, check the boxes next to the presets you want to export.
You can check as many presets as you like. Lightroom exports one version of the image for each preset you select!
How to Export Photos to Publishing Services
Some online gallery services like Smugmug and Flickr communicate with Adobe Lightroom Classic. An integration plug-in lets you export photos from Lightroom directly into your gallery.
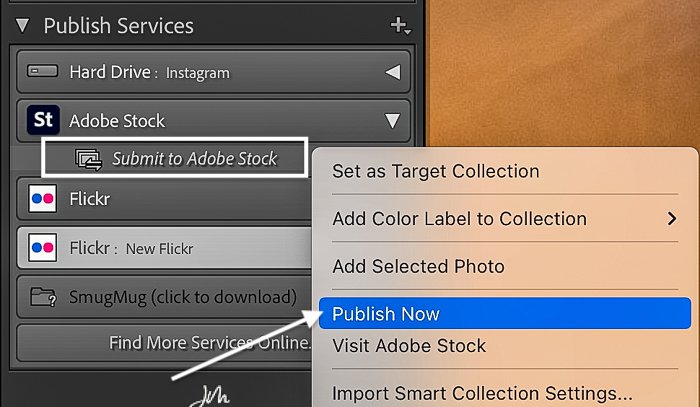
‘Publish Services’ appears just above the Import button in the left-hand column of the Library module. If you have an account with one of the services shown, here’s what you do:
- Double click the service to open the settings box.
- Enter your account information.
- Select your Lightroom export settings.
- When you are ready to export to a gallery, drag the image into the folder under the publishing service.
- Right-click on the folder. Select ‘Publish Now’.
How to Add a Publishing Service
If your hosting service is not listed, see if it integrates with Lightroom. If it does, download the plug-in:
- Go to the File drop-down menu and select File > Plug-In Manager.
- Click the Add button and navigate to the downloaded plug-in.
You can now add that service to the list of Publish Services by clicking the plus icon. If you use Adobe Portfolio or Behance, your albums will be available through your Creative Cloud.
How to Export as a Catalog from Lightroom
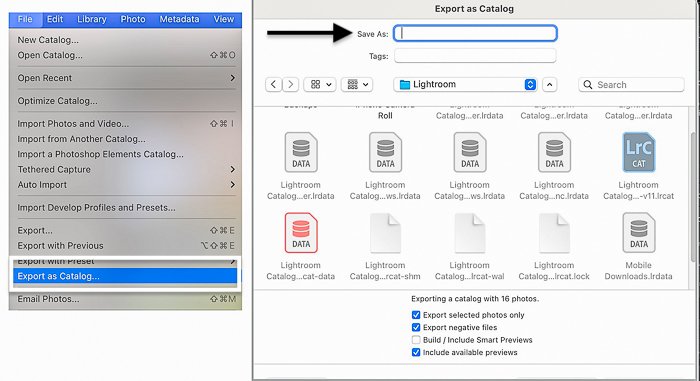
In Lightroom Classic, you have one other export option. You can export photos to a catalog. This lets you share a portion of your Lightroom catalog with another Lightroom user:
- Highlight the files you want to include in this new catalog.
- Under the File drop-down menu, select File > Export as Catalog.
- Choose where you want to save the new catalog and name the file.
- Click the button Export Catalog.
This does not remove the files from your current catalog. It makes a new catalog that includes only the selected photos. Also, remember that the actual image files are not in the catalog. You have to share the images along with the catalog.
Conclusion
Exporting from Lightroom is like the ‘Save As…’ command in other programs. It packages the original file with your photo edits.
Both Lightroom CC and Lightroom Classic let you select features of your exported images. Resize, rename, and prepare the image for print or online posting. But Lightroom Classic has more export options.
Learning how to export photos from Lightroom lets you share your photographic creativity. The more you do it, the easier it gets!
Try out our Effortless Editing course to master all the secrets of professional editing in Lightroom.
