
Moody landscape photography is about capturing a scene’s feeling rather than just reproducing what you see. It can be a great way to create evocative and atmospheric images that capture a sense of place and time.
8 Moody Landscape Photography Tips
Here are eight tips to help you get started.
1. Finding a Location to Intensify the Dark Landscape
Take a moment to analyze your favorite moody landscape photos. Do you notice any patterns?
Many landscape photos feature powerful subjects, like mountains and thick forests. Choosing the right location and subject can make taking high-quality images of gloomy landscapes easier.
Find a location with a great view. It should be spacious and give you a full view of the landscape.
Shooting from a low angle makes the landscape look even more powerful and superior. This is an easy way to intensify the moodiness in your shots.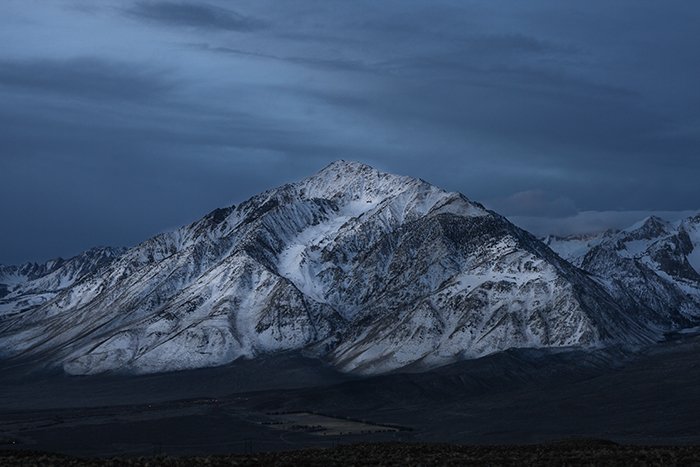
2. Take Photos When It’s Cloudy or Foggy to Create a Haunting Atmosphere
Another way to improve your dark landscape photography is to take photos in specific weather conditions. Gloomy weather may not be ideal for portrait photoshoots. But it’s perfect for dark landscape photography.
Take photos when it’s very cloudy, rainy, or foggy. Cover your equipment in special rain gear if you plan to take pictures in the rain. Even though this will cost some money, it can help you take some pretty cool photos.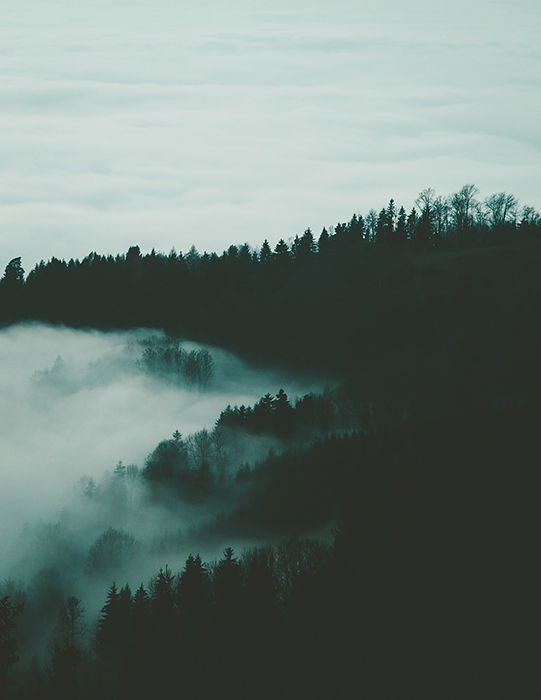
3. Adjust Your Camera Settings Manually to Avoid Taking Dull Photos
Many of today’s cameras have automatic and manual modes. Automatic mode is suitable for taking good photos in well-lit conditions. If you want something more specific, you must manually adjust your camera settings.
If possible, shoot in RAW mode. This will preserve more image data, which will help you be more flexible in post.
As its name suggests, dark photography usually involves a small amount of light. Don’t be afraid of using a slightly higher ISO number than you’re used to. You can remove any unnecessary grain in a professional editing program like Lightroom.
If it’s very dark outside, use the largest aperture possible. A large aperture allows more light to enter the lens, making it easier to take correctly exposed photos.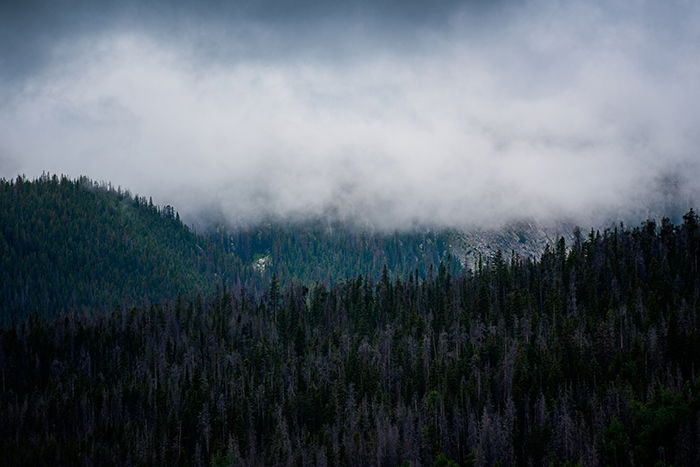
4. Use a Tripod for Sharp Photos and Stunning Long Exposures
Make sure you invest in a sturdy tripod. This will keep your photos sharp and help you experiment with creative photography techniques.
Many famous landscape photographers use the long exposure technique to make their photos look surreal. Long exposure photography allows you to show the way something moves. This creates a soft and silky effect.
Dark landscape photography is perfect for photographing the movement of clouds and water. You can even use it to shoot the movement of stars in night landscapes.
Put your camera on a tripod and use a slow shutter speed. The longer it is, the smoother the movements will look in your photos.
There’s no specific setting for this. But you can start with five seconds. Make sure your tripod doesn’t move because of you or the wind, or your photos will turn out blurry.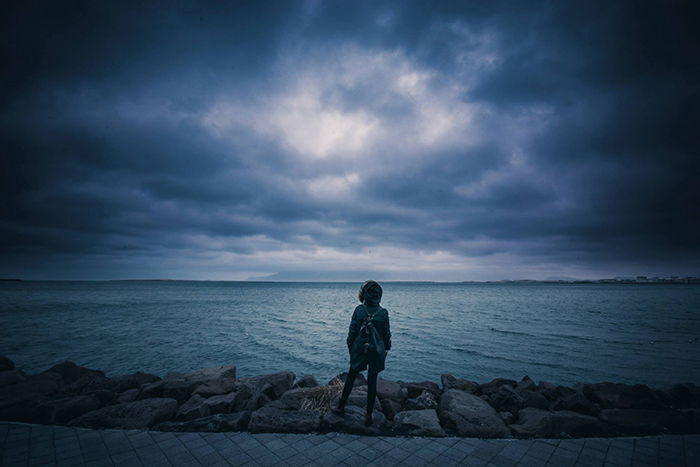
5. Use Manual Focus to Ensure Your Photos Are Sharp in the Right Areas
Your camera might find focusing on the right subject in low-light conditions challenging. If there are foregrounds in your shot, your lens might focus on an object that’s closest to it.
To avoid this, focus manually. This technique will take more time and effort. But it will ensure that your photos look as sharp as you want them to be.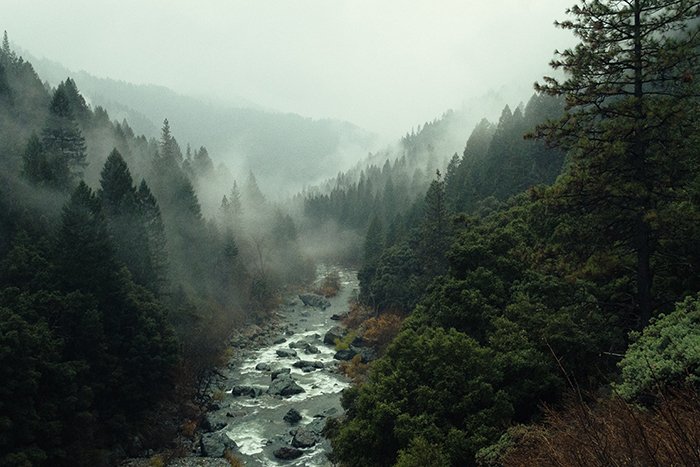
6. Shoot Through Objects to Create Depth
When you shoot through objects, you create something called a foreground. Foregrounds are great for adding depth to a photo, but they can also be used to frame simple subjects.
You can also use colorful foregrounds to make dull photos look more vibrant.
If your landscape looks empty, shoot through objects like branches or grass. This will add more interesting elements to your photo and create depth. Together, these things will make your dark landscape look more eye-catching.
7. Shoot in B&W Mode to Create Dramatic Landscape Photos
Black-and-white landscape photography is one of the most common kinds of photography. The reason it works is that it focuses on shapes and tones. Without color, the world looks much more dramatic and gloomy.
You can approach this in two ways:
- Take photos in B&W mode
- Convert your pictures to B&W in an editing program
Many photographers prefer the second method because it gives them more control over the tones in their photos. But the first method can be beneficial if you want to take creative images.
Seeing the world from a different perspective can help you come up with exciting new ideas for your landscape photography.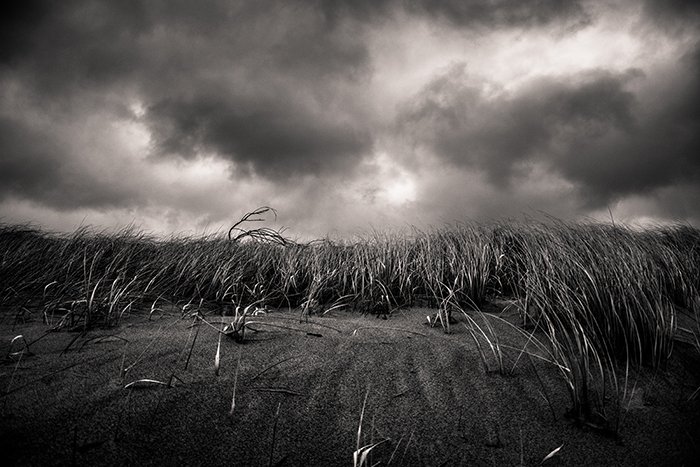
8. Enhance Dull Landscape Photos Using the Graduated Filter in Lightroom
Even if your photos don’t look too gloomy, you can enhance them using moody processing techniques. In Lightroom, you can achieve this using the Graduated Filter tool.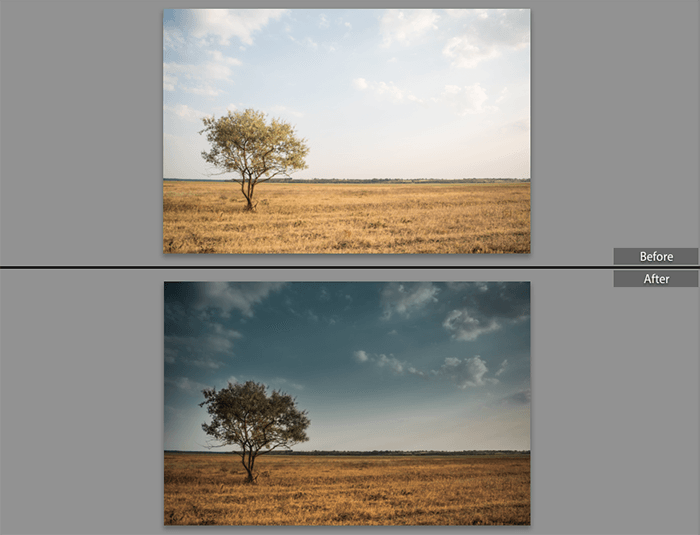
Go to the Develop module and click the fourth icon under the Histogram. Alternatively, press M on your keyboard. This will open a new panel.
Next, hold the Shift button and drag your mouse from the top of the sky to the horizon. This will create three separate sections.
The dark circle in the middle will be your focal point or the area most affected. The other parts will fade out to create a natural look.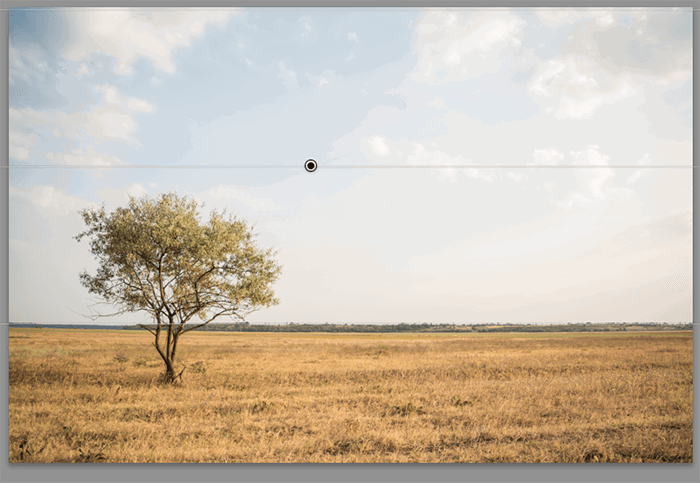
Drag the Exposure slider to the left. This will darken the sky. You can adjust the horizontal sections to make the effect stronger in some places and less intense in others.
You can also use other sliders, like Highlights and Shadows, to make your sky look more dramatic.
When you’re done, you can move on to the other panels in Lightroom to make your entire landscape look gloomy. You can achieve this by color correcting, desaturating specific colors, and adding more contrast.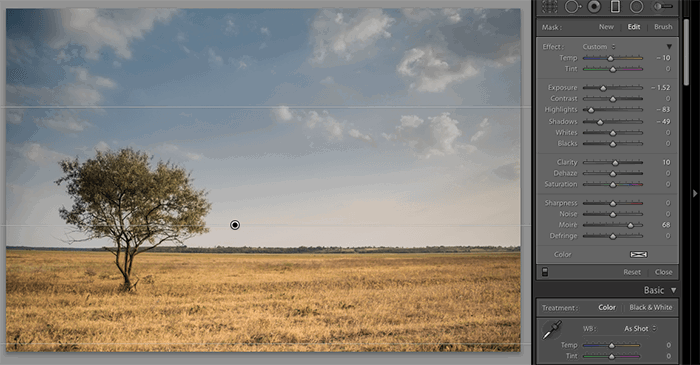
Common Landscape Photography Questions
Here are some answers to frequently asked questions (FAQs) about landscape photography.
What Camera Settings Should I Use for Landscape Photography?
Make sure you shoot in Manual mode. Pay careful attention to your shutter speed, aperture, and color temperature. If you want sharp images, use a fast shutter speed. For dreamier landscape photos, use a slow shutter speed.
How Do You Shoot a Low-Light Landscape?
When shooting in low-light conditions, always use a tripod. This will help you keep your images sharp. Shoot in Manual mode and make sure your pictures are RAW.
And don’t be afraid of using a high ISO. You can reduce any unnecessary noise in your preferred editing program.
How Do I Take Nighttime Landscape Photos?
Make sure you use a tripod and a remote to avoid any camera shake. Use a high ISO number. But ensure it’s not extreme, or your photos will look too grainy. Last but not least, use manual focus and a large aperture.
Conclusion: Moody Landscape Photography
You can take dark and gloomy landscape photos with the help of a few tools and techniques. Remember to choose the right location, take pictures when it’s cloudy, and use a tripod at all times.
You can take your landscape photos to the next level using moody processing techniques in Lightroom or a similar program!


