Macro photography is a fascinating and rewarding genre that can be explored on a budget. Here are seven tips for getting started with creative macro photography without spending a lot of money.
What You’ll Need for Creative Macro Photography
For all the of the following methods, you’ll need an interchangeable lens camera. Both DSLRs and mirrorless cameras are suitable.
We recommend using a system that has extensive third-party support. This means numerous companies making accessories for it. This decreases the cost of the project significantly. For instance, you’ll find cheaper extension tubes for Canon EF mount, than for Pentax K.
This, of course, only applies if you have equipment from more brands, or haven’t yet bought a camera. Otherwise, use what you have; there are no restrictions. In today’s article, I’m using Canon EF cameras, both full frame and crop.
For every tip, I will note what extra accessories you’ll need to acquire. All of them are inexpensive, not exceeding a couple of hundred bucks in total.
First off, let’s discuss what close-up and macro photography, and magnification are.
What Is Close-Up Photography?
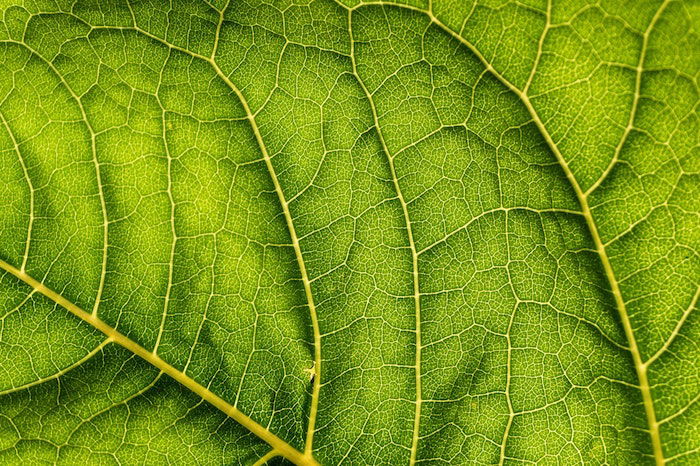
Close-up photography is the broadest term we’ll be wandering in. It consists of all sorts of photography involving capturing subjects from a close distance. It’s all about seemingly enlarging, emphasizing them.
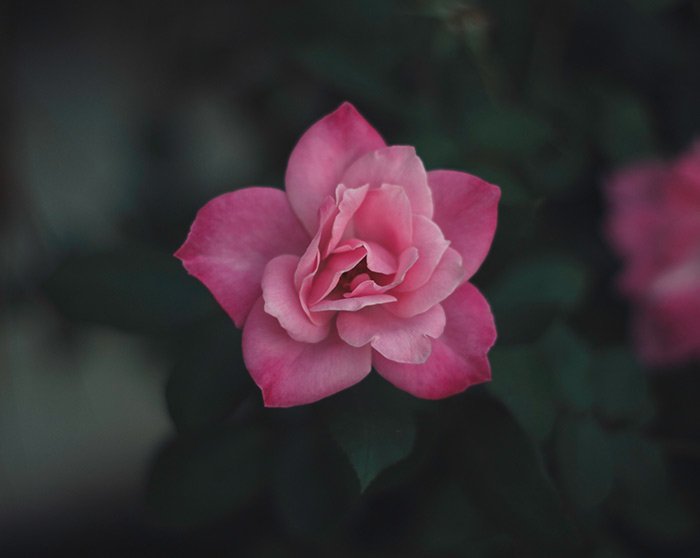
Tight portraits, shots of flowers, detailed nature photographs are all close-up photographs. But they are not macro photographs – macro has a fairly specific definition.
General close-up photography doesn’t require extra gear – you’re probably taking such shots day-to-day. In many ways, its rules are similar to those of macro photography, although not so strict.
What Is Macro Photography?
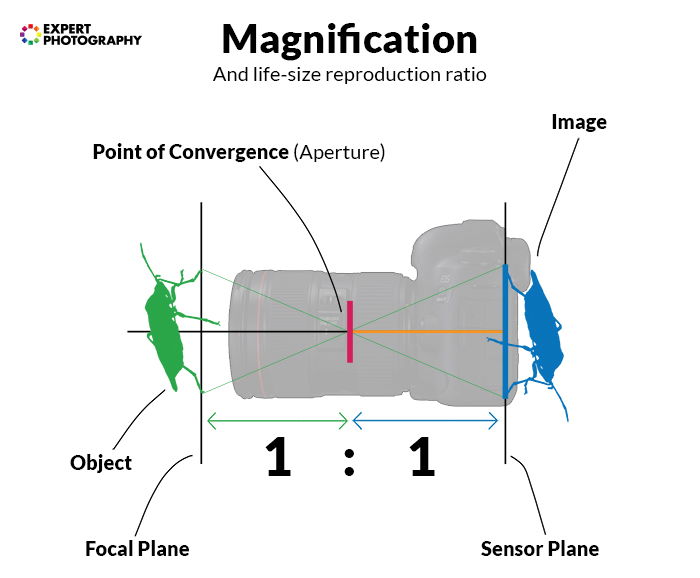
Macro photography has various definitions. According to the most common one, the subject appears in life-size magnification (or bigger) in a macro situation.
Magnification refers to the ratio of the object and its image in an optical system.
When you focus closer, magnification increases. It’s largest at the lens’ Minimum Focus Distance (MFD). As MFD has a physical limit, magnification, too, has a limit.
Most non-macro lenses have a maximum ratio between 1:6-1:8. It can also be expressed as a single number, which is more common. You divide the two – 0.12x is identical to 1:8.
Macro lenses and equipment are all about increasing magnification by different methods.
Life-size magnification is the ratio of 1:1, where image and object size are identical. At 1:1, the image on the sensor has the same size as the real thing.
When you increase it further, you start to actually magnify it – making it bigger on the sensor than in real life.
How Does This Affect Your Gear?
General-purpose lenses are not capable of reaching 1:1. Most are not even close.
As I mentioned earlier, it’s usually limited around 1:6. The magnification 1:6 is enough to frame up smaller animals, or tight portraits.
It’s essential to know your equipment – some of your lenses might be capable of more.
For instance, Canon and Nikon‘s 18-55mm kit lenses perform well, reaching 1:3. Some other lenses include the Panasonic G Vario 14-140mm OIS and the Canon 24-70mm f/4 IS. Try DPReview’s lens feature search to see all options.
If your intention is only close-up, then you’re good to go. But for anything more magnified, you’ll need modifications.
So, let’s find inexpensive ways to increase magnification and improve your macro photography in other ways.
Seven Cheap Ways to Improve Your Macro Photography Kit
7. Use a Screw-On Diopter Lens
A very convenient option is to use a screw-on diopter filter. These work similarly to a UV filter – you screw it in the front thread of your lens, and you’re good to go. Unlike UV filters though, they are not flat.
Instead, they are plano-convex lenses. This means that the lens is flat on one side, and spherical (convex) on the other.
You can get them in different strength levels, usually more in one pack. They’re best used moderately, not going much further than +2.5. There are options for +10 diopter filters, but their quality is very questionable. I recommend to avoid them. I also suggest getting one from a renown manufacturer.
The downsides of diopter lenses are self-evident. They add on to the optical system of your lens, obstructing its meticulous design. As they consist of a single piece of glass, there are no correction elements.
This results in increased aberrations, particularly chromatic aberration towards the edges. Manufacturers can correct for this with coatings, but they can’t do miracles.
On the other hand, diopters are very effective while remaining small. They are cheap and don’t add significant weight to your lens. The physical length of your lens remains roughly the same with diopters. Thus, they don’t shorten the working distance as much as extension tubes.
They are especially powerful when attached to telephoto lenses. Their effect is not diminished by longer focal lengths when focusing closest. It’s even amplified when focusing furthest away (which might still be macro).
Calculations
Let’s see the math for calculating Minimum Focus Distance when a diopter is attached, and focusing is at closest possible.
New Minimum Focus Distance: nMFD (in metres!)
Original Minimum Focus Distance: MFD (in metres!)
Diopter Strength: D
nMFD = MFD / (D * MFD + 1)
Suppose you have a Canon EF 85mm f/1.8 lens, which has a minimum focus distance of 0.85m. This is an ideal focal length for macro, but 0.85m is pretty far away. So, you screw a 3x diopter on the lens. Let’s insert it into the formula:
nMFD = 0.85 / (3*0.85 + 1) = 0.23
So, your new minimum focus distance is 0.23 meter, which is 23cm. If you divide 85 by 23, you find out that it’s 3.7x increase.
Magnification, too, is increased by the same ratio. Originally it was 0.13x. Now it’s 0.48x. Still not ‘real’ macro, but much closer.
However, this particular 85mm lens is not ideal for converting to macro. If you choose a lens with better default magnification, you can easily reach 1:1 with diopters.
Note: Wikipedia’s article on close-up lenses is accurate and understandable. If you want to know the actual physics behind diopters, check it out.
Recommendations
If you’re aiming for the very cheapest, this Vivitar diopter set is an ideal choice. It comes in different 4 strengths: +1, +2, +4, and +10. Of these, +10 is basically useless, but the others are fairly good performers.
Invest in a bit more, and you can get a Hoya set of +1, +2, and +3. It’s probably the best set out there. Still, expect some loss in image quality.
Keep in mind that both of these fit lenses that have 52mm front threads (for example, Canon’s 40mm pancake lens). They won’t fit other lenses. Check your thread size and choose accordingly.
6. Use Extension tubes
Extension tubes are another popular choice. They are hollow tubes that you place between your camera and your lens.
You can get them in different lengths, usually 12mm, 20mm/25mm, and 36mm. Their two types are manual and electronic tubes. Only choose manual if you’re shooting with a fully manual lens – you can’t control electronic lenses otherwise.
They work by increasing the focal length without intervening in the optical structure of the lens. This comes with tradeoffs, but also with big advantages.
Let’s start with the tradeoffs.
With tubes, you increase focal length while not increasing the aperture diameter proportionally. This means that the relative aperture (your f-stop, the ratio of focal length and diameter) decreases. So, some light is lost.
Also, the increased focal length demands more resolution (sharpness) from a lens. You probably won’t notice this, unless you use a slightly soft lens.
Now, let’s mention their significant advantages over other methods.
Extension tubes are stackable without having to worry about significant quality loss. They only increase spacing and slightly decrease sharpness, but won’t distort.
Unlike diopters, they don’t introduce extra chromatic aberration. They only amplify existing aberrations of the lens. The good news is that most lenses have more CA towards the image corners. Those corners are what are being ‘cropped out’ by tubes.
Calculations
Extension tubes favour shorter lenses, both in physical size and focal length.
The following formula is concluded from the thin lens formula. It is thus a simplified calculation. The results are not 100% accurate, especially with complex zoom or internal-focus lenses (most 70-200 f/2.8 lenses are both, for example). However, you’ll most likely use extension tubes with less complex primes, such as a 50mm f/1.8.
New Magnification = nM
Original Magnification of Lens = M
Total Length of Tubes = T (in mm)
Focal Length of Lens = F (in mm)
nM = M + T/F
Let’s suppose you have two lenses, a 100mm and a 50mm. Both have a default magnification of 0.2x.
Adding a 20mm extension tube will increase the 50mm’s magnification to 0.6x. Meanwhile, adding the same 20mm tube onto the 100mm lens only extends it to 0.4x.
So, we recommend using tubes with shorter primes. Later in this post, you’ll see me using a Canon 40mm f/2.8 pancake lens. This lens is an ideal choice to use with tubes. It’s tiny and has a short, but not too short focal length. It makes for a very convenient and cheap macro lens.
Note: we have a separate article on calculating magnification with tubes, with more calculations and real-life examples.
Recommendations
The following are extension tube sets for Canon EF mount, that’s what we currently use. If you have a different system, choose tubes that fit yours.
One of the cheapest electronic sets available is from Acouto. It has a very plasticy design, but it features metal mounts, surprisingly. The release buttons are metal, too, although not the best construction.
If you’re looking for sturdier tubes for long-term use, we recommend the Kenko DG set. It utilises much better materials, fits tightly, and its buttons feel nicer.
We don’t advise buying expensive tube sets from the camera manufacturers. As there are no glass elements inside, non-native sets don’t obstruct quality. Electronic contacts are just pins and wires – no difference here either. However, choosing a solidly built set is vital.
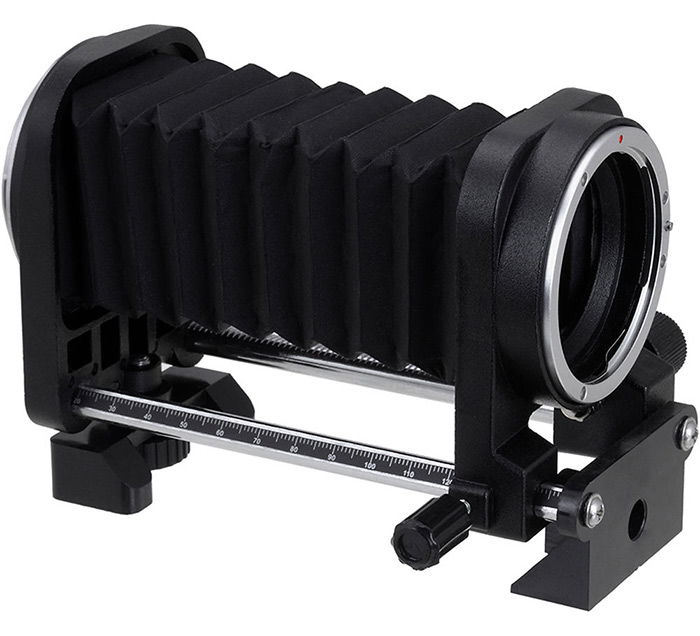
5. Use a Macro Bellows
A macro bellows works very similarly to extension tubes. The key difference is that you can change the amount of extension on the fly, without having to swap tubes.
You can also mount it directly to a tripod, giving a better balance. You’ll have the ability to change bodies and lenses more easily.
However, we couldn’t find any bellows (at least for EF mount) that transfer electronic signals. It would be possible with a separate chord, but nobody created this yet (here’s a niche to fill!).
So, you’ll have to use manual lenses. With modern glass, you’ll have to set the aperture electronically before attaching your lens to the bellows. It’s not at all convenient.
You can calculate the increase in magnification with the same formula as extension tubes.
We recommend this Fotodiox bellows. It’s well-built and allows for precise control.
4. Use a Teleconverter
This is the typical case of ‘use what you have’. I don’t advise to purchase a teleconverter for macro photography. They are expensive, and not so effective.
However, if you’ve got one, you can utilise it to get a bit closer.
Most teleconverters don’t fit shorter lenses. So, combine it with an extension tube. Attach the teleconverter to the camera. Then, mount the tube to the teleconverter, and finish the setup with your lens.
Teleconverters increase magnification by their rating (so, a 2x gets you twice as close). They also increase the working distance.
Obviously, you’ll lose light. The relative aperture (f-stop) will decrease with the converting factor. So, if you use a 2x teleconverter, your aperture decreases by two stops.
3. Reverse Your Lens
This is a controversial technique, but undoubtedly useful.
Take a non-macro lens. Find an adapter that converts the filter thread of your lens into a lens mount. Then, put it on your camera using the new mount.
The amount of magnification reached varies from lens to lens. There’s no general formula to calculate it. It most importantly depends on the focal length. The lenses that are most optimal for this are wide-angle fast primes.
The effect is similar to extension tubes. Most wide-angle lenses have a longer distance between their point of convergence (POC) and their front element than between the POC and the lens mount. You can see these distances in blue and orange on the graphic.
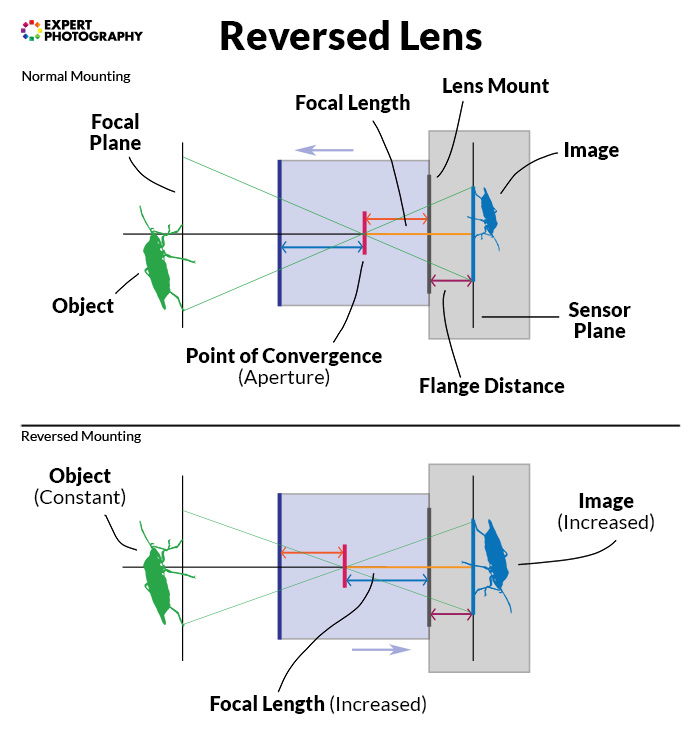
We know that focal length is the distance between the sensor and the POC.
So, let’s reverse the lens. What was previously before the POC went behind it. This means that the longer (blue on the diagram) distance becomes part of the focal length. As a result, the focal length increases.
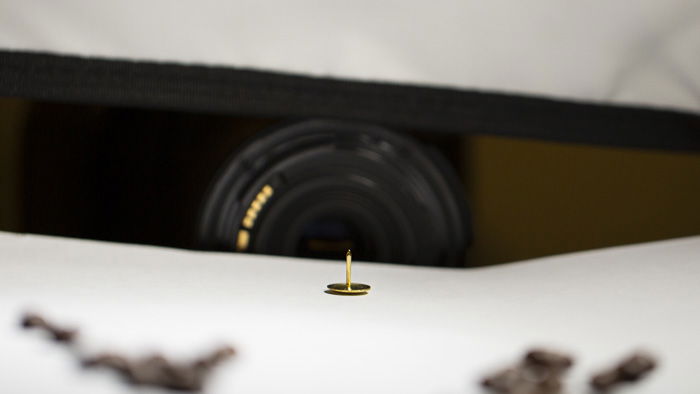
You can achieve huge magnifications, although at a somewhat degraded quality. Here’s a shot with our 18-55mm lens reversed, at the 18mm end (which is the long end here). I added a 31mm tube as well.
This is a thumbtack. Magnification is around 4x.
Recommendations
This technique is best and cheapest if you get an old, manual wide-angle prime. When you reverse the lens, electronic contact to the camera is ceased. This makes setting the aperture a painful process. Without a dedicated aperture ring, you have to remove the lens every time you want to adjust the aperture.
It’s possible to buy adapters that transfer electric signals via a separate chord. Movo manufactures one. It’s excellent, reliable and sturdy, but you have to pay a higher price for it.
So, if you’re going for a cheaper option, purchase a vintage lens and a manual reverse adapter. This one is for 58mm-threaded lenses. The Takumar 28mm f/3.5 lens is a great choice, with a 58mm thread and good image quality. You can reach a magnification of around 2.5x with this setup on a DSLR.
2. Use a Crop Sensor Camera
This might sound weird since crop sensors are usually said to have the subpar quality to full frame. This is true to an extent, but when there is enough light, or you have high-quality lenses, it diminishes.
Macro photography requires an additional light source anyway in most cases. So, the difference becomes negligible.
Crop sensors have an advantage for budget macro photography. Their crop factor affects the focal length, but not the minimum focusing distance!
This means that even though real magnification remains the same, they seemingly bring macro subjects closer.
Let’s suppose you shoot the same subject with identical lenses and settings on a 1.6x crop camera and a full frame one. The image from the crop sensor will appear to be 1.6x more magnified, even though we’ve just cropped it.
If you’re in the fortunate situation of only having full frame gear, you might consider buying a cheap crop camera. We use a Canon 1300D in our studio, and occasionally a 7D MkII. Both are great performers for macro photography.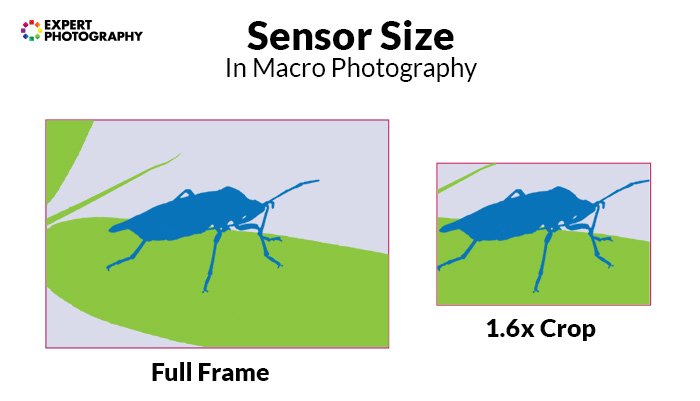
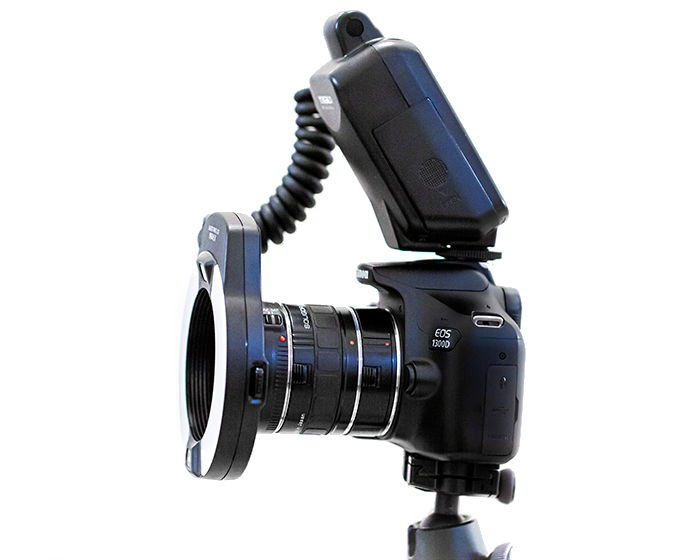
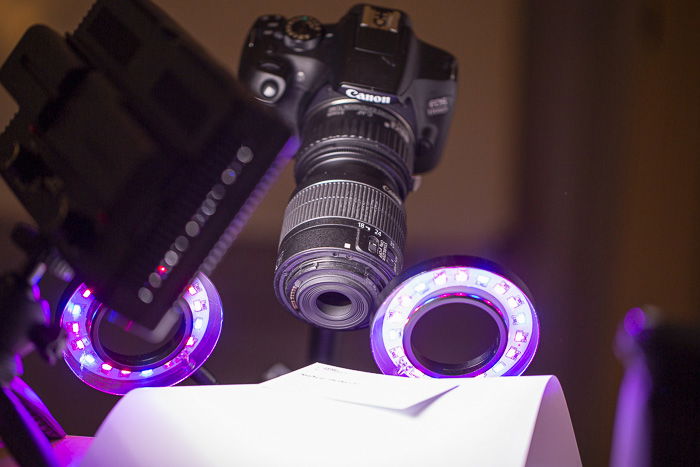
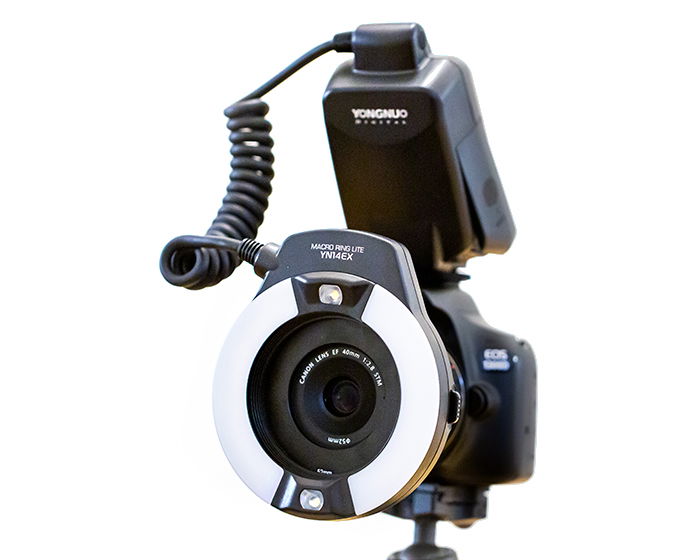
1. Get a Cheap Ring Light or Flash
Macro photography is not all about magnification. Whether you use natural or artificial light, its amount and quality are at least as important.
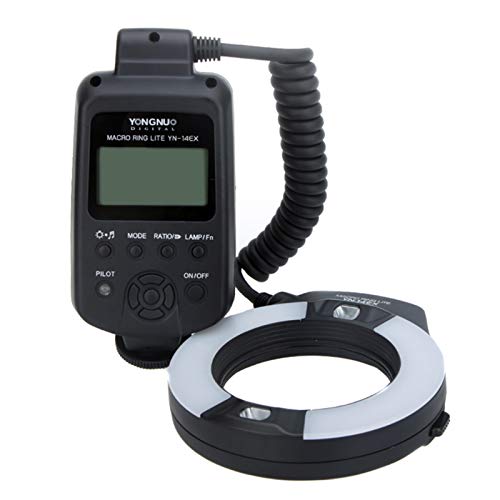
One of the best options is a ring light. A ring light attaches to the front of your lens, directly illuminating your macro subject from all sides. It gives soft, consistent light that you can use on its own or combine with other sources.
The ring flash made by Canon costs almost as much as a dedicated macro lens. But it’s by far not the only option.
We’ve got a Yongnuo YN-14EX in our studio. Its build quality is not the best (we could not close the battery door after a while), but the light itself is genuinely excellent. It’s on par with Canon’s offering.
If you’re only shooting macro occasionally, this is much easier to justify buying. It will increase the quality of your macro photographs drastically.
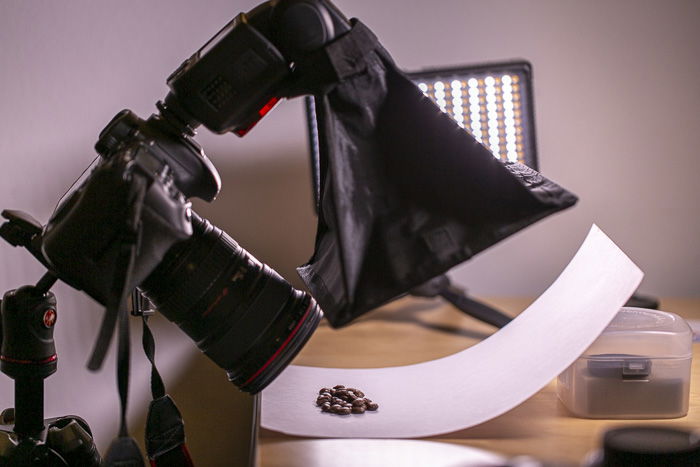
+ 1: Use Your Flash and Other Light Sources
As an alternative to the ring light, you can use your existing flash. Be sure to attach a small softbox, though. It will provide a more balanced light with more adjustment options.
If your lens setup is not too long, you can mount it on the camera. You can also use it off-camera, on the side. This will give more dimension to the shot. In turn, you might struggle with lighting the parts closest to the lens.
Be aware of flaring, too. Some lenses are susceptible to light coming from the sides. Test your lens to make sure it can handle the situation. You can also incorporate the flares in your shot – it’s your creative decision.
You can also use a constant light – this will help a lot with focusing, too.
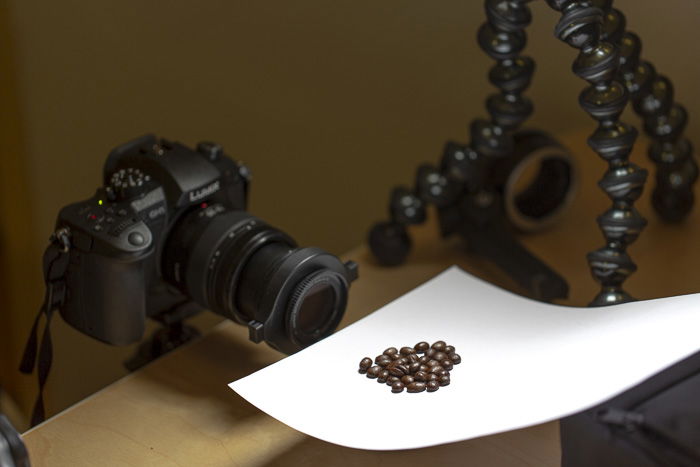
My Favourite Cheap Macro Setup
We’ve discussed the components to achieve a working macro kit on a budget. Now, let’s build it!
This kit consists of:
- A Canon 1300D crop sensor DSLR camera,
- 36mm and 20mm electronic extension tubes (I’ve used my Soligor set; they are the same product as the Kenko set, just rebranded),
- A Canon 40mm f/2.8 STM pancake lens,
- And a Yongnuo YN-14EX ring flash.
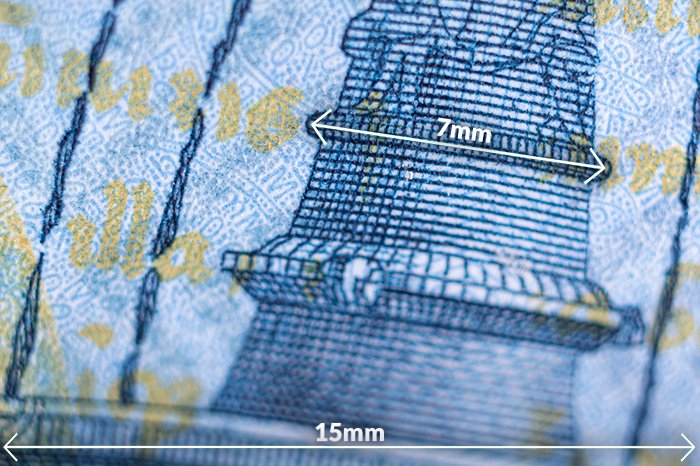
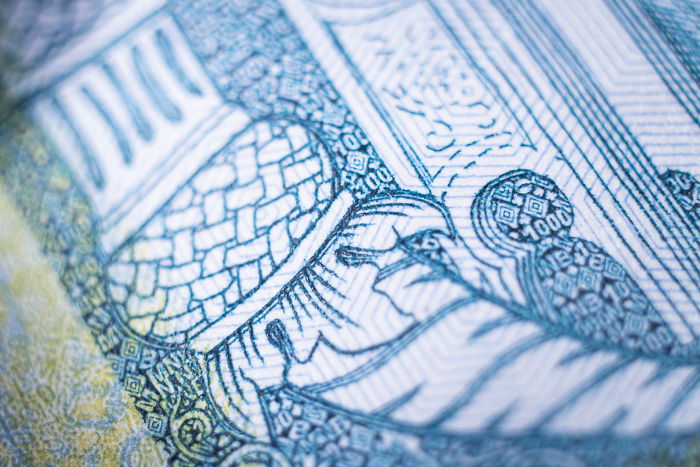
I’ve reached a magnification of 1.5x with this kit. The images are sharp and detailed. The light is plentiful and of high quality.
It can easily be used in a studio or outdoors, too. Thanks to the tiny size of the lens, it still provides a manageable working distance of a couple of inches.
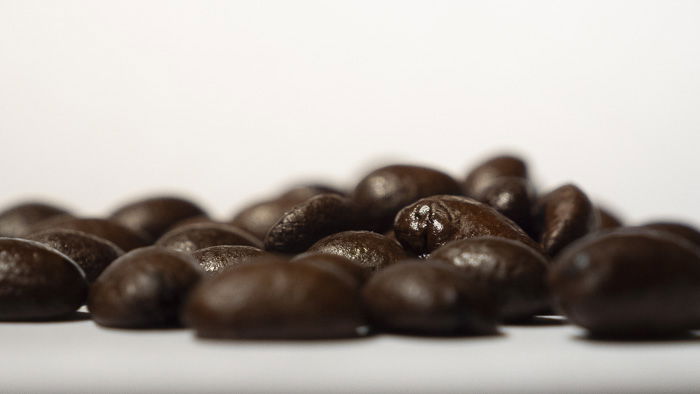
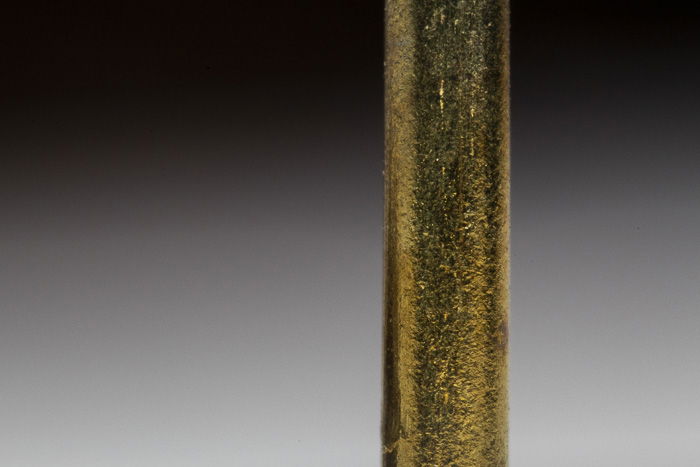
Have a look at some test images.
Conclusion
Hopefully, this article will help you achieve your macro dreams.
Exploring the world in Gulliver’s perspective gives you constant inspiration and drive. It never ceases to surprise and mesmerise.
Capturing and sharing it with others is art in its best form.
Share your best macro photographs with us in the comments below!