A macro focusing rail is a great tool to have when shooting subjects up close. Not only does it keep your camera still, but it also lets you micro-adjust the focus you place on your scene.
There are other benefits, such as macro image stacking. Let’s look at what a macro focus rail is and how to use one.

What Is a Macro Focusing Rail?
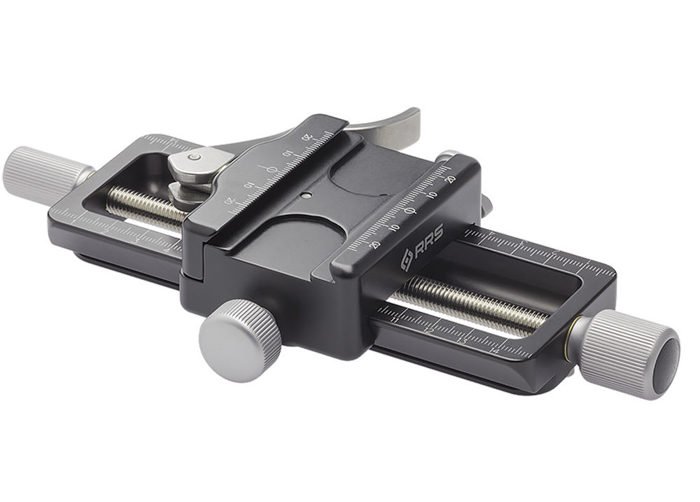
A macro focusing rail is a system that lets you move your camera forwards and backwards or even left to right. There are a few reasons why this is necessary to capture the best macro photography.
For one, you can adjust the focus you place on your subject in micro amounts. This ensures a sharp focus. This is really handy since the depth of field you get with macro photography is very thin.
As macro photography requires the camera to get very close to objects, it limits your focal depth. It is great for bokeh and out of focus backgrounds. But, if you’re looking to capture a subject entirely in focus, then you’ll need a focusing rail.
The mechanics of the macro focusing rail gives you a precise focus. You can then use these accurate focal points many times across the subject in a technique we call focus stacking.
Here, the photographer focuses on the front of the subject. They capture an image and then refocuses on a distance a little further away. This process repeats until the entire subject is shot.
In the end, the photographer has many images which need stitching together. This is done in editing software. The resulting image could come from any amount of shots, ranging from 5 to 45, where the subject achieves an all overexposure.
The rail has measurements that allow you to move the rail as much or as little as you want, in a controlled manner.
How to Use a Macro Focusing Rail
A macro focusing rail means that you keep the settings on your camera consistent. You don’t even need to change the lens’ focusing barrel, as the mechanics on the focusing rail do that for you.
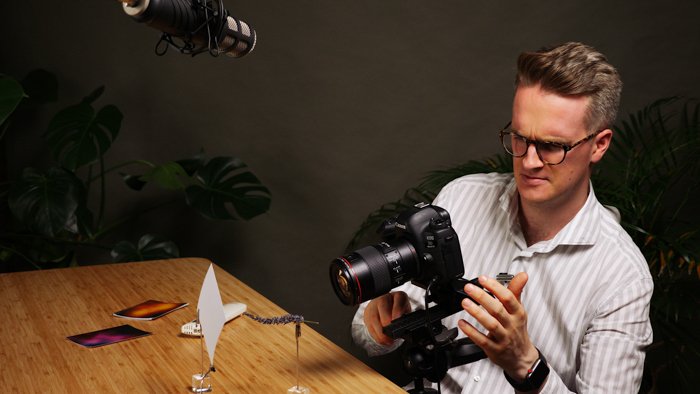
To begin, you need to attach your camera or lens to the macro focusing rail. Usually, you use the tripod thread on the bottom of your camera, unless you are using a telephoto macro lens. A telephoto lens connects to the macro focusing ring via its tripod collar.
Once your camera is set up on the macro focusing rail, you need to decide something. Do you want to start from the back of the subject or the front? Knowing where you’ll start your focusing point will allow you to set up where your camera sits on the focusing rail.
This macro rail works by moving a tripod-like plate backwards and forwards via a knob. If the tripod plate starts all the way at the back, for example, it can only move forwards. This would be a starting position for focusing at the front of the subject and moving towards the back.
How many images you take will depend on your depth of field. This is itself determined by your aperture and distance from the subject. The closer and smaller your depth of field will need more images and smaller movements.
Similarly, the bigger the object, the more images are needed to cover in its entirety. The images you capture will need to overlap a touch. This is to make sure that when you stitch them together, there aren’t any focus gaps. This has the potential to ruin your work.
Just to give you an idea, Levon Bliss, an insect macro photographer captures an image at 10-micron intervals. To give you a reference to that distance, a human hair is around 75 micros thick. This is how he manages to end up with between 8 and 10,000 images.
For your project, you are looking at a range of images between 8 and 45.

Common Macro Focusing Rail Questions
What is Macro Focusing?
Macro focusing is how you focus on macro photography subjects. Macro photography is all about shooting tiny subjects and enlarging them larger than lifesize. In fact, you need to capture the subject above a 1:1 ratio.
Anything below this is a close-up image and not a true macro image. To achieve this, you need to know how to focus on each of the subjects you want to shoot. Insects are a common subject for macro photography due to their detail and interest.
Focusing on such a small subject is troublesome. First of all, you need a dedicated macro lens. These are normal lenses that can also be used for any type of photography. The one thing that makes them different is their closest focusing distance.
For example, the Canon EF 100mm f/2.8L IS USM Macro Lens has a closest focusing distance of 0.99 ft./0.3m. The regular Canon EF 100mm f/2 USM Lens has its minimum focusing distance limited to 3 ft/0.9m.
To ensure that your subject has an all-over focus, you’ll need a focusing rail. This allows you to make micro-adjustments in where your focal point lays. By taking many images with a small depth of field will allow your subject to have a through focus by focal stacking.

What is Needed for Macro Photography?
Macro photography present images that are equal to or more than a 1:1 ratio magnification. Larger than life. Anything else outside of this magnification of a small subject or object is close-up photography.
To achieve this you need a few things. For starters, a lens that gives you a short minimum focusing distance is essential. This comes with specific macro photography lenses. Or by reversing a normal standard or telephoto lens you already own.
The latter needs a special adapter, or you could try freelensing. This means holding the lens without attaching it. A macro lens can be used alongside extenders, allowing you to close the gap between your lens and subject.
A tripod is necessary for keeping your camera as still as possible. This allows you to capture multiple images without having to hold it. If you are using focus stacking, a tripod is a necessity to ensure each shot is exactly the same.
In terms of focusing, a macro focusing rail is helpful for focus stacking. Here, you have full control over how much you adjust your focal point and placement, using small increments if needed.
Lighting is important in keeping your shutter speed fast. This is especially helpful when capturing insects that are in motion. Otherwise, expect a blurry image. Light can be gained in many ways, from lights embedded into lenses, to complicated macro flash units with flexible arms.
As you are dealing with subjects of tiny size, tools, such as tweezers are also important. They will help you move the object around without damaging them, and are easier to use for precise placements or movements.

