Butterflies are fascinating to photograph. If you don’t know where to start in butterfly photography, we’ll teach you a few useful tips.
Butterfly Photography: Where to Find Butterflies
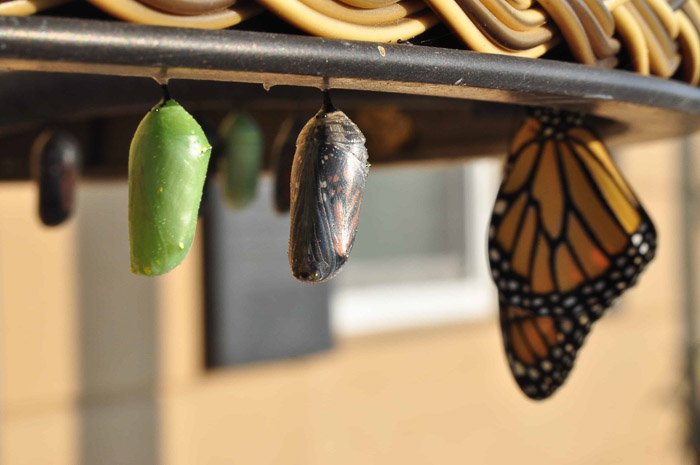
The secret to finding butterflies is to hunt down plants that caterpillars feed on. To start, go online and find out the variety of species you can find in your area. Study the different plants that attract them.
Drive around your neighbourhood and look for those plants that attract butterflies. Make several visits and observe the insect activity in your area. If you spot butterflies there all the time, then it’s an excellent place to shoot.
The seasons also play a significant role in finding these colorful creatures. The best time to take great pictures of butterflies is during summer and spring. Come fall and winter, you’ll find less of them flying around. So always plan in advance, or you’ll have to wait a long time before you see them again.
Use a Macro or Telephoto Lens to Get Butterfly Photography Details
Taking butterfly pictures with an ordinary kit lens can be difficult. Since it can’t focus at close distances, you’ll end up with blurry photos all the time. To avoid frustration, use a macro lens instead.
Macro lenses allow you to take extreme close-ups of small objects. The best options for butterfly photography are between 100mm to 200mm. These let you shoot macro photography far enough not to disturb cautious insects.
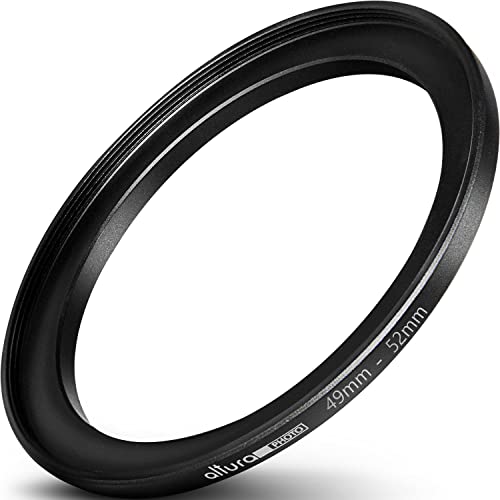
Yet, macro lenses can also be expensive. If you’re on a budget, you can try using attachments that convert any ordinary glass into a macro lens. The most common ones are reversing rings, extension tubes, and bellows. These add-ons cost less than $50 in most cases and produce amazing results.
To use bellows and extension tubes, all you have to do is attach them to the camera then snap on the lens onto them. A reversing ring works almost the same way. The only difference is you’d need to connect your lens backwards to achieve magnification. The downside is that adding these accessories will disable your autofocus. Practise manual focus if you plan on using them.
So how about if you don’t have a macro lens or a macro attachment? Then, you should consider using your telephoto lens, instead. Zoom into your subject, and you have yourself the close-up shot that you need.
To learn all about macro photography, try our Macro Magic course.
What Are the Best Settings for Butterfly Photography
Insect photography can be tricky. You don’t have control over your subjects. If you fumble around too much with your camera, you might scare the butterflies away.
First, use an ISO between 100 and 400. As much as possible, stick to 100 to avoid image noise. When you find yourself in the shade, you can bump up the value to 400. It’s high enough to compensate for the lack of light but low enough not to introduce distracting grain.
Now let’s move on to aperture size. Since you’re shooting macro photos, your background is going to be blurry no matter aperture you use. So you might as well avoid using values such as f/1.8 or f/2.
They will only make the depth of field even more narrow and give you a hard time focusing. Instead, select anything between f/8 and f/22. The deep DOF they produce would help you keep your subject sharp.
Finally, let’s talk about shutter speed. Since insects move fast, you shouldn’t go any lower than 1/180th of a second. If you do not have a fast shutter speed, your butterfly will end up blurry in your photo. If you want to make sure the flapping butterfly wings look crisp, then shoot from 1/500th or higher.
Try Different Focusing Techniques for Tack Sharp Images
It can be frustrating if you don’t know how to focus your lens while taking macro butterfly photography. You have to respond quickly to their movements, or otherwise, you’ll miss the moment. We’ll show you a few techniques you can try to help you nail the shot.
The first method is to use Continuous or AI Servo Focus Mode. This autofocus feature allows your camera to track any movement in your frame and focus on that. Point your lens at the butterfly while half-pressing the shutter button. Let your device do the rest.
The only downside is that it may not always focus on the areas that you want sharp.
If you don’t trust your camera to do the focusing for you, you can try doing it manually, instead.
First, disable your Autofocus Mode. Then turn your focus ring left or right until your subject looks sharp. It’s a slower process, but at least you have full control over your device.
The final technique is a bit unusual, but it works well, especially for macro photography. Check if the DOF is too shallow to focus manually. If so, shift your body closer or farther from your subject instead without moving the focus ring. In most butterfly photography situations, it’s easier than wondering whether to turn your focus left or right.
How to Stabilize Your Shots
You’re dealing with long lenses and a shallow depth of field. This means that you should stabilize your camera all the time. Doing so will not only keep your hands from getting tired, but it also prevents too much camera shake.
The best way to stabilize your butterfly photography shots is by using a tripod. Set it up near a flower bed and loosen the head enough to let you move your camera. That way you can shoot at any angle you want while following the butterflies.
If you want more freedom of movement, then use a monopod. It lets you get closer to the scene just by shifting your weight. At the same time, it’s sturdy enough to hold your camera and keep it steady while shooting.
For low angle shots, consider getting a Gorillapod or any regular tabletop tripod. It’s small enough to let you shoot above the ground and still keep you stable. At the same time, it allows you to pick up the camera whenever you want because it doesn’t weigh that much.
Of course, you don’t have to stick to one option when shooting wildlife photography. These pieces of equipment are all portable. You can bring them with you whenever you need to photograph butterflies.
How to Avoid Spooking the Butterflies
Patience is a critical virtue in nature photography. Everything is a waiting game, even when it comes to photographing butterflies.
Butterflies, like most insects, are restless creatures. If you want to photograph a variety of butterflies, you’ll need to familiarize yourself with how they behave. You can’t just walk up to them and take pictures right away. You have to be stealthy and move at a slow pace. If you let them know that you’re not a threat, they’ll stick around for your photos.
Before taking pictures, hang around the flower bed for a good ten minutes. Don’t make any sudden movements. Stay still and observe all the activity around you.
Once the butterflies get used to your presence, start taking pictures. It will also help a lot if you shoot in the morning when butterflies are still sluggish. If you find it hard to follow them around, wait for them to perch on a flower to guarantee good shots.
Crop Your Butterfly Photos for an Even Closer Composition
Do you feel like you can’t get close enough to the butterflies? Then you should try cropping your images. But why crop the image in the first place? The simple answer is that it magnifies your photo, so it looks a whole lot bigger than the original.
To crop your photo, first, open your file using your favourite editing suit. Then click the cropping tool and select the area that you want to enlarge. Once you confirm the crop, you’ll have an image that appears magnified.
Also, remember to recompose your image while cropping. Turn on your editing suite’s gridlines to help you. All you have to do is align your subject to where the lines intersect, and you’ll have a perfect composition.
Do you have a 16-megapixel digital camera or better? Then you can crop your photos without affecting the quality that much. How about if your camera is 12-megapixels or under? Well, you can still crop a tiny bit. But if you cut off too much, and you’ll end up with a low-resolution, low-quality image. So do it more cautiously.
If you have an older camera, it would be best to choose a longer lens, instead. That way you can get closer to the subject yourself without having to crop in post.
Conclusion
The primary challenge of butterfly photography is looking for these elusive insects. So remember to do a lot of research before going out. It also helps a lot if you wait for the right season where you can encounter plenty of them in the wild.
Once you find them, you’ll realize that they’re actually quite fun and easy to shoot.