Having a baby is both a momentous, photo-worthy occasion — and a major life event that can drain the bank account. DIY newborn photography captures the sweetness of a new baby without cutting into the diaper funds.
You might book a professional newborn baby photo shoot and just want to capture additional images as your baby grows. Or maybe you’ll capture your baby’s first few weeks entirely on your own.
Whichever you choose, learning to snap great baby photos is a parenting skill that will reward you for years to come.
But newborn photography is one of the most challenging types of portraits to master. Infants are fragile, can’t understand posing instructions, and have a mind — and a schedule — of their own.
Here’s how to incorporate a few DIY newborn photography tips in your everyday. You’ll be better prepared to capture the first few weeks of your little one’s life.
DIY Newborn Photography: Pick Up a Few Inexpensive Props, Ahead of Time
Shooting your own lifestyle newborn photography in your own home is great — and something you should do. But props will help create newborn portraiture that focuses entirely on the new member of the family.
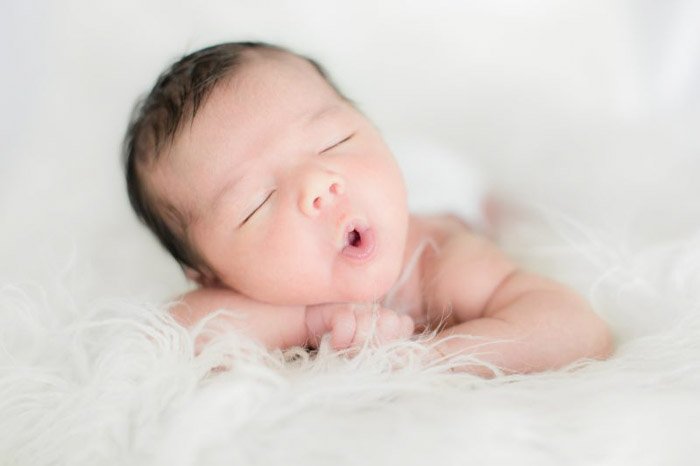
Start with a simple, plain-colored blanket. The size of an adult throw blanket or larger is best. Place a large pillow or a beanbag underneath for the baby to rest on. Stretch the rest of the blanket back as a backdrop.
You can use clamps or chip clips and dining room chairs to hold the back of the blanket up. Be sure the chairs aren’t going to tip over. This is a great, inexpensive DIY backdrop to focus entirely on the baby.
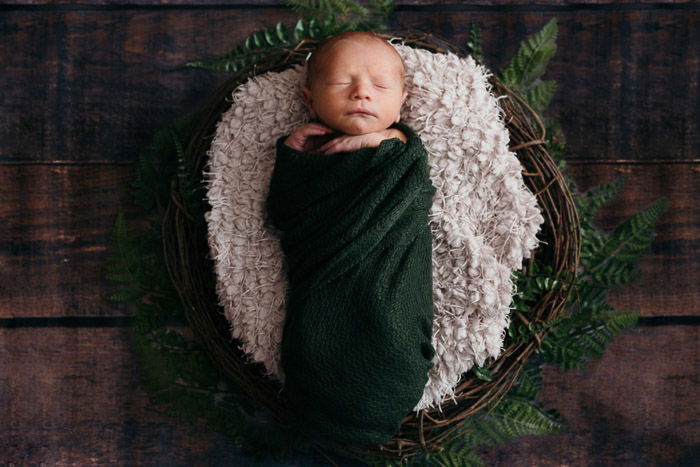
After snapping photos of just the baby, working with additional props can help show a sense of scale. Nothing quite shows off the teeny, tiny size of your new baby like a few props.
First, you need to make sure the prop is safe. Avoid baskets and bowls with a narrow base that may tip or tall buckets that may become top-heavy once the baby is inside. Newborns are also top-heavy!
Be wary of vintage items that could be made with things like lead paint. When putting the baby inside a prop, use a spotter. This is someone who stays within reach if baby decides to choose that moment to learn how to roll.
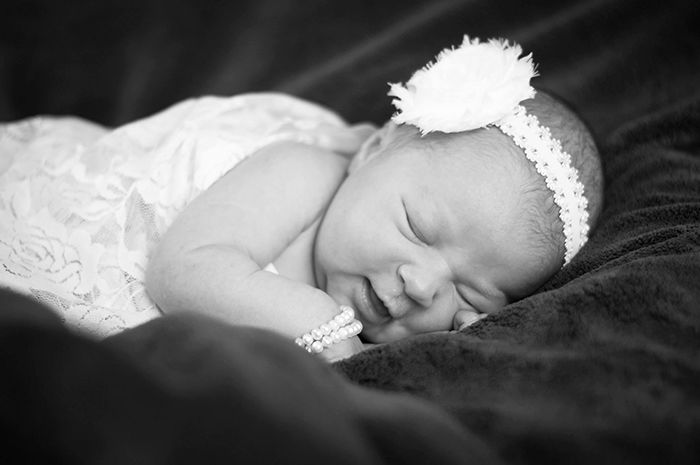
Along with low and sturdy baskets and boxes, consider seasonal props or props that represent your family, such as heirlooms, hobbies, or other items.
A paper floor drop is also great, along with stretchy newborn wraps. Etsy is a great source for ready-to-go props. Home decor stores are great for baskets and boxes, along with craft stores for fabric and other props.
Take Advantage of DIY and Take Your Time
When you choose DIY newborn photography, you lose the skill, expertise, equipment and creative eye of working with a professional newborn photographer.
But what you gain is time and an understanding of the subject — the baby. Take advantage of those perks.
Like heading out to the studio, the best time to do the newborn shoot is typically between two and three weeks old. With DIY, you can start earlier and continue later if you need.
With DIY newborn photography, you don’t have to travel to a studio and get all the photos done in one day. Take advantage of the time that you have with your new baby. Spread out the different setups and poses.
Don’t stress out yourself — and the baby — by trying to do it all in one day. Stick to one or two setups a day, or for as long as the baby stays content. Try additional props and poses the next day.
Another perk of DIY newborn photography? No one knows your baby better than you. When is your baby most content and most likely to sleep? That’s the best time to try to shoot newborn photos.
Stick With Safe, Sweet Poses
Professional newborn photographers are experts at putting tiny, fragile babies into the sweetest positions. But many poses aren’t safe for inexperienced photographers to try without risk of injuring the infant.
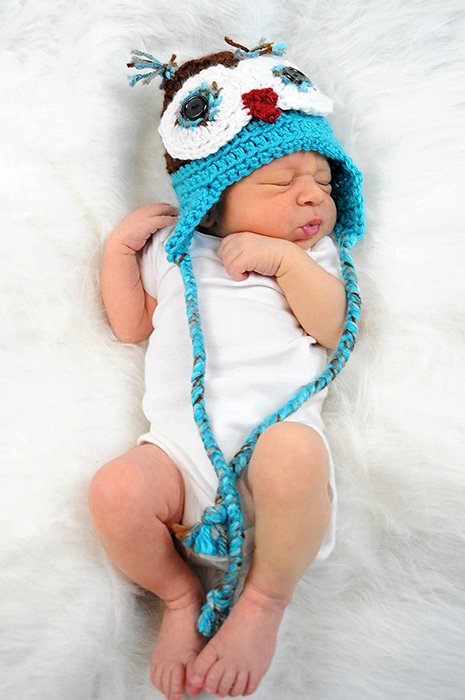
For DIY newborn photography, stick with the safe poses that are still just as sweet. Placing the baby on his or her back or side are simple, safe poses for newbies.
You can add variety to the pose by adjusting the placement of the baby’s hands and feet. Or you can adjust your composition, and use different wraps and props.
It’s important to understand that many of the photos that you see coming from a professional photographer are in fact Photoshop composites. They aren’t safe to shoot without extensive photo editing.
The popular froggy pose where the infant is holding his or her own head up on two hands? Newborns can’t do that. The photographer has to Photoshop out someone’s hands holding the baby safely in that position.
The same applies for props. Props that tip or would otherwise be unsafe usually have an adult keeping the baby safe that was later Photoshopped out of the image.
Set Up by a Large Window
Great photos need great light. A window is a free source of light for DIY newborn photos, But, understanding how to use that light is essential.
Set up the shoot near a large window, ideally, one where the sun isn’t directly outside that window. The light will be too bright and harsh.
If that window is creating an obvious square of light on the floor, choose a different window. Or wait until the sun has changed positions or gone behind the clouds.
Then, when placing the baby in position, arrange the baby in a way where the light is coming in a natural direction.
What’s a “natural direction?” Think of the sun’s position in the sky. During any given time of the day, the sun may be casting light from one side or from above, but never from below.
Don’t place the baby so that the light hits his or her toes first. Instead, position the infant so the light is coming from the side of their face, never below.
Use a Space Heater for White Noise and Warmth
One of the tricks to great newborn photography is keeping the baby happy and content. Babies tend to get cold much faster than adults, especially when photographing them in their birthday suit.
To keep the baby content longer, try using a space heater to keep the area warm. As an added bonus, a heater will double as white noise. This can also help keep baby calm.
If you have a baby during the warmer months, turn down the air conditioning instead and use a white noise app on a smartphone.
Play With Stretchy Newborn Wraps
Easily one of the most versatile newborn props is a stretchy wrap. These wraps can help pose the baby by wrapping them snuggly into position. They can also be used loosely tucked around the baby for variety, or to help fill in boxes and baskets.
Newborn wraps should be stretchy and long for the easiest wrap. You’ll need to pull the wrap snuggly as you swaddle the baby.
These wraps are often less than $10 on Etsy. You can also buy them from different photography prop shops.
Use a Wide Aperture
Newborn portraiture differs in several ways from photographing kids and adults. But some of the same ideas still apply. A wide aperture will help blur the background and draw the focus to the baby.
Shoot in aperture priority mode (or manual mode if you are comfortable there) with a wide aperture camera setting, such as f/2.8.
Remember to use a narrower aperture when photographing the infant with a sibling or another family member to ensure both are sharply focused.
Another DIY newborn photography setting tip is to use single point autofocus. This mode allows you to choose where the focal point is using the joystick or arrow keys at the back of the camera.
Place the camera over one of the baby’s eyes.
Play With Perspective
Every time you move the baby into another pose, you risk waking the baby up. Make the most of each pose by playing with perspective and composition.
Shoot the pose at eye level with the baby, then shoot from above the baby. Experiment with different angles before moving on to a different pose.
With DIY newborn photography, you have more time than working in a studio. Use that to your advantage.
Snap Close-Up Details
Along with varying the perspective, add variety by shooting from different distances or focal lengths. Photograph the entire baby, then a head and shoulders.
Finally, get even closer — put on a macro lens if you have one — and photograph the tiny details. Get that funny cowlick, photograph those tiny toes, capture that pouty lip.
Adjusting the composition is an easy way to add variety without using lots of crazy poses.
Edit Baby Pictures for the Best Results
Once you are finished snapping the photos, editing helps create polished newborn portraits. Use a photo editor to adjust the exposure, colors, sharpness, and contrast.
The red and orange luminance slider is helpful for newborn skin tones. The healing and cloning brush can eliminate newborn acne.
The key to editing newborn photos is balance. Retouching baby acne is fine, but keep details that will grow with the child, like a birthmark, intact.
With newborn photography, avoid over softening the skin and spending too much time editing the details that are already perfect on a brand new baby.
Bonus Tip: Consider Monthly Baby Pictures.
DIY baby photography shouldn’t end at the newborn stage. Taking monthly photos is a great way to track your child’s growth over the first year.
Consider using a prop that will help show a sense of scale when used in all the images, such as a stuffed animal or a letter board.
Keeping images consistent from one month to the next will highlight change the best. Remember that while your newborn won’t try to crawl away, your 11-month-old will. Choose props and a background that will grow with the baby.
Conclusion
Capturing your own child’s newborn photos allows you to take your time and work when the baby is calmest, instead of on a studio schedule.
You can’t capture newborn photography like an expert that’s spent years working with new babies.
Instead, focus on capturing, simple, safe shots that freeze the sweetness of the newborn phase in pixels by integrating a few tips for high-quality DIY newborn photography that doesn’t look DIY.