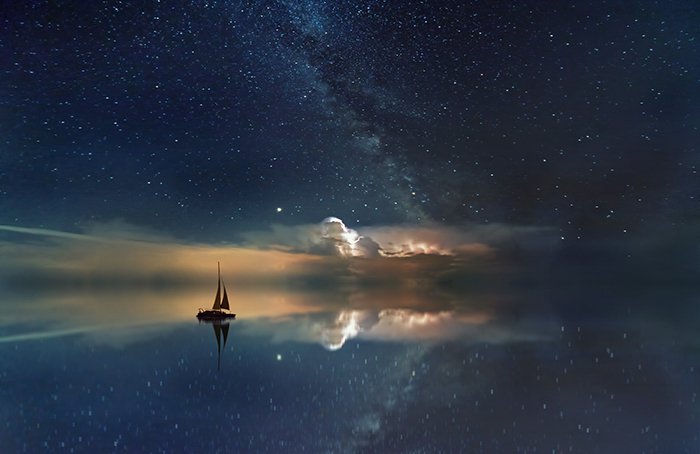
Photographing the Milky Way is one of the most rewarding and impressive types of photography that you can master.
When done right, astrophotography produces awe-inspiring results. These will impress your friends and strangers who view your portfolio.
Setting Up for Milky Way Photography
Photographing the Milky Way is about 20% technique, 30% gear, and 50% preparation.
It’s important to not only know which settings to choose and lens to use. But also how to find the Milky Way at night without worrying about other factors.
For example, the moon washing out the night sky, or the clouds blocking your view, or city lights hiding the Milky Way.
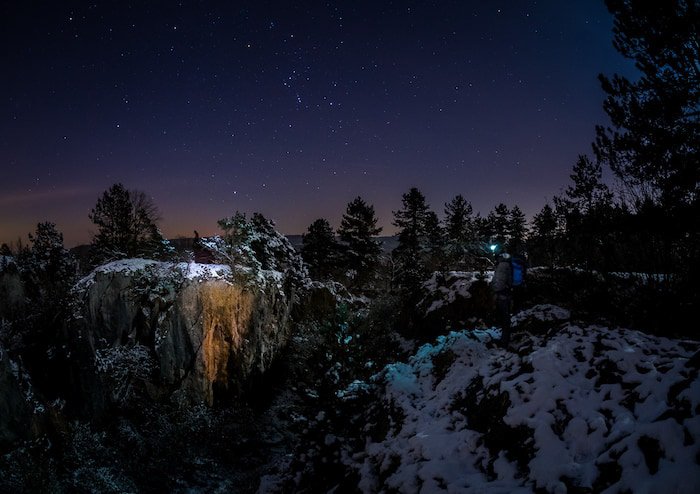
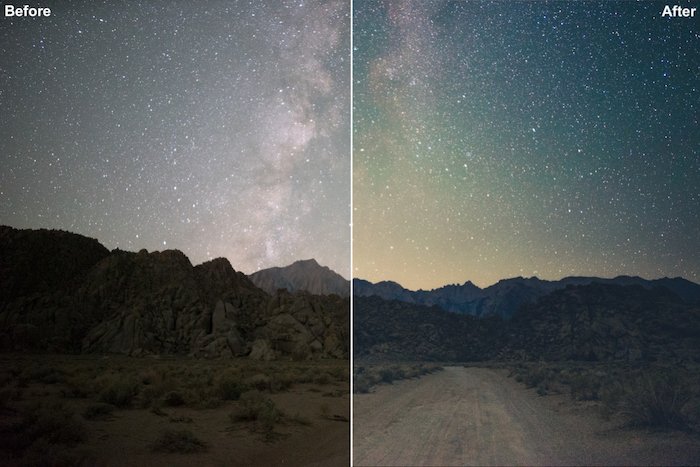
Taking photos in the middle of the night, in pitch-black darkness, can be as tricky as it sounds. We suggest checking a light pollution map too, to avoid city lights. Your location matters too, as the Milky Way is not always visible. Check visibility times in the southern and northern hemispheres before you head out.
It’s important to make sure that you come prepared with the right gear, set up and ready to go.
In this first section, we’re going to talk about the gear you need. This ranges from your camera and lens choices to remote shutters and tripods, all the way through to the clothes we recommend you wear.
Milky Way Photography Gear: A Comprehensive Guide
Astrophotography doesn’t need as much expensive or specialized gear as you may think. You can capture incredible results with a basic DSLR or mirrorless digital camera.
But, all gear is different. If you’re going to invest in any more equipment, it should be the lenses we recommend in this post below. These include wide-angle lenses and manual focus lenses.
We also go over a few handy accessories that you won’t want to leave home without.
To make sure you have all the necessary gear for Milky Way photography, read our article!
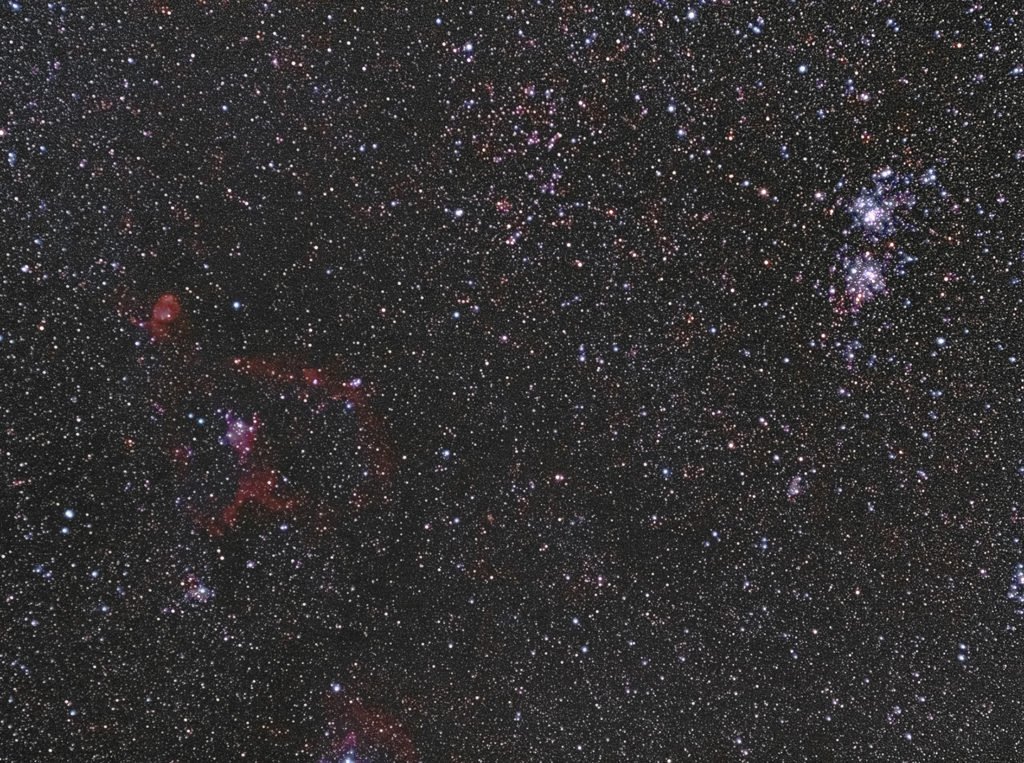
Which Camera Sensor Size is Best for Astrophotography?
Sensor size is often a topic of discussion amongst photographers. It affects the field of view, depth of field and resolution of your images. Therefore it is crucial to know at least the basic traits of each sensor type before delving into photography.
Which sensor you choose will naturally affect your astrophotography as well. When it comes to field of view, each sensor size has its advantages and disadvantages. However, in the case of low light performance, full frame cameras definitely win the competition.
Read our article if you would like to know more about how different sensor sizes affect your astrophotos!
The Best Clothing and Accessories for Astrophotography
Shooting at night means that you need to think carefully about what you are going to wear. You need to take the lower night temperature into account.
On top of that, you need to get around on the location in the dark, without seeing much. Lights and good boots are as important as your camera and tripod.
This article will show you what clothes and accessories you’ll need. Especially if you plan to stay warm on long nighttime shoots. The best images come from perseverance and patience, which definitely require you to be comfortable and warm.
We also recommend a few pieces of accessories for each category. With having the proper equipment, you can make sure you can take the photos you planned to get.
8 Best Apps for Milky Way Photography
Getting the conditions just right does take a little bit of planning. But luckily we live in an era when technology can help us in that planning.
There are many mobile apps that you can take advantage of to help you do everything.
For example, finding the darkest skies near your location and checking the phase of the moon. It’s best to shoot during the new moon.
On top of this, they’ll help you discover when you’ll have full darkness on any given day. Accurate weather forecasts are important too.
These apps are our personal, field-tested favourites. There are the same ones used during the making of our Milky Way Mastery course.
One of the apps on this list is Photopills. Check out our article to learn about the other apps!

8 Must Have Astrophotography Apps For iPhone
One of the biggest technical challenges of astrophotography is navigating on the dark sky.
You need to find the stars and constellations that you have planned to photograph. You also need to make sure the weather and the lighting conditions are suitable for night photography.
Luckily, nowadays technology allows us to eliminate these problems, and even more.
You can download apps that follow the Sun’s journey through the sky, give you more information about the phases of the moon, and even help you find places with the least light pollution.
Check out our list of iPhone apps that will assist you in your Milky Way photography!
How to Photograph The Milky Way
Once you have gotten the proper equipment for your shoot, you are ready to head out into the field. Start by spending some time orienting yourself to the Milky Way.
It may seem easy enough to locate your subject. But it’s not as simple as going outdoors at night and pointing your camera towards the heavens.
There are a number of important things you need to know about the Earth, sky, and your own camera. These will affect your ability to get good pictures of the Milky Way.
These include seasonal and environmental factors. Such as what time of year you’re shooting, and where you are on the planet.
Weather conditions, light pollution, and camera exposure time considerations are also important.
Choosing the right settings and following the basic rules are also crucial for astrophotography. Since it is a very specific niche, you need a lot of research and preparation to learn all the technicalities.
The following articles will help you grasp these technical details. They will help you find the Milky Way and be ready to capture it in your photos.
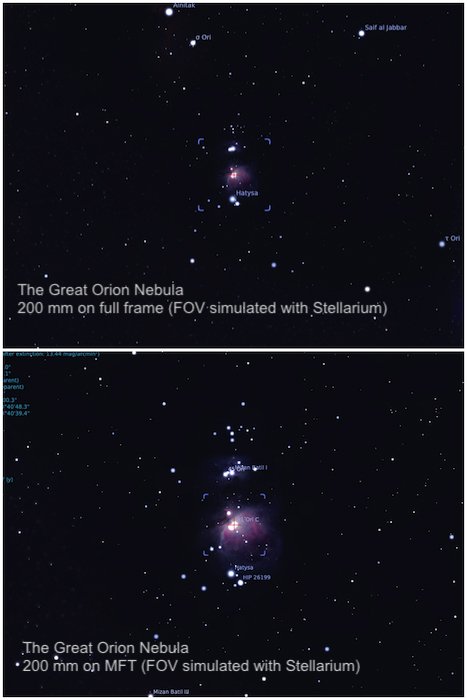
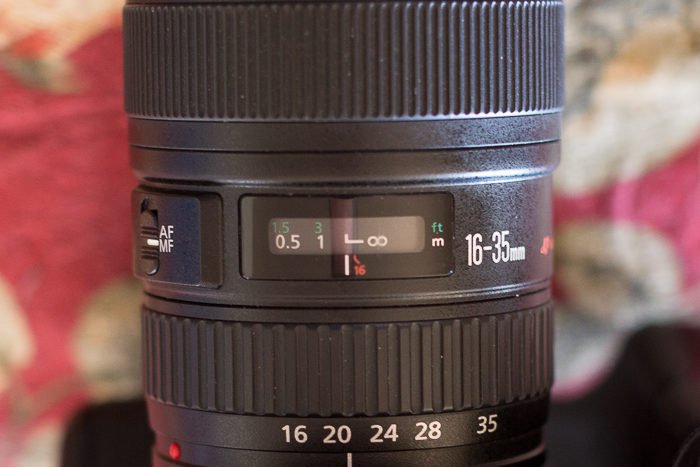
Best Camera Settings for Milky Way Photography
Astrophotography requires a different approach than almost any other kind of photography.
You need to master the 500 Rule, focusing to infinity, and long exposure noise reduction.
Because of this, we’ve written an entire article on the settings that you’ll need to take your shots of the galaxy.
We also delve into the specifics of shutter speed, aperture, ISO, and focus and why you need to set them as you do here.
These settings are effective for almost every shot of the Milky Way you’ll take. Master these and you’ll be ready to start shooting.
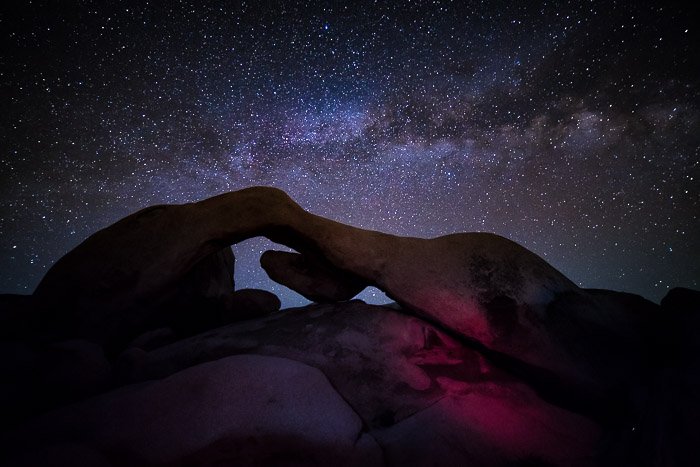
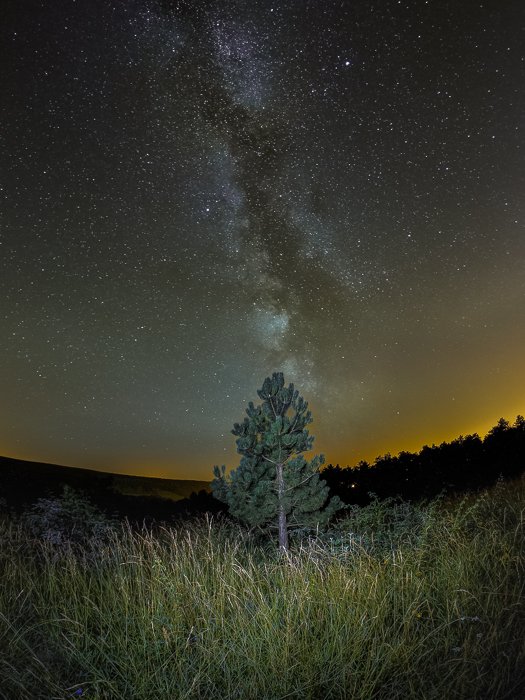
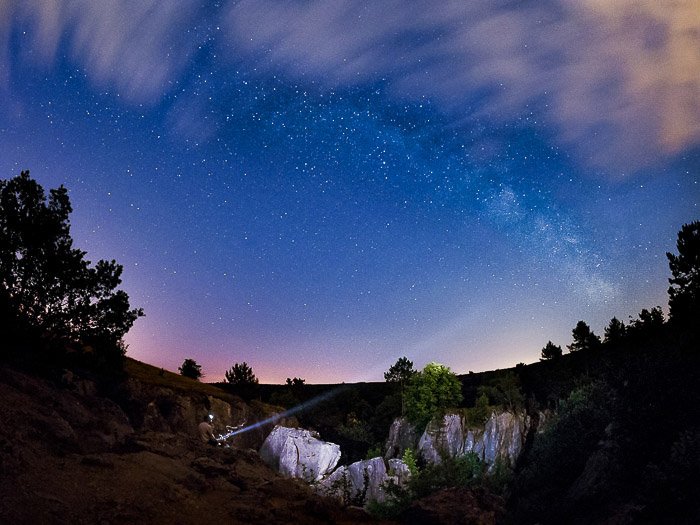
How to Find The Milky Way at Night
So, you chose the Milky Way as your subject. It goes without saying that you need to be able to find what you’re looking for in the dark sky.
This is before you point your camera towards the stars.
You’ll take the best photos when the environmental conditions are on your side. Better images come from seeing the Milky Way clearly.
This means picking the right time and place for your shoot. Also, locating the position of the North Star will help you get a sense for the sky that you’ll be shooting.
Once you discover your orientation in relation to the Milky Way, you can start to make decisions.
Two important ideas are when and where to shoot to have it appear a certain way in your photos.
On top of this, you should think about what parts of the sky to include and emphasize in your photographs.

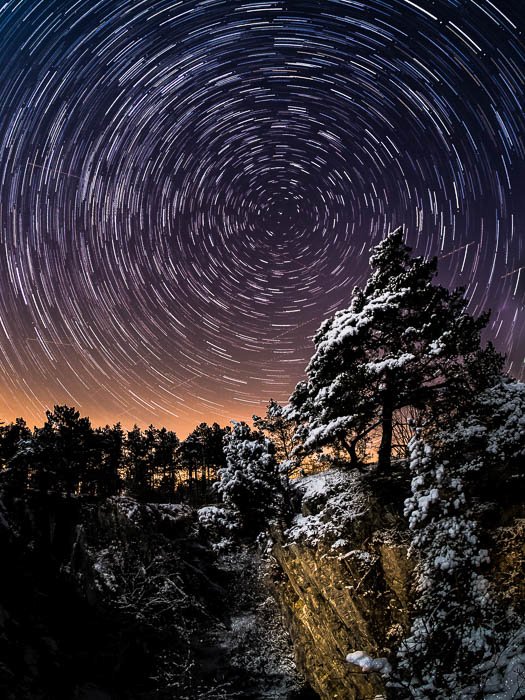
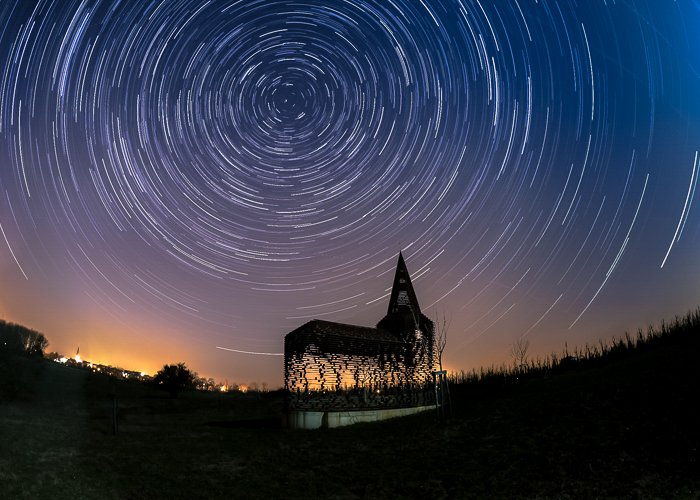
How To Shoot a Milky Way Time-Lapse
A Milky Way time-lapse is perfect for documenting the movement of stars on the night sky. However, to get spectacular results, you need to put quite a lot of effort into it first.
You have to make sure you have all the equipment you need, a suitable camera, a tripod, and an intervalometer being the most important ones.
You also have to put extra research into finding the darkest location where the sky is the clearest. There are some smartphone apps that can help you with this.
After setting up the photoshoot carefully, you still need to ensure that you use the right settings. This might seem like a lot of things to pay attention to. Luckily, our article collected the most important steps for shooting a star time-lapse.
What Is the 500 Rule in Photography? (And How to Use It!)
The 500 rule provides you with a formula that helps you guess the right shutter speed for night photography. This shutter speed is fast enough to avoid star trails but slow enough to let enough light into the camera to make the stars visible.
Naturally, if your goal is to create star trails, you should ignore this rule. However, if you are looking for general night photography tips, the 500 rule is something that you definitely have to master.
There are also variations of the rule with different numbers. This helps you calculate the exact shutter speed for different conditions, depending on the situation.
To learn how the formula works and how you should combine it with image stacking, read our article!
A Practical Guide for Star Photography
Finding suitable gear and settings for night photography is quite a challenge. Especially if we consider the fact that there are several types of star photography, all needing a slightly different setup.
Whether it is star trails, deep space, or Milky Way photography, you can learn to bring the most out of your shots by following a few simple tips. Apart from choosing the right settings, the biggest challenges will be focusing on the stars and framing the photo right.
Our article covers all these topics, and much more. Don’t forget to check it out!
How to Photograph Star Trails at Night (From Landscape to Cityscape!)
Long exposure photos give us a sense of difference in a world where photography is mainly about capturing the moment. If you know how to use long exposure sparingly, but creatively, you can make your images stand out from the crowd.
You can apply this technique to astrophotography too. Star trail images capture the movement of stars in the sky. They make for amazing results if you know the few basic things to pay attention to.
If you want to avoid the noise that a long exposure night photo generates, image stacking might be a solution for you. You can learn all the details in our article.
SLR Lounge ‘Photographing the Milky Way’ Review
If you would like to learn Milky Way photography, but don’t know where to start, SLR Lounge’s course might be just for you.
The content consists of video lessons, PDF’s, exercises, and bonus presets. By finishing the course, you can master astrophotography in no time. All this comes for a reasonable price, where you can choose between a one-time purchase and a yearly subscription.
It is suitable for amateurs who have a basic knowledge of photography, but having astrophotography experience is not necessary.
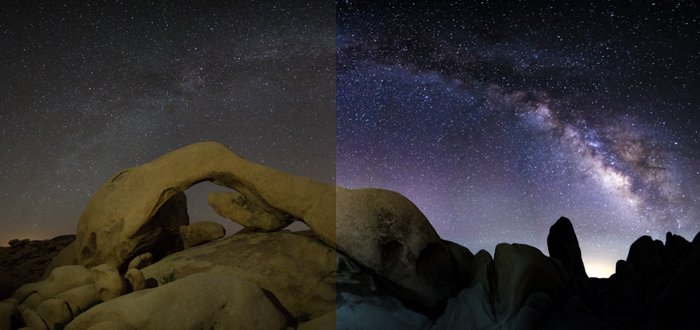
Processing Milky Way Photography
It’s important to know that editing Milky Way images is not like processing typical landscape photos. You don’t just open Lightroom or Photoshop.
You also need to learn specific editing techniques to bring out the best from your night images. This applies even if you’re already comfortable with post-processing other types of photos.
Post-Processing Milky Way Photography: 7 Settings You Must Use
For striking photos of the night sky, you’ll want to remove certain colors. You’ll want to do this while enhancing others.
On top of this, modulate highlights, shadows, and clarity so that the stars in your image pop. This is in contrast to their surroundings.
Besides that, you will also want to correct the occasional lens distortions. They will likely occur in your Milky Way photos.
Reducing the appearance of haze in front of the stars in the sky you’ve photographed is also helpful.
Here we take a closer look at the exact adjustments that you’ll want to make in Adobe Lightroom. You’ll also see settings that give the pictures the finished look that you’re after.
9 Best Software Resources For Astrophotography
Astrophotography is a demanding niche when it comes to editing. Luckily, if you combine Lightroom and Photoshop, you have high chances to get the image that you had in mind.
There are many Photoshop actions, action packs, plugins and Lightroom presets that help you bring out the most of your night photos. From color correction to noise reduction, these tools will assure that your astrophoto editing workflow is as smooth as possible.
For more information, make sure to read our article!
5 Useful Photoshop Tips For Astrophotography Editing
In the field of astrophotography, editing is just as important as taking the actual photo.
Firstly, you need to get familiar with image stacking in order to have as much detail on your photos as possible. After that, you need to smooth the background by reducing the noise and create more natural colors by adjusting the white balance.
By reading our post, you can also learn how to bring the most out of your raw images in Photoshop. This article will not only fasten your workflow, but it will also ensure that your night photos are as stunning as possible.
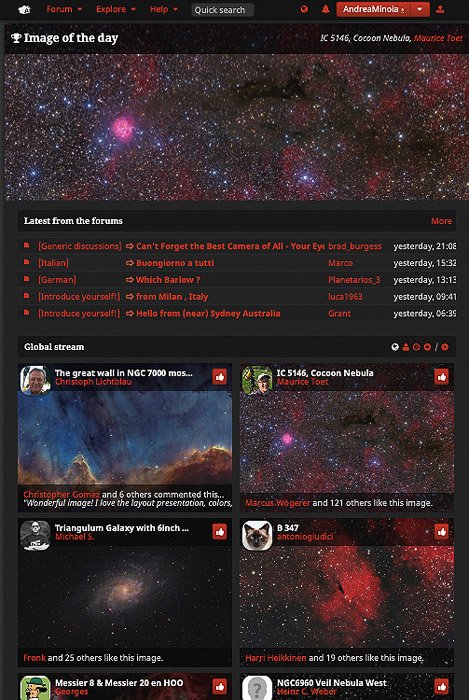
AstroBin Review for Astrophotography
AstroBin is an image hosting website, specialising in astrophotography. It also includes a multilingual photography forum, a photo backup service and it a huge gear database.
AstroBin allows you to upload your night photos in full resolution and organize them into a gallery. It also offers discussion forums on various topics, whether it is regarding photography, astronomy gear or post-processing techniques.
You can choose from different subscription plans which allow you to upload an increasing number of pictures to your gallery.
Read our review to learn more about this amazing astrophotography website!
Creative Night Photography
Capturing images of the Milky Way is, of course, part of the broader category of night photography.
If you enjoyed the experience and challenges of working in low-light conditions, you can expand. You may well enjoy exploring other types of night photography.
For the ambitious, you may even want to combine some other nighttime photography projects.
Milky way photography can take a long time. So it might be best to make the most out of your milky way photography trip.
Here are a few more ideas for photography you can do after night has fallen and darkness cloaks your surroundings.
How to Master Your Night Photography
Everything photographable during the day is repeatable at night. Oftentimes, you can do it with more dramatic or interesting effects.
This is because you’ll need to harness methods to achieve proper exposure.
When you’re comfortable modulating aperture, shutter speed, and ISO at night, you can begin to plan your shots.
There are certain effects that you can only achieve during the nighttime.
Light trails, reflections, moonlight, and image noise are only a few natural, in-camera effects that you may want to explore. Check out our article for more tips!
Think of night landscape photography as a hybrid of Milky Way photography and traditional landscapes.
Many of the same concerns about shooting conditions and camera settings apply. The key difference is that your subject is the landscape rather than the sky above.
Because of this, you’ll mainly be paying more attention to the foreground and composition.
You won’t necessarily have to worry so much about the moon and the position of the stars in the sky.
Yet, you will still need to think about the movement of the Earth. And you’ll need to time your long exposures accordingly (depending on whether you want star trails in your shot).
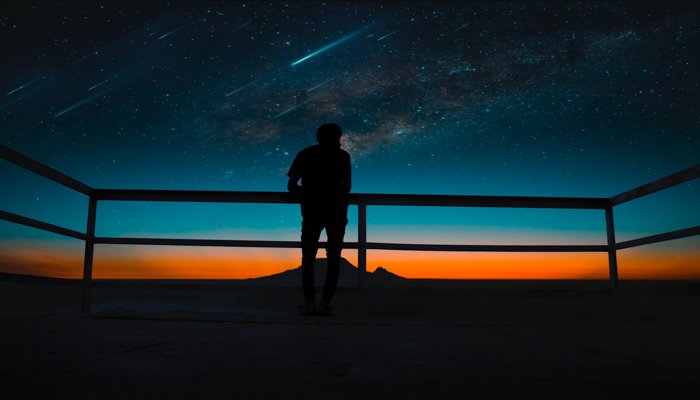
How to Photograph a Meteor Shower
The milky way is one of the highlights of the nighttime sky. Once you get the hang of capturing it, it can become a little boring.
By incorporating different elements into the scene, you break that monotony. Capturing foreground landscapes is one addition you can make.
For more impressive images, why not combine meteor showers?
NASA says approximately 30 visible meteor showers occur each year. Some of these showers have been around longer than 100 years.
That gives you a pretty good chance of capturing them, no matter where you live. Our article here provides all the info you’ll need.
How To Shoot Spiral Light Painting Photography
This unique variation of light graffiti is a great way to create some stunning images. The best thing is, you’ll only need a few simple household materials.
In essence, you’re taking a long-exposure photo. The shutter stays open while you are “painting” within the frame.
The equipment you need to do it is inexpensive, easy to find, and very portable. This makes light painting photography an excellent side project during Milky Way shots.
Our article covers not only the techniques of creating these images but also the essential equipment you need to take when doing it.

Conclusion
Photographing the Milky Way is undoubtedly a difficult photography niche to master. You need to get a specific set of equipment, research the right settings, learn new editing techniques, all this while being at the mercy of the weather.
We hope that our article has helped you with becoming a better astrophotographer!
If you found this article useful, check out our Milky Way Mastery course!